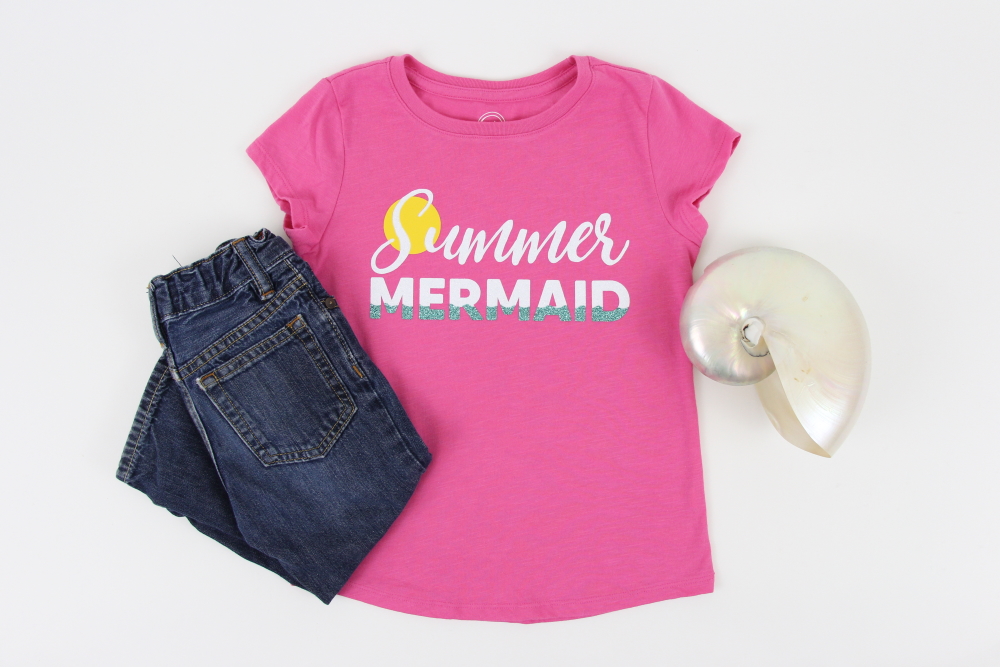
Free Summer Mermaid SVG and HTV Tutorial
| This post may contain affiliate links, which means I may receive a small commission, at no cost to you, if you make a purchase through a link. |
My sweet niece, my summer mermaid, is really missing all the normal summer activities right now. The weather in southern California is brutal in the summer (hello 100 degrees every day!) and that little girl absolutely loves the beach. I was always a summer mermaid when I was her age too.
I knew I was going to need a super cute Summer Mermaid SVG to decorate a t-shirt for her since she is such a little fish and I am sharing the FREE cut file with you too!
Estimated Time: 20 Minutes
Skill Level: Advanced
Supplies Needed:
- Silhouette CAMEO®
- Silhouette Cutting Mat
- Weeding Hook
- Silhouette Studio – use the Business Edition to make importing SVGs easy
- Heat Transfer Vinyl
- Blank t-shirt (be sure to wash and dry before crafting)
- Iron or heat press
- Free Summer Mermaid SVG
Step One: Creating Your Summer Mermaid Knockout Method Design:
Open Silhouette Studio®.
Select the Page Setup Window and adjust your cutting mat size to 12×12 (or the sized mat you are using).
First, you need to download your design from The Polka Dotted Blue Jay Freebie Library and then open it in Silhouette Studio. Click File>Open>Select your downloaded file.
Using the Business Edition of Silhouette Studio will make part seamless but you can also trace your design if you have the free edition. Ungroup your design by right-clicking and selecting “ungroup”.
Use the fill option in Silhouette Studio® to color each element of your design. Click a part of the design and then select the color you want from the fill menu in the toolbar. I like to coordinate the fill color with the color of my vinyl so I can “see” what my design will look like.

Measure your t-shirt and re-size your design to the correct space on your 12×12 template – be sure to click and drag to select the whole design, right-click, and select “group” to re-group your design to move it as one design and keep everything lined up.
You will need to flip your design, so it appears backward for Heat Transfer Vinyl – this is called “mirroring” your design. Highlight your design, click “object” from the toolbar, “mirror” from the menu, and then “horizontally” to mirror it.
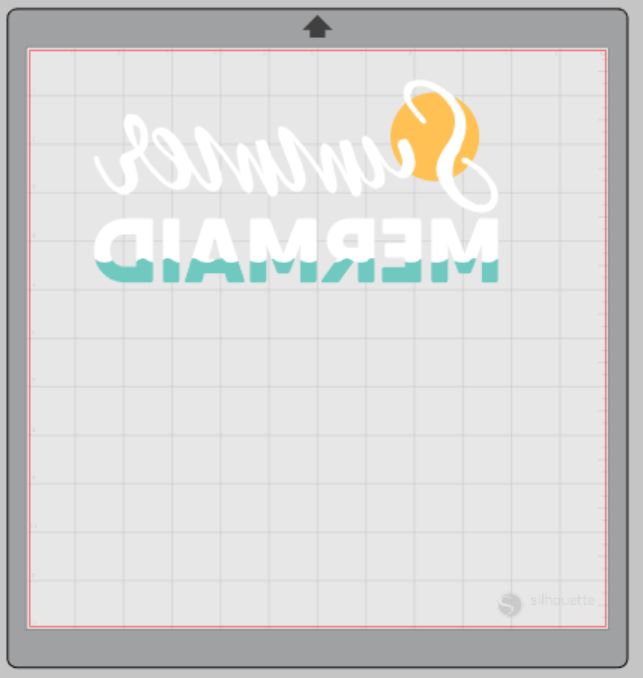
Now You’re Ready to Cut:
Select “Send” to prepare to cut.
Follow the prompts in the Design Studio for Glitter Heat Transfer Vinyl (or the type you are using for your project) and double-check to make sure your design has been selected to cut.
Select the fill option instead of “simple” from the cutting menu. You can select each color and your Silhouette Cameo will only cut out the elements in your design that are that color. This is why it is helpful to change the design colors in step 5.
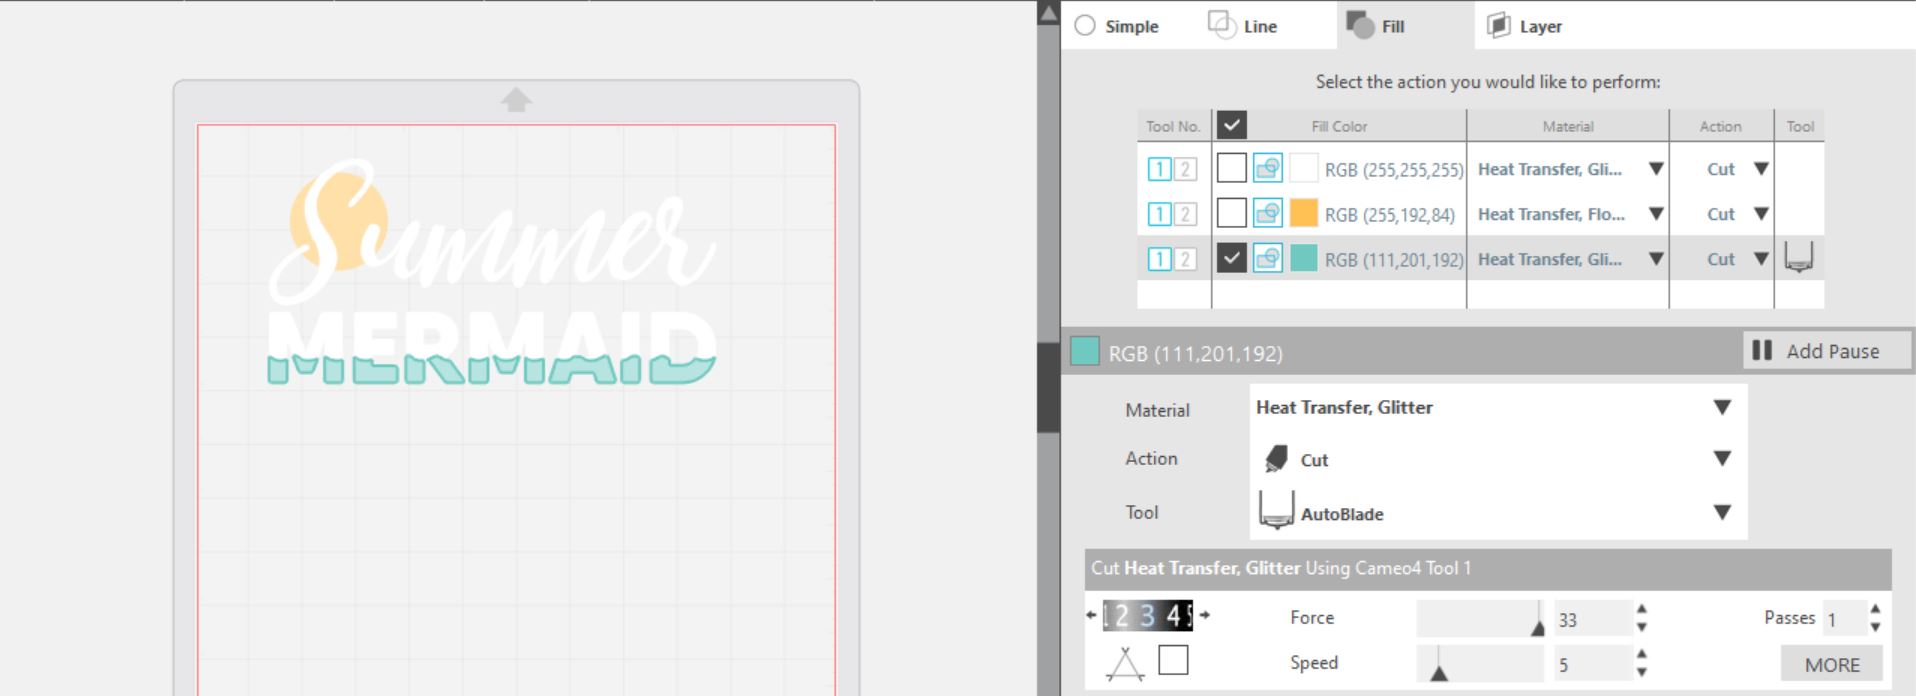
Load your heat transfer vinyl into your Cameo 4 with the glitter side face down on the mat.
Click “Send”
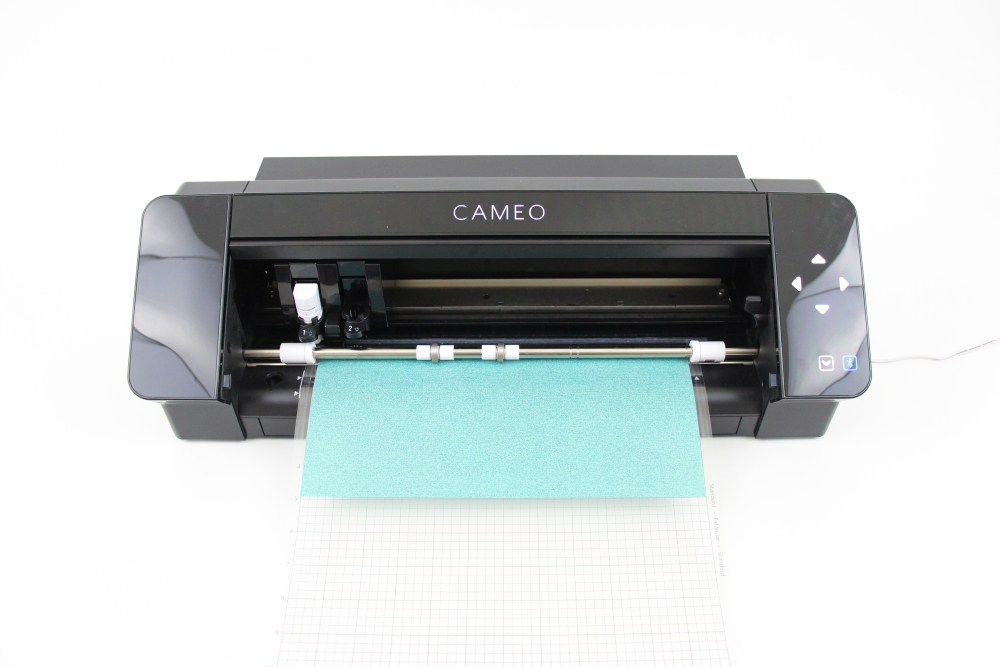
Press the down-arrow when your machine has finished cutting your design to remove the cutting mat from the machine.
Repeat for the next color of heat transfer vinyl.
Step Two: Preparing Your Summer Mermaid Knockout Method Design:
Remove your sheet of Glitter Heat Transfer Vinyl from the cutting mat – go slow so it doesn’t curl up or tear.
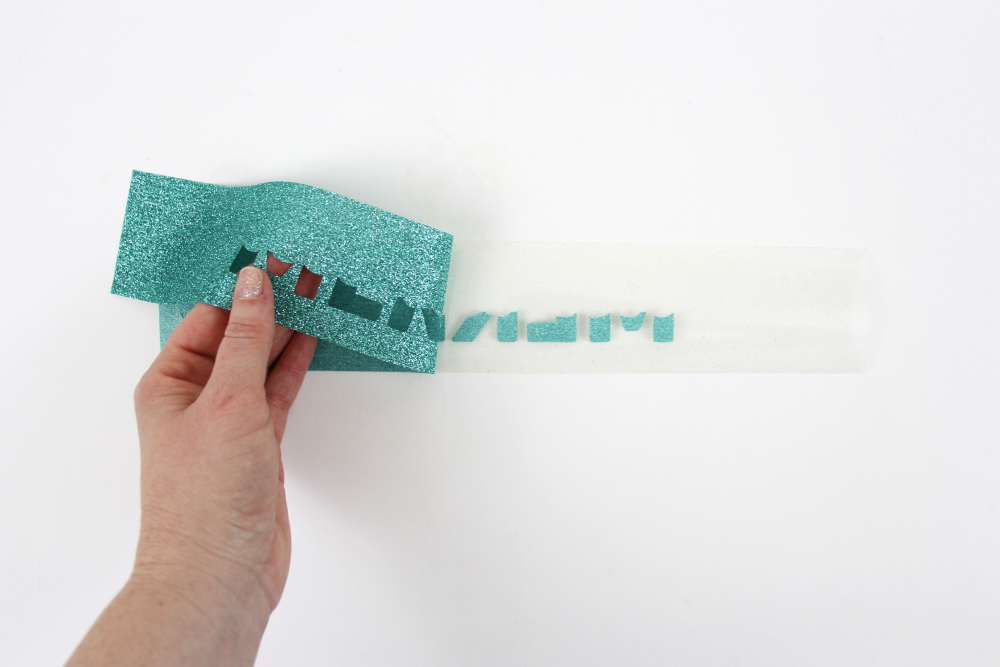
Use your fingers or a weeding tool to remove the excess vinyl from each color. Be sure to leave your design on the clear carrier sheet.
Step Three: Creating Your Summer Mermaid Knockout Method T-shirt:
Pre-heat your t-shirt – use your iron or heat press to warm up the fabric for a better transfer.
Place the first color of your design on your t-shirt right side up (this is the reason you mirror your design for cutting).
Heat the larger part of your design for the recommended time for the HTV you’re using. Apply steady pressure.
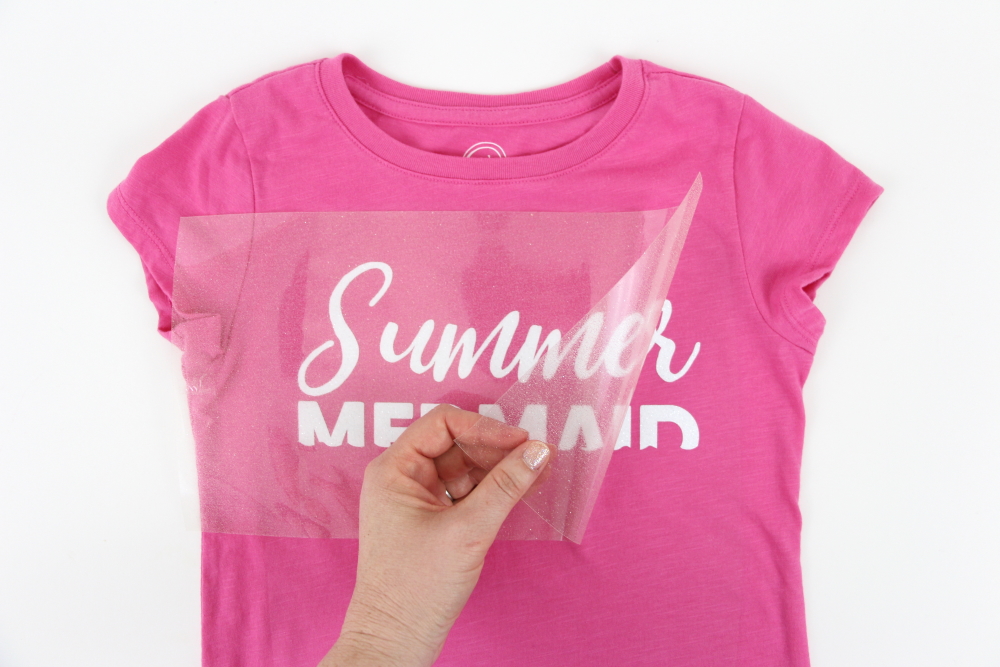
Peel back the clear carrier sheet. Some Heat Transfer Vinyl requires a hot or cold peel – always follow the recommended peel for your heat transfer vinyl. Tip: pull from a corner and not the side to make sure each part of the design transfers completely to your t-shirt while holding the shirt down.
Repeat steps 2-4 for the next color making sure that your carrier sheet covers the design you already pressed.
Tip: use a Teflon sheet to make sure you don’t overheat/burn any of your vinyl.
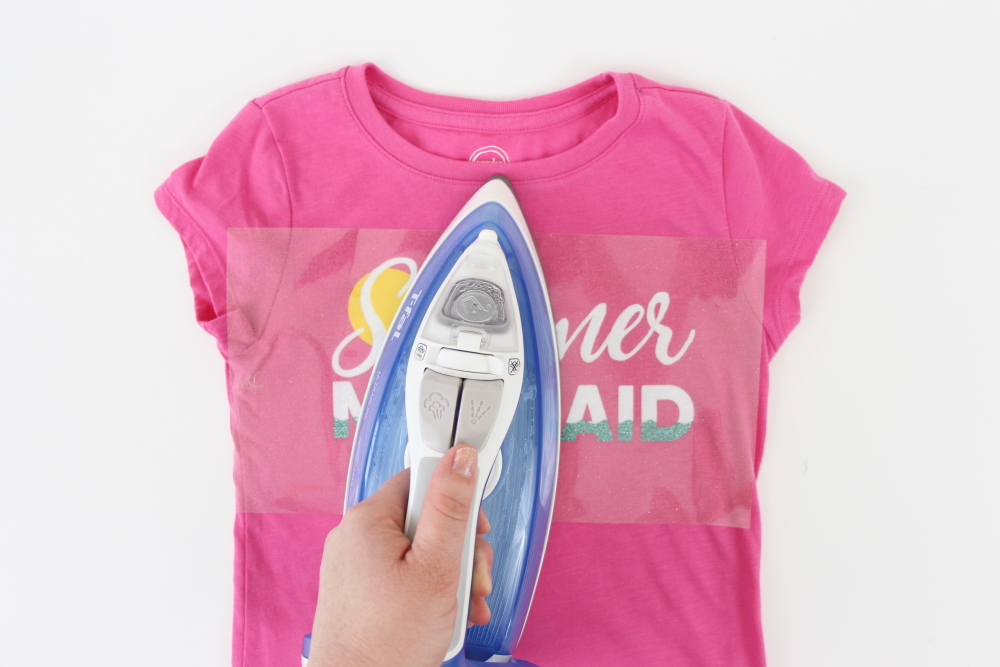
Flip your t-shirt over and give it a 10-second press to activate the adhesive.
Once you have applied all the elements of your design and allowed it to cool, your t-shirt is ready!
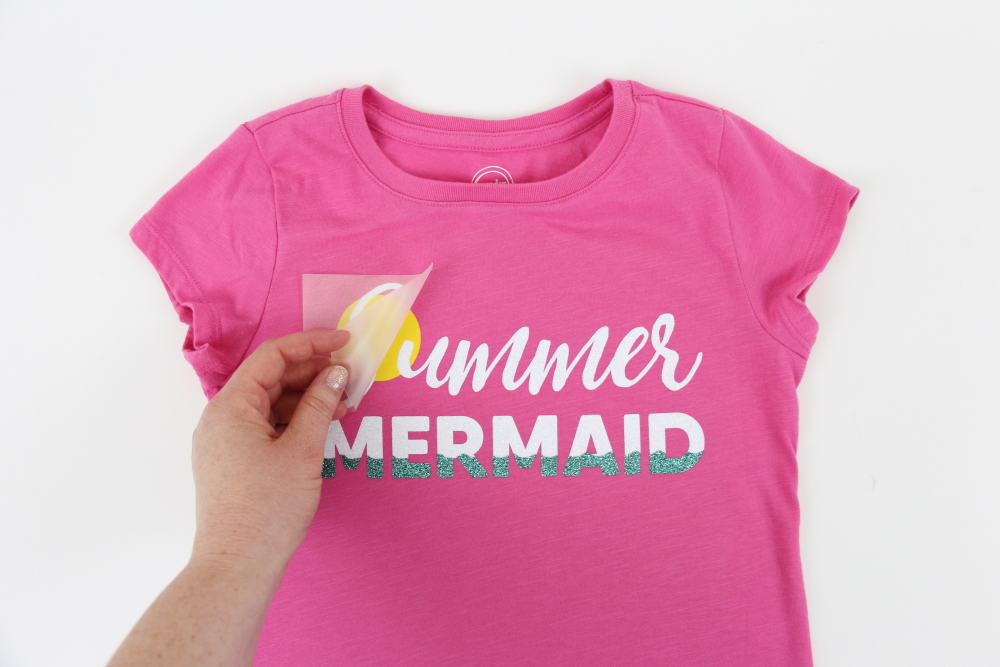
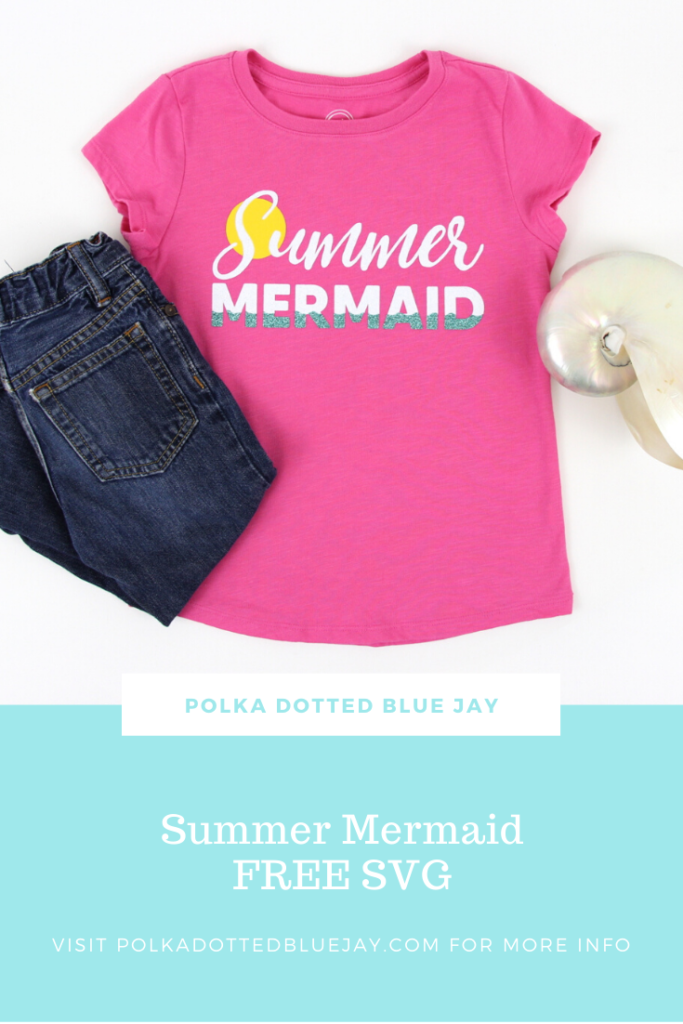
What project will you make with this Summer Mermaid SVG? I would love to hear about it in the comments or with a tag on social media!

Tattoo Style Salty Mermaid by Persia Lou
Print and Cut Mermaids by Amy Robinson
Seashell Mini Pinata by Studio Xtine
Mermaid Mode by Polka Dotted Blue Jay
Mermaid Zipper Pouch by Oh Yay Studio
Mermaid Scales Banner by Gina C. Creates
Forever Mermaid Tail by Pen + Posh
Make a Big Splash by Kayla Makes
Salty and Sweet Mermaid by Poofy Cheeks Blog
Mermaid Craft Container by Me and My Inklings
Mermaid Scales Heart by Liz on Call
Mermaid Box Cards by The Bearded Housewife
Vintage Sunset Salty Mermaid by The Walnut Street House
Mermaid Kisses and Starfish Wishes by Sunshine and Munchkins
Sparkle Shine Make a Splash by Lettered by Stephanie
Mermaid Vibes Only by Tam’s Sweet Life (File no longer available)
Vitamin Sea Mermaid by Spot of Tea Designs
Mermaid Essentials by Simply Made Fun
Free as the Ocean by Tried & True Creative
Summer Mermaid by Polka Dotted Blue Jay
Here are 11 other FREE Summer SVGs from some of my crafty friends.


9 Comments
Pingback:
Pingback:
Pingback:
Pingback:
Pingback:
Pingback:
Pingback:
Pingback:
Pingback: