Silhouette Skills: How to Create a Mockup of Your Project in Silhouette Studio
| This post may contain affiliate links, which means I may receive a small commission, at no cost to you, if you make a purchase through a link. |
Have you ever had a project idea but aren’t sure how the cut file will look on the blank? Had trouble figuring out what size to make your design? I am going to show you a quick trick for how to make a mockup of your project in Silhouette Studio.
Supplies Needed:
• Silhouette Studio (always recommend the Business Edition)
• A photo of your vinyl blank (I am using a tote bag)
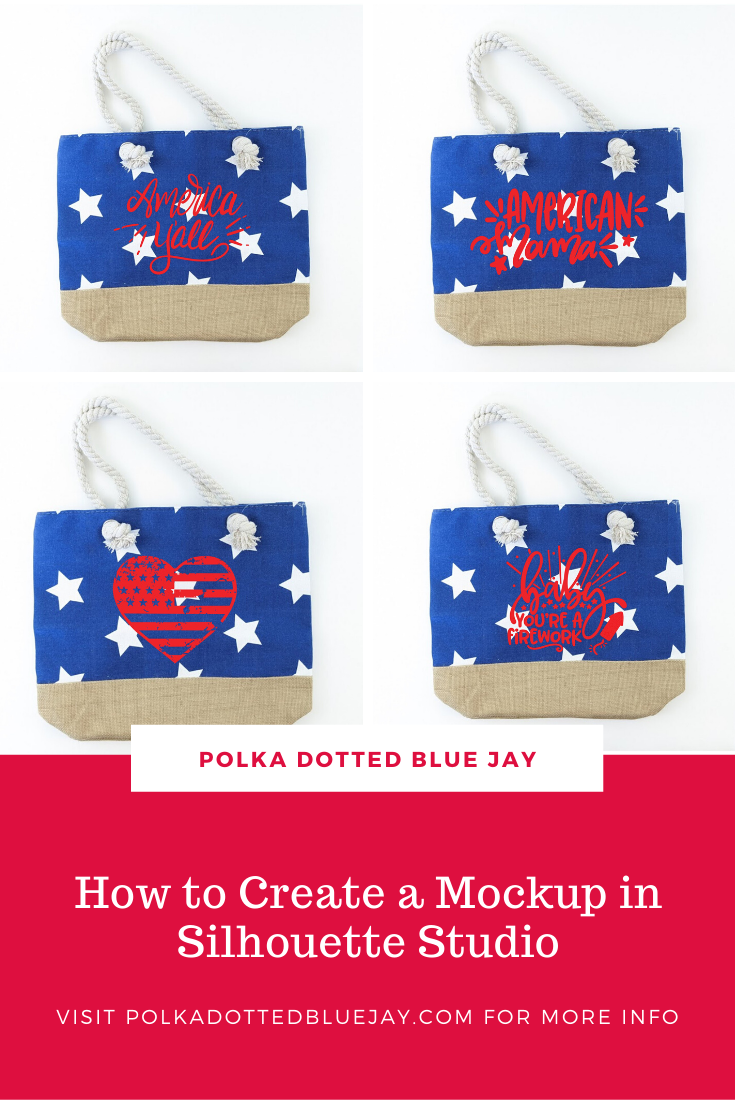
• Design #1: America Y’all
• Design #2: American Mama
You can shop my mockups on Etsy if you need blanks for projects or products.
Step One: Get a digital photo of your item
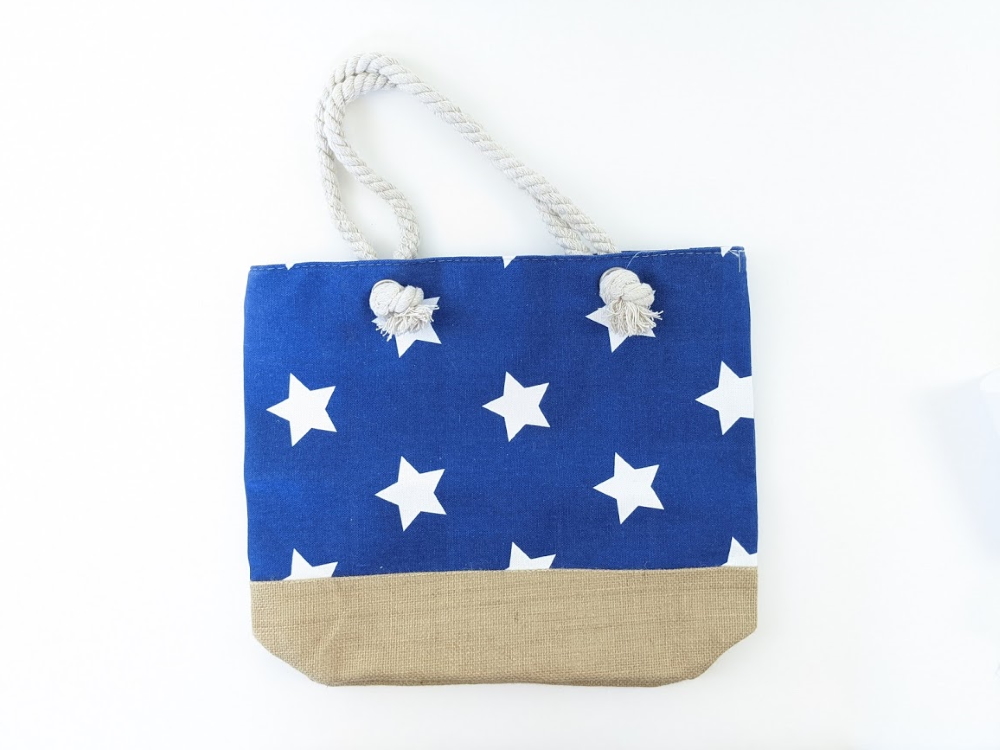
- Take a photo of your tote bag or blank item (I used my phone to take a photo of my tote bag on a white table).
- Save the image to your computer.
Step Two: Import your photo to Silhouette Studio
- Open Silhouette Studio®.
- Open your photo in the software Click File>Open>Select Your Photo>Ok
- Re-size the photo to fit on your digital cutting mat.
Step Three: Creating a preview of Design #1

- Purchase your America Y’all design from the Silhouette Design Store
- In Silhouette Studio: Click File>Library>Library>Recent Downloads>Select File>Ok
- Select your design and change the fill color to the color vinyl you will be using so you can see what it will look like.
- Re-size your design and place it over the photo.
Step Four: Creating a preview of Design #2:
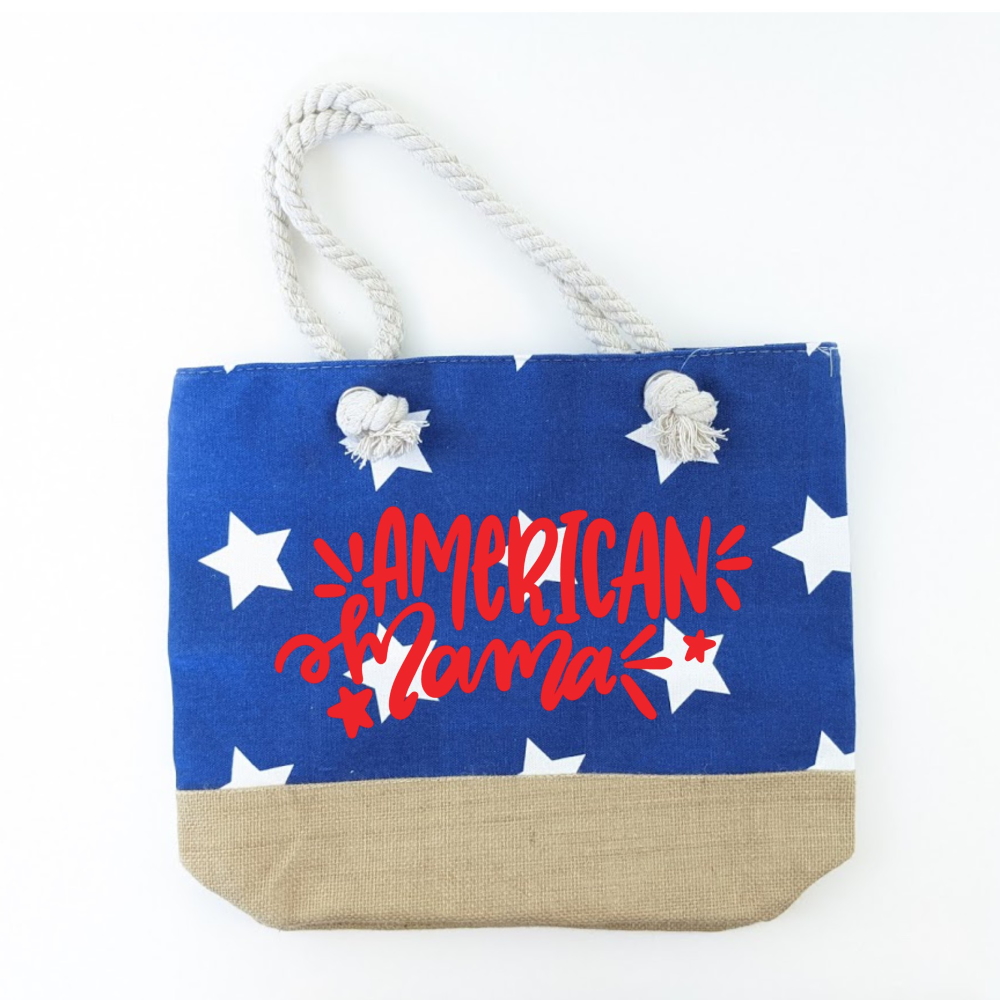
- Purchase your American Mama design from the Silhouette Design Store
- Open another blank project tab in Silhouette Studio.
- Click File>Library>Library>Recent Downloads>Select File>Ok
- Select your design and change the fill color to the color vinyl you will be using so you can see what it will look like.
- Re-size your design and place it over the photo.
Step Five: Pick your design and make your project
- Toggle back and forth between your two tabs and pick the design you like the best.
- Click the photo and hit “delete” on your keyboard to remove it.
- Re-size your design on your cut mat and send it to cut. See this Hand Towel craft for easy to follow instructions for heat transfer vinyl.
I love using this trick to make sure my design will look just the way I want on my finished project.
Which one of these designs would you pick? America Y’all or American Mama?
I have a whole list of Vinyl Blanks on Amazon that would be great for practicing with this trick.