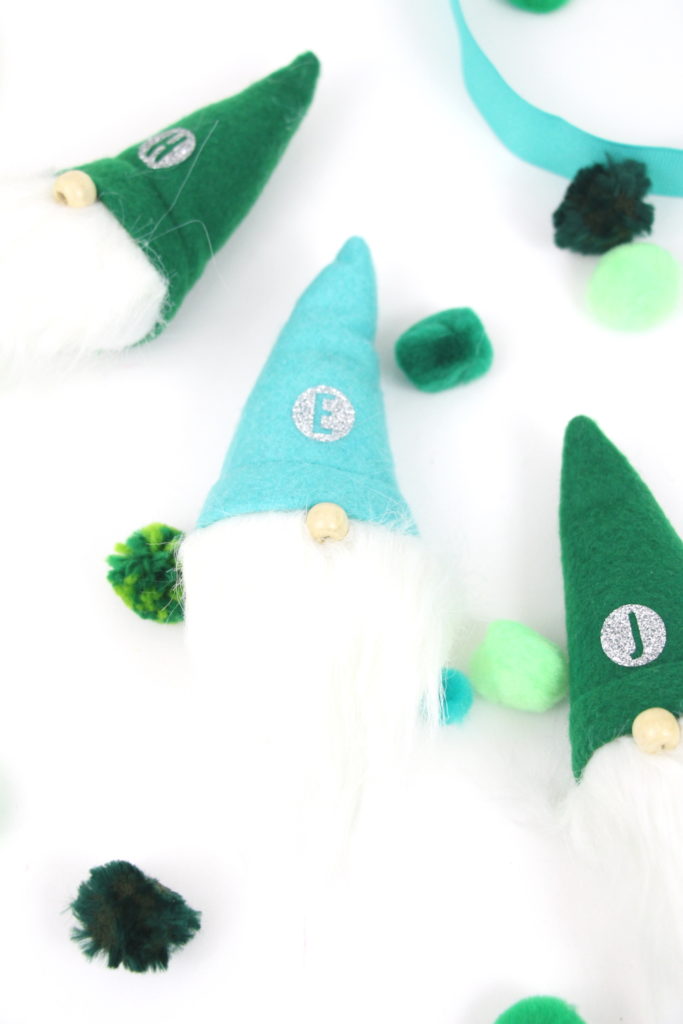
Monogrammed Gnomes for Christmas Stockings
| This post may contain affiliate links, which means I may receive a small commission, at no cost to you, if you make a purchase through a link. |
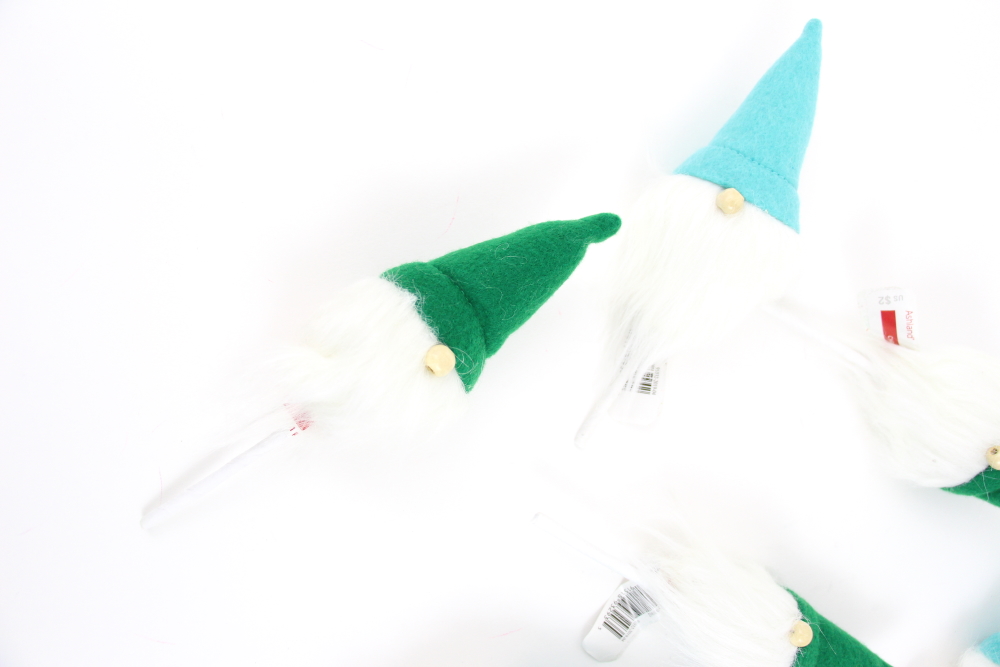
I love decorating for the holidays and wish I had the budget to create a new theme every year. This year I am loving mint and green together with a tiny bit of pink and found these gnomes that were too cute to pass up. Keep reading to see how I made my Monogrammed Gnomes for Christmas Stockings.
Estimated Time: 30 Minutes
Skill Level: Intermediate
Supplies Needed:
- Silhouette CAMEO®
- Silhouette Cutting Mat
- Weeding Hook
- Silhouette Studio
- “Solid Circle Monogram Alphabet” Design
- Heat Transfer Vinyl – Silver Glitter
- Felt Gnomes
- Iron or heat press – I used my Clover mini iron
Creating Your Design:
Step 1: Open Silhouette Studio®.
Step 2: Select the Page Setup Window and adjust your cutting mat size to 12×12 (or the sized mat you are using).
Step 3: Download your monogram from The Silhouette Design Store and then open in Silhouette Studio. Click File>Library>Library and select your downloaded file.
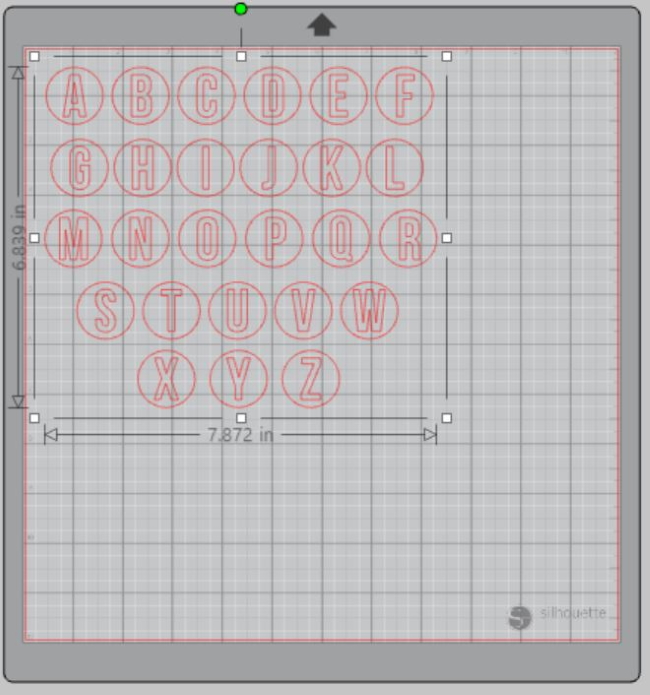
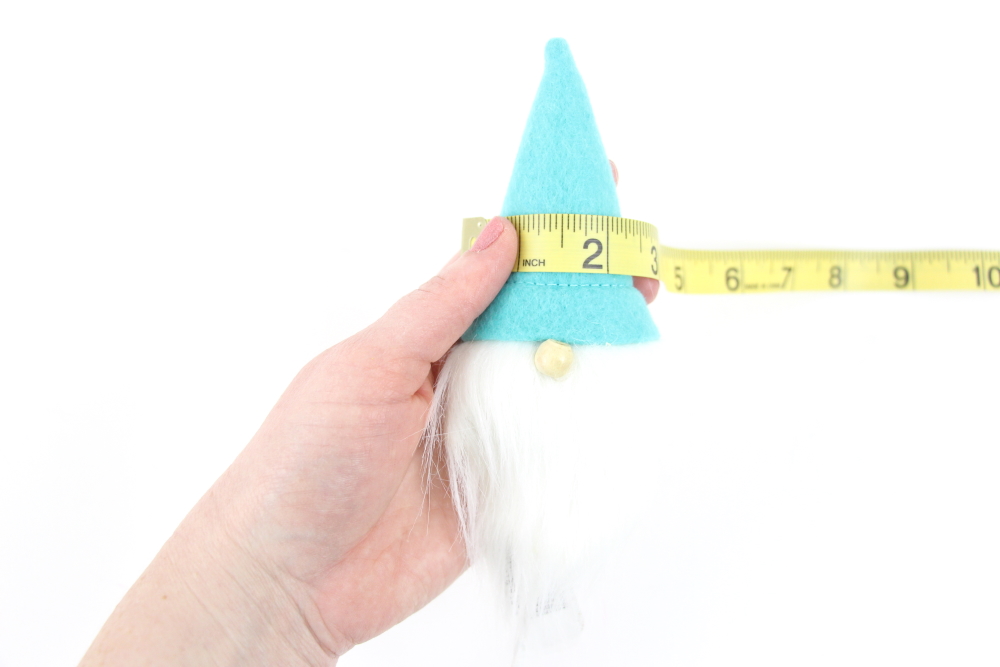
Step 4: Measure your gnome and re-size your design to the correct space on your 12×12 template – be sure to move the design as a group so it keeps all the letters the same size. You can do this by clicking and dragging to cover the whole design and then moving as one piece.
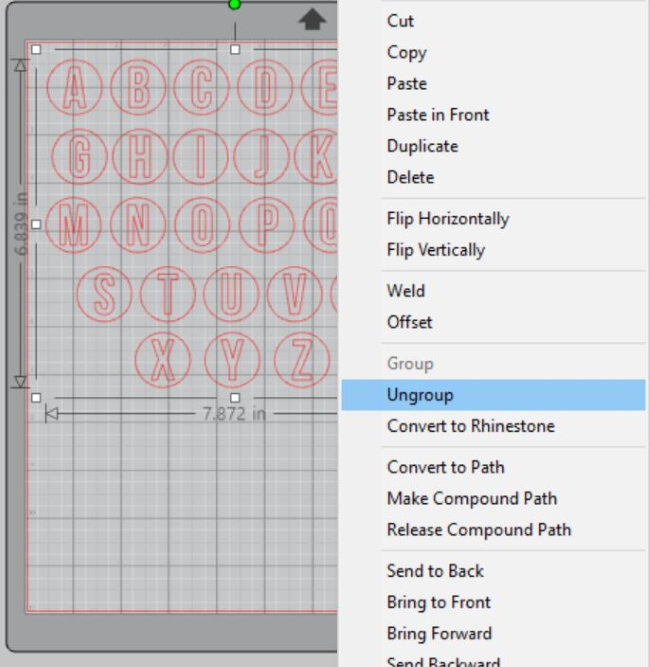
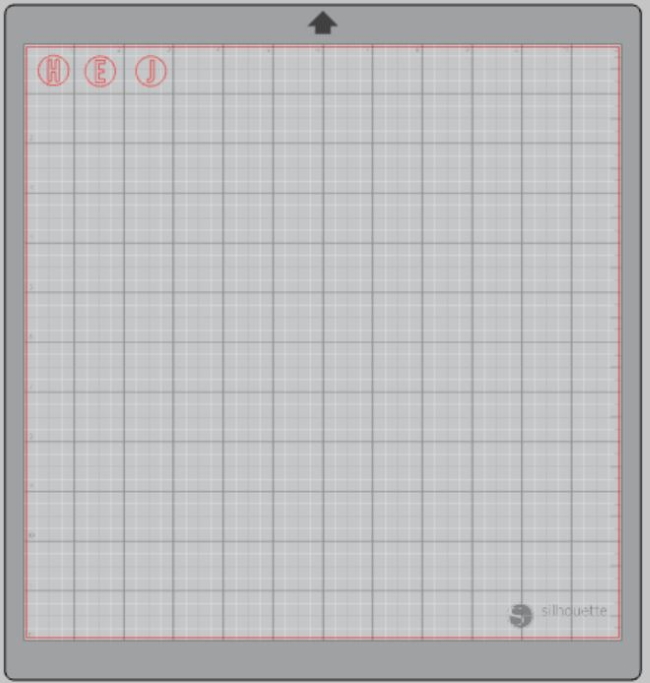
Step 5: Ungroup your design so you can edit each part individually. Right-click on your design and select “ungroup” from the menu.
Step 6: Delete the letters you don’t need. Copy and paste if you need duplicates.
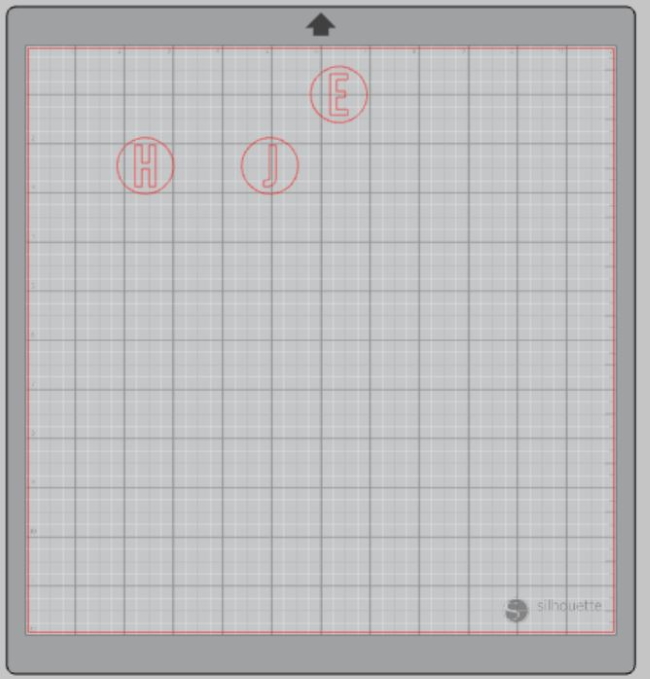
Step 7: Move your letters where you want them on your cutting mat.
Step 8: You will need to flip your design, so it appears backward for Heat Transfer Vinyl – this is called “mirroring” your design. Highlight your design, click “object” from the toolbar, “mirror” from the menu and then “horizontally” to mirror it.
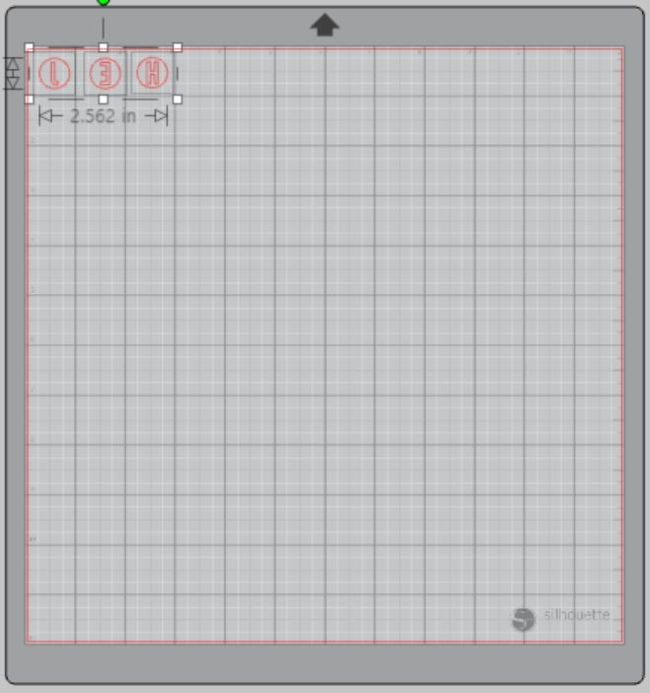
Step 9: Select “Send” to prepare to cut.
Step 10: Follow the prompts in the Design Studio to adjust your blade (if using a ratchet blade) for Glitter Heat Transfer Vinyl and double-check to make sure your design has been selected to cut.
Step 11: Click “Send”
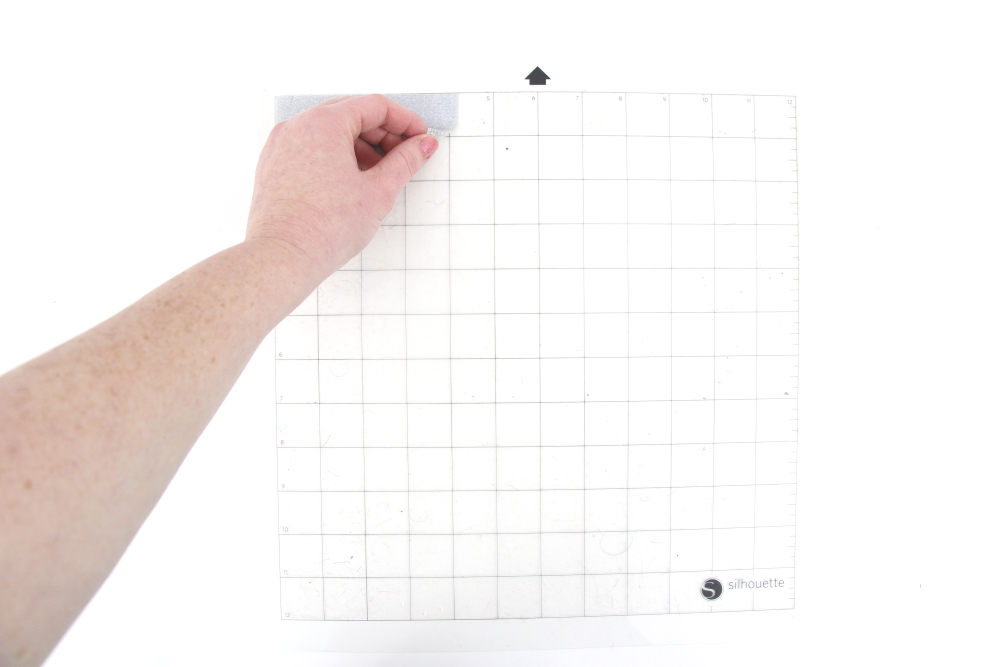
Step 12: Select “Unload” when your machine has finished cutting your design to remove the cutting mat from the machine.
Preparing Your Design:
Step 1: Remove your sheets of Glitter Heat Transfer Vinyl from the cutting mat – go slow so it doesn’t curl up or tear.
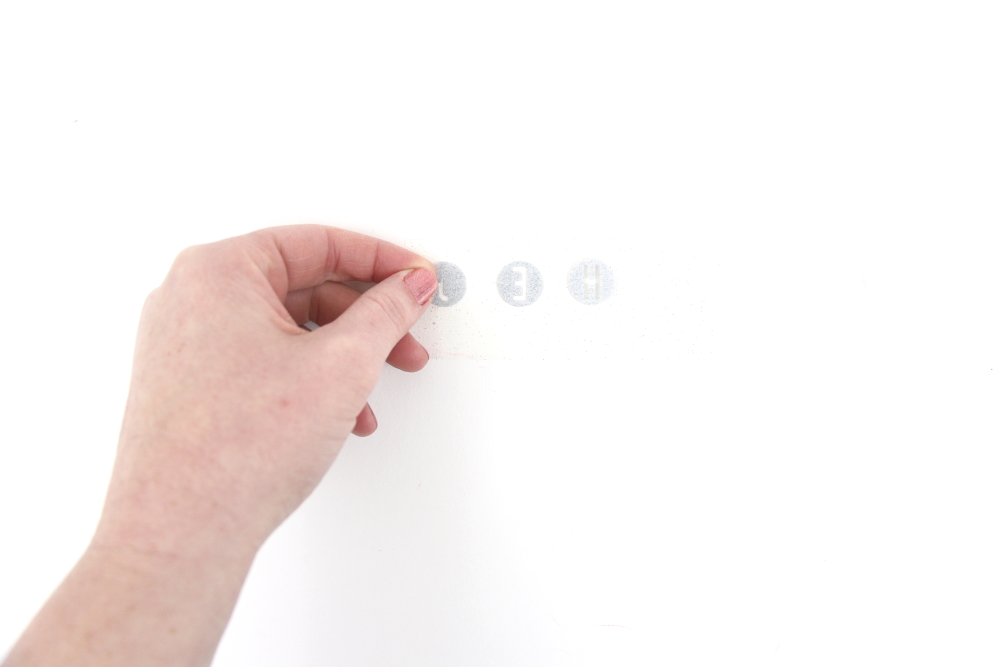
Step 2: Use your fingers or a weeding tool to remove the excess vinyl from each color. Be sure to leave your design on the clear carrier sheet.
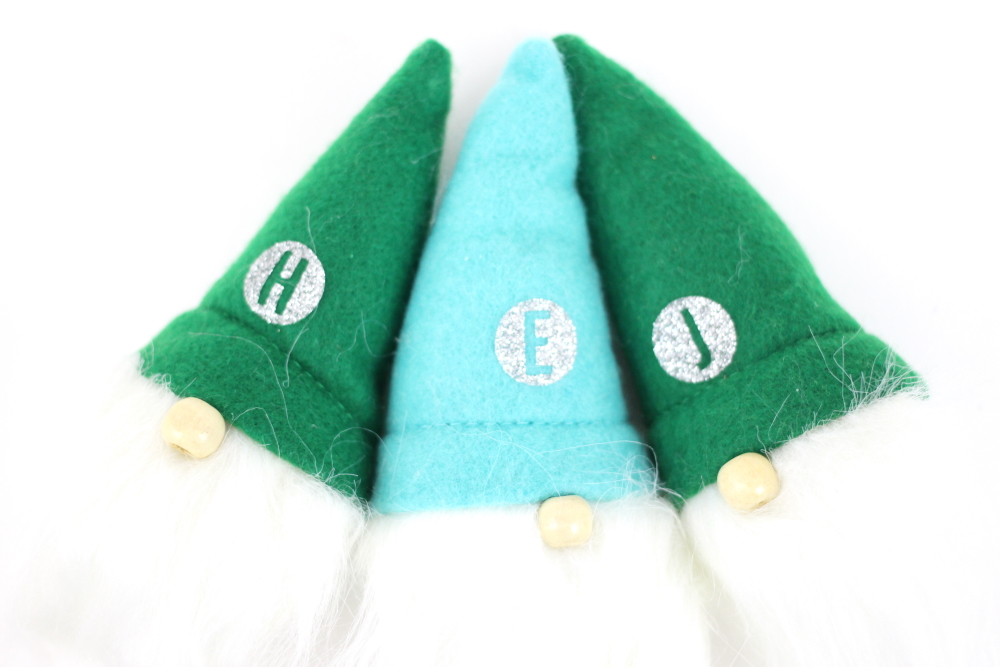
Creating Your Monogrammed Gnomes for Christmas Stockings:
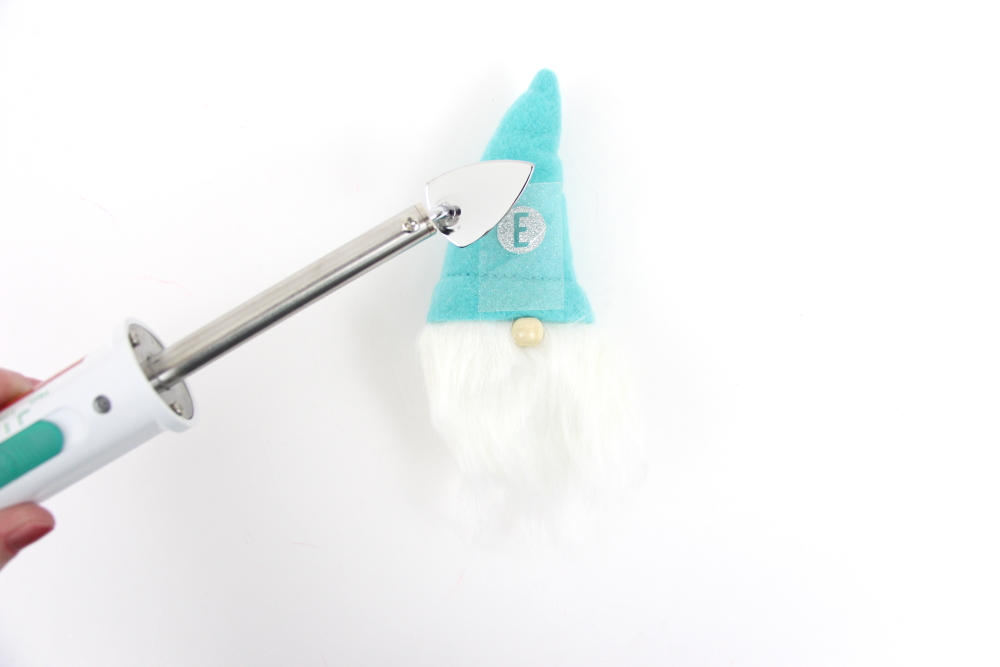
Step 1: Heat up your iron or heat press.
Step 2: Place your monogram on your gnome right side up (this is why your design must be mirrored for cutting).
Step 3: Heat your design for the recommended time for the HTV you’re using. Use steady pressure. – Be careful not to burn the felt beyond the carrier sheet.
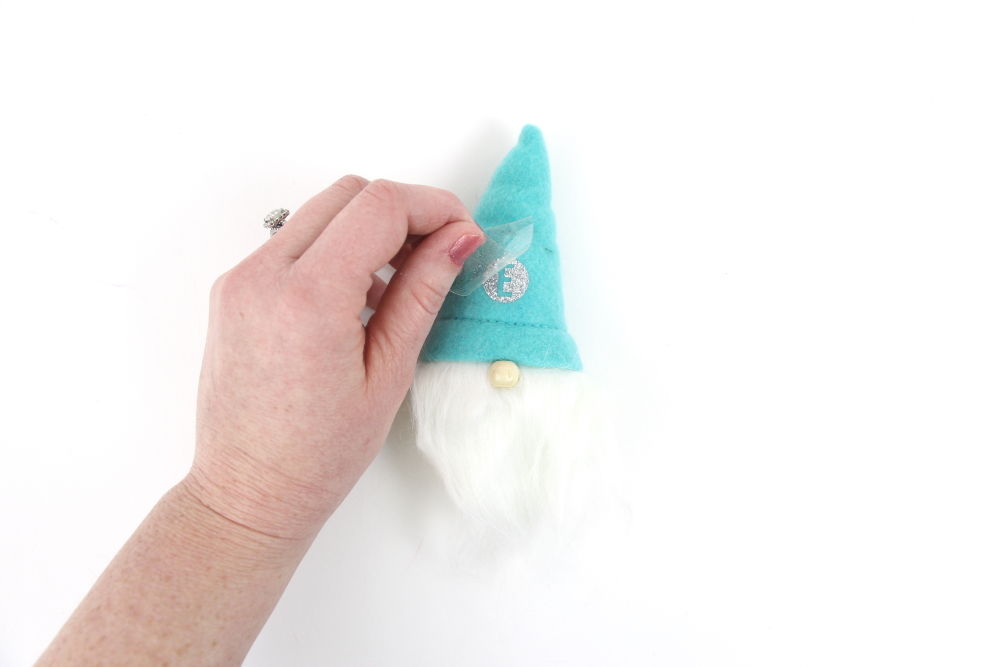
Step 4: Peel back the clear carrier sheet. Some Heat Transfer Vinyl requires a hot or cold peel – always follow the recommended peel for your heat transfer vinyl. Tip: pull from a corner and not the side to make sure each part of the design transfers completely to your hand towel.
Step 5: Repeat for each gnome and initial.
I love that this decorating hack allows me to switch out my decorations without breaking the bank every time. I just keep the same neutral stockings and switch out the decorations on the front.
Untraditional color schemes are so much fun and I love that they are becoming more popular. Tell me your favorite color scheme in the comments.