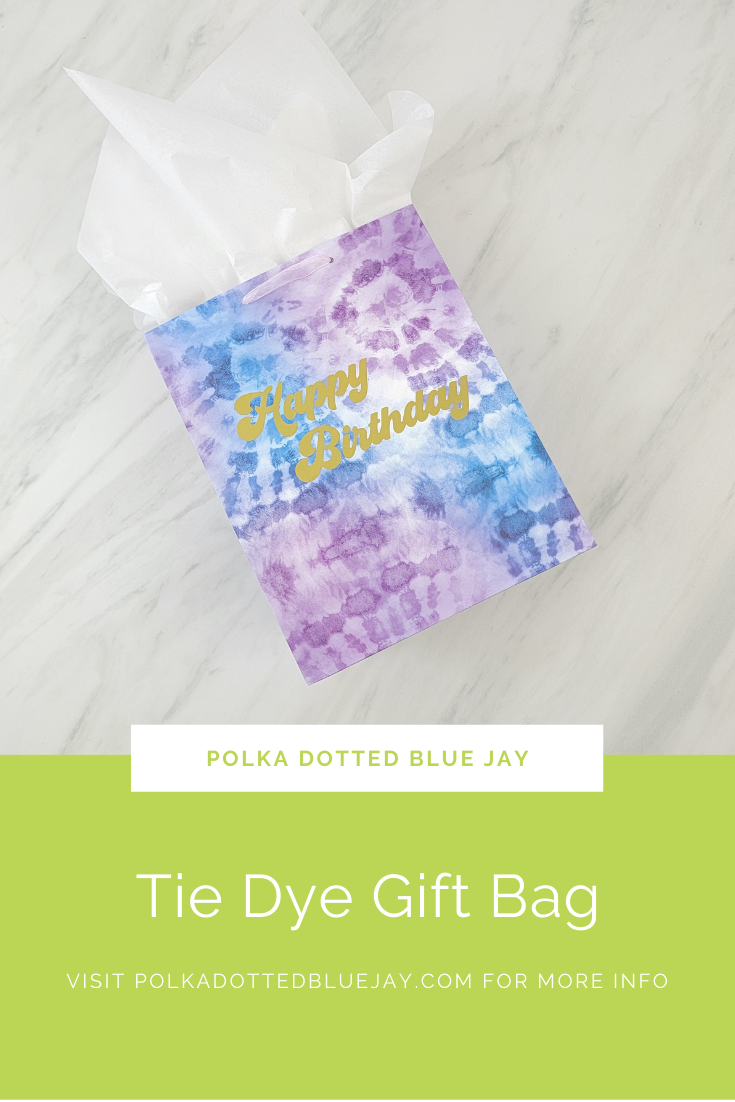
Tie Dye Gift Bag
| This post may contain affiliate links, which means I may receive a small commission, at no cost to you, if you make a purchase through a link. |
I love fun gift wrap and knew I wanted to make a tie-dye gift bag when Team Creative Crafts said the May prompt was “tie dye”. Using store-bought gift bags and dressing them up with some vinyl or other embellishments is one of my secret party tips; it makes everything match your theme perfectly; a tie dye gift bag would be perfect for a roller skating party or a groovy themed event.
This tie dye gift bag could easily serve as your party favor bag too; just switch the “happy birthday” out for “thank you” or “stay groovy” and you’ve got a perfect party favor to give to your guests.
Estimated Time: 10-15 Minutes
Skill Level: Beginner
Supplies Needed:
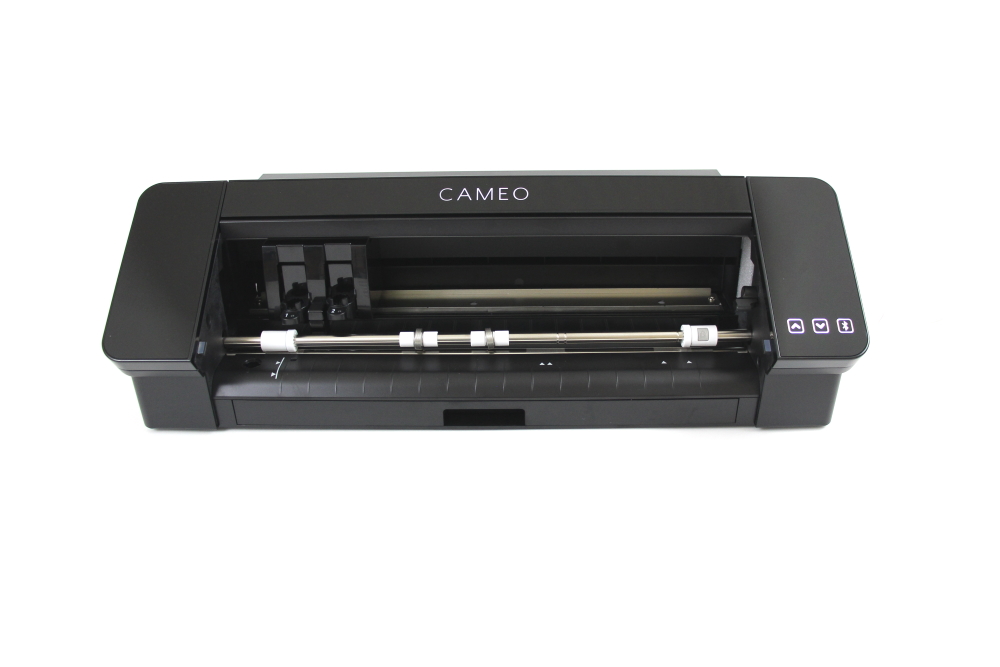
- Silhouette CAMEO®4
- Silhouette Cutting Mat
- Silhouette Studio
- Adhesive Vinyl
- Gift Bag
- Happy Birthday SVG – from the Polka Dotted Blue Jay Freebie Library
- The Groovy Script Font – if you would like to create your own phrase or add a name
- Silhouette Software – you will need the Business Edition to make importing the PDF easy
How To Get The Groovy Happy Birthday SVG:
Click here to subscribe to the free cut file library and Polka Dotted Blue Jay newsletter.
Once subscribed you will get a welcome email with a link to the freebie library and the password to access the files.
Find the Groovy Happy Birthday file and click the image to download it to your computer.
If you’ve already subscribed but can’t remember the password, check your inbox for a newsletter email. The link and password are always included when you get an email from me.
Step One: Create Your Happy Birthday Decal:
Open Silhouette Studio®.
Select the Page Setup Window and adjust your cutting mat size to 12×12 (or the size mat you are using).
Next, add your groovy happy birthday cut file. Click File>Open>and select the SVG (you will need the business edition of the Silhouette software to easily use the SVG.)
Step Two: Editing your Decal:
Highlight the whole design and resize it to the size you need for your project.
Be sure to highlight the whole design before resizing so everything resizes in the correct proportions.
Step Three: Cutting Out Your Decal:
Turn on your Silhouette Cameo 4.
Attach your adhesive vinyl to the cutting mat, color side up, and load it into your machine by lining up the mat on the guidelines and pressing the “up” arrow on the touch panel.
Follow the prompts in the Design Studio for the type of vinyl you’re using and double-check to make sure your design has been selected to cut.
Click “Send” in the design studio to start cutting.
Press the “down” arrow on the Cameo 4 touch panel when your machine has finished cutting your design to remove the cutting mat from the machine.
Step Four: Using Your Groovy Happy Birthday Decal:
Remove your vinyl from the cutting mat – go slow so it doesn’t curl up.
Cover your design with transfer tape and then slowly peel the vinyl away from the backing sheet; your design should be stuck to the transfer tape with the sticky part of the vinyl facing out.
Add to your gift bag and then remove the transfer tape.
Need some more fun tie dye projects? Check out these projects from some of my crafty friends with Team Creative Crafts:
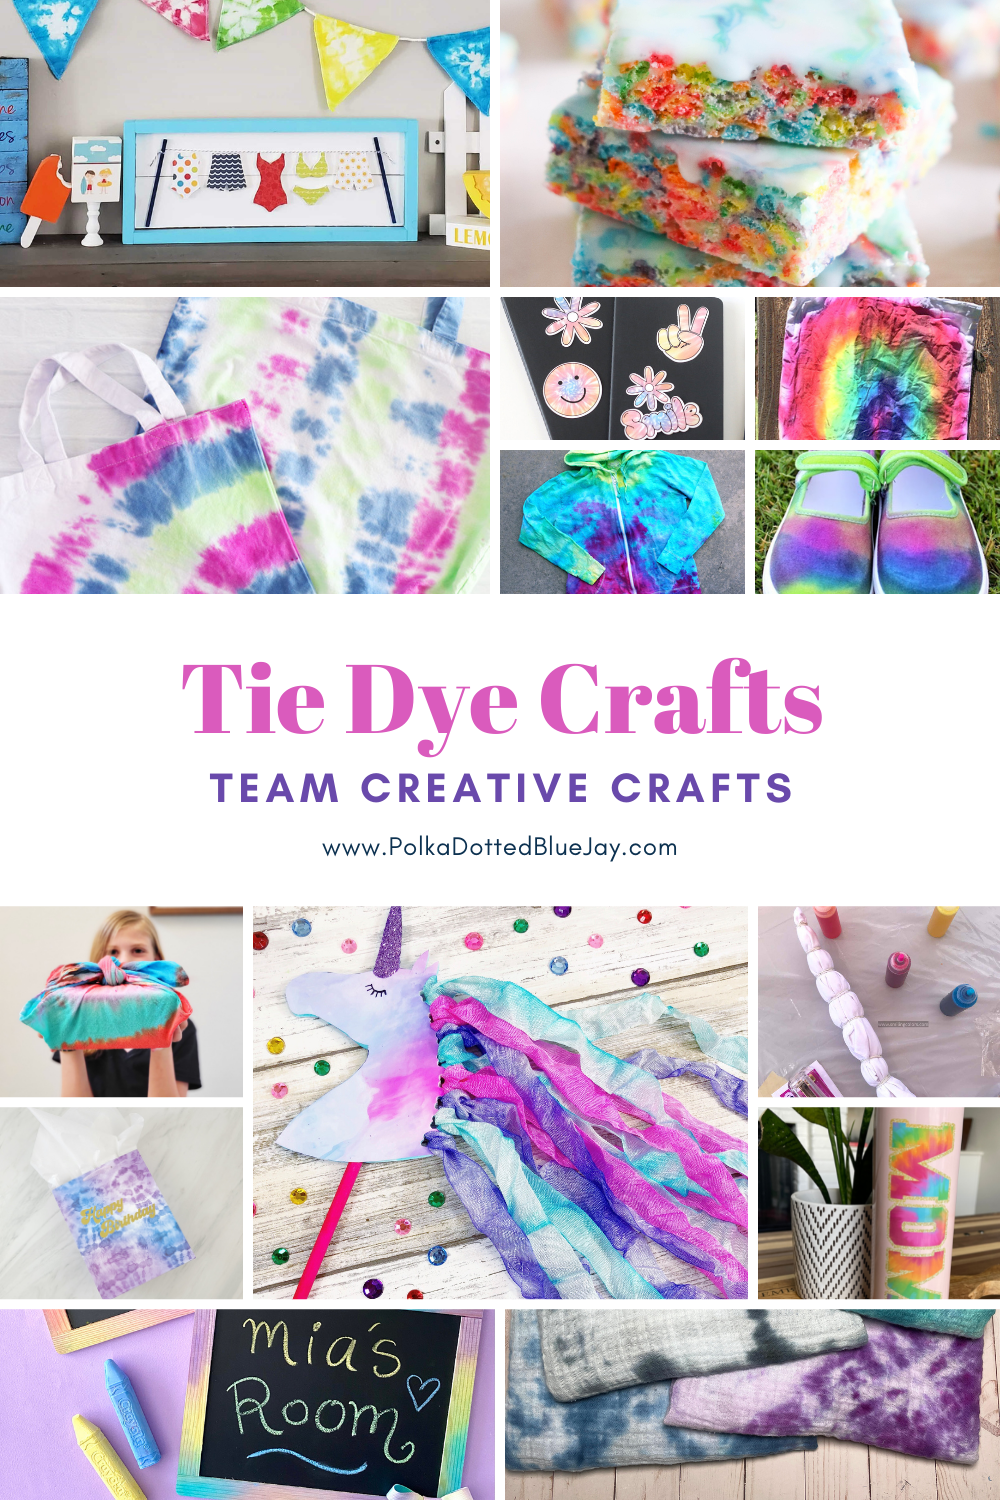
Laura from Me and My INKlings has created a bright and colorful Rainbow Tie Dye Tote Bag
Smitha from Smiling Colors is sharing How to Throw a Tie Dye Party, perfect for Summer
Shani from Sunshine and Munchkins has created a rainbow Tie Dye Banner
Laura from Laura’s Crafty Life has a full tutorial on How to Tie Dye Tote Bags
Justine from Little Dove has created a reusable Tie Dye Fabric Wrapping Paper
Erica from 5 Little Monsters is sharing Shibori Inspired Tie Dye Swaddle Blankets
Kelsey from Poofy Cheeks has created a Tie Dye Sublimation Tumbler for Mom
Beth with Creatively Beth is sharing How to Tie Dye Paper with Markers to make a Unicorn Wand
Lindsay from Artsy Fartsy Mama has created a gorgeous and colorful Ice Tie Dye Hoodie
Liz from Liz on Call is sharing a set of groovy Tie Dye Stickers created with her cutting machine
Kimberly from Crafting Cheerfully has created fun and vibrant Tie Dye Chalkboard Signs
Ginger from Ginger Snap Crafts is sharing a super cute pair of Tie Dye Sneakers for Summer fun
Elise from Polka Dotted Blue Jay has created a Tie Dye Gift Bag, perfect for all the groovy gifts
Heather from Homemade Heather is sharing the recipe for yummy Tie Dye Fruity Pebble Bars