Birthday Baggie Banners
| This post may contain affiliate links, which means I may receive a small commission, at no cost to you, if you make a purchase through a link. |
So this year, Houston’s Metrolink birthday party paled in comparison to last year… lame. I was much more focused on our plans for the weekend, his actual birthday and working my butt off to finish my homework ahead of schedule so I could have a relaxing and stress free weekend with my man.
I still wanted to make our Metrolink party fun, so I decided to bake my chocolate chip cookies that everyone likes and put up some small decorations.

We spend hours commuting every week and LITERALLY sit with the same people on the train. Every.Single.Day. The people I have come to know on the train are my commuting family. Ray brings me coupons, Donna gave me a ride to my car when I forgot to get off the train, and everyone looks out for each other when one of us is sleeping (errr, that would be me).
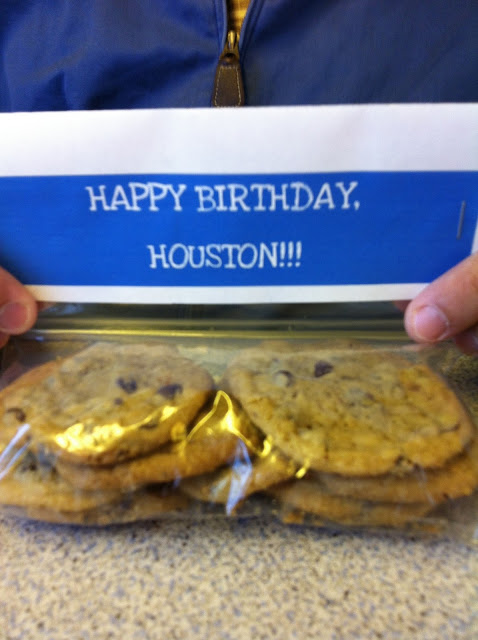
I hung a Happy Birthday banner in the train and picked up a “birthday boy” ribbon for Houston – he is the best and actually wore it on the train.


I made a batch of cookies and put some in individual baggies for all of the train peeps. To jazz it up a bit, and to celebrate Houston, I made a bag topper that said “Happy Birthday, Houston”.
Here is how it’s done:
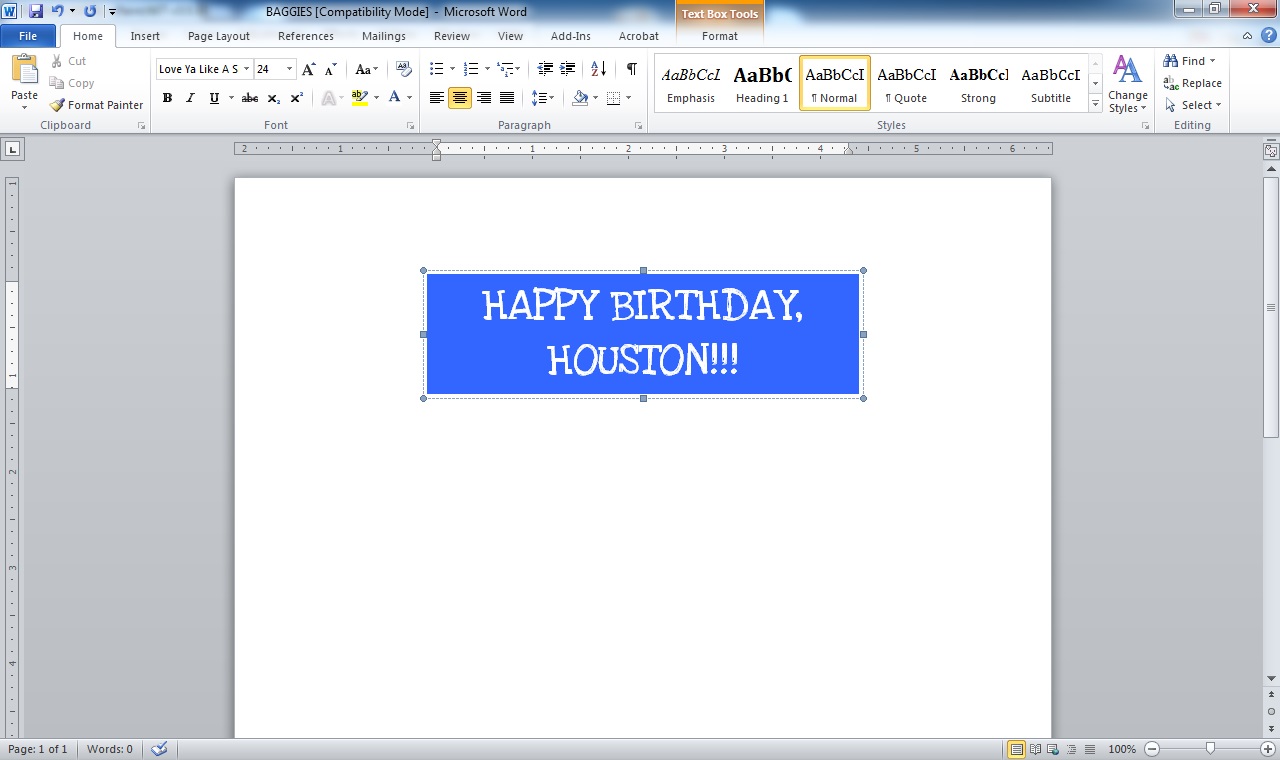
Create a text box in Microsoft Word. Select format text box from the top tool bar and customize!

I chose to make mine blue (Houston’s favorite color) with white letters. I generally center my text and then also center the box in the middle of the page (no funny sized borders). I wanted to have the banner be the border itself, so I removed the border by selecting “shape outline” and then “no outline”.

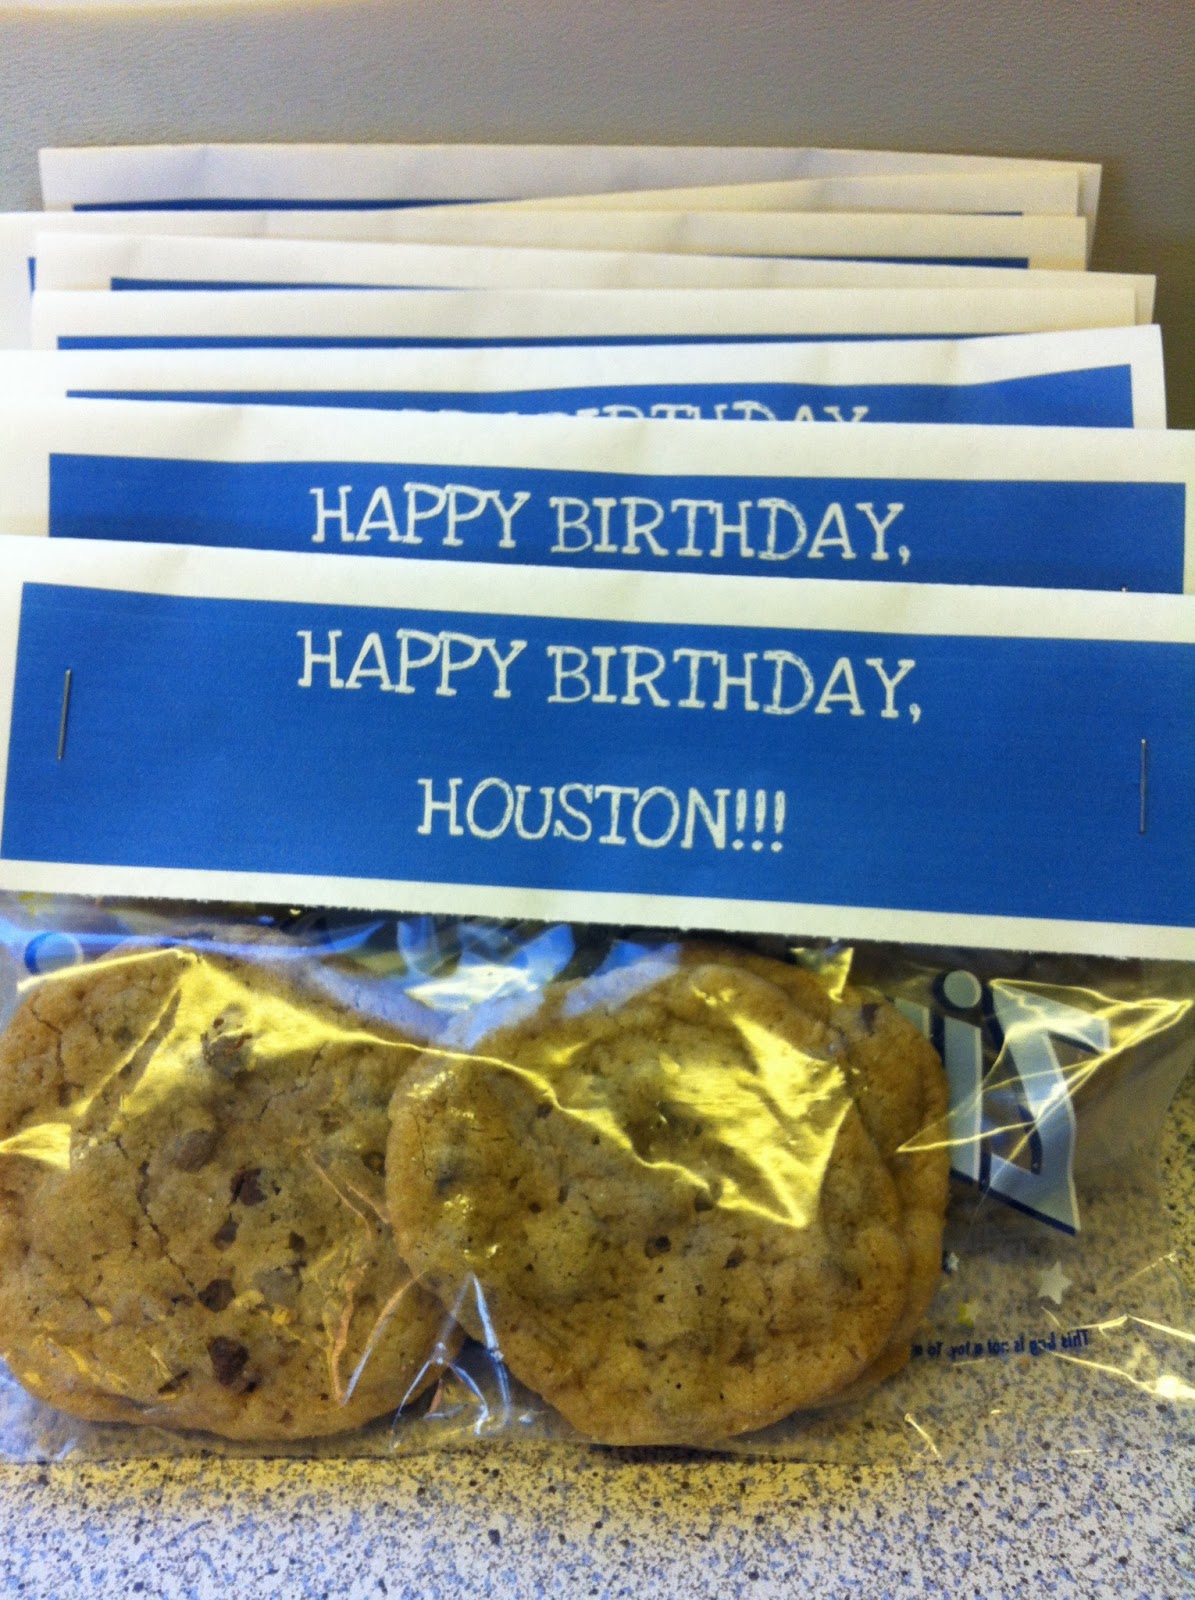
Type your greeting/whatever you would like the baggie to say.
Since you will need a “flap” to fold over the top of the baggie, Hint: hit enter a couple times to make sure there is enough paper to make the flap. [I am not savvy enough to figure out dimensions on my computer, I just eyeball it and then print a test copy.] If you print at the top of the page, the text will be upside down and the flap won’t work.

Once you have printed and re sized to your liking, print a bunch of copies and get to cutting! I am sure there is a way to measure and graph each of these, but I am just wayyyy too lazy and cutting with my paper trimmer takes less time than figuring it all out. Then fold the paper in half (use your test prints to figure out the size).
Fill the baggies with the yummy dessert of your choice and seal the bag.
Place your folded “Baggie banner” over the bag and attach. I usually go for staples, but I have used a hole punch and ribbon before too. – stapling is easy and it gets the job done fast!
Ta-da!!! Birthday Baggie Banners! A sweet way to dress up goodie bags for parties, or even simple lunch bag sandwiches. Cute, right?

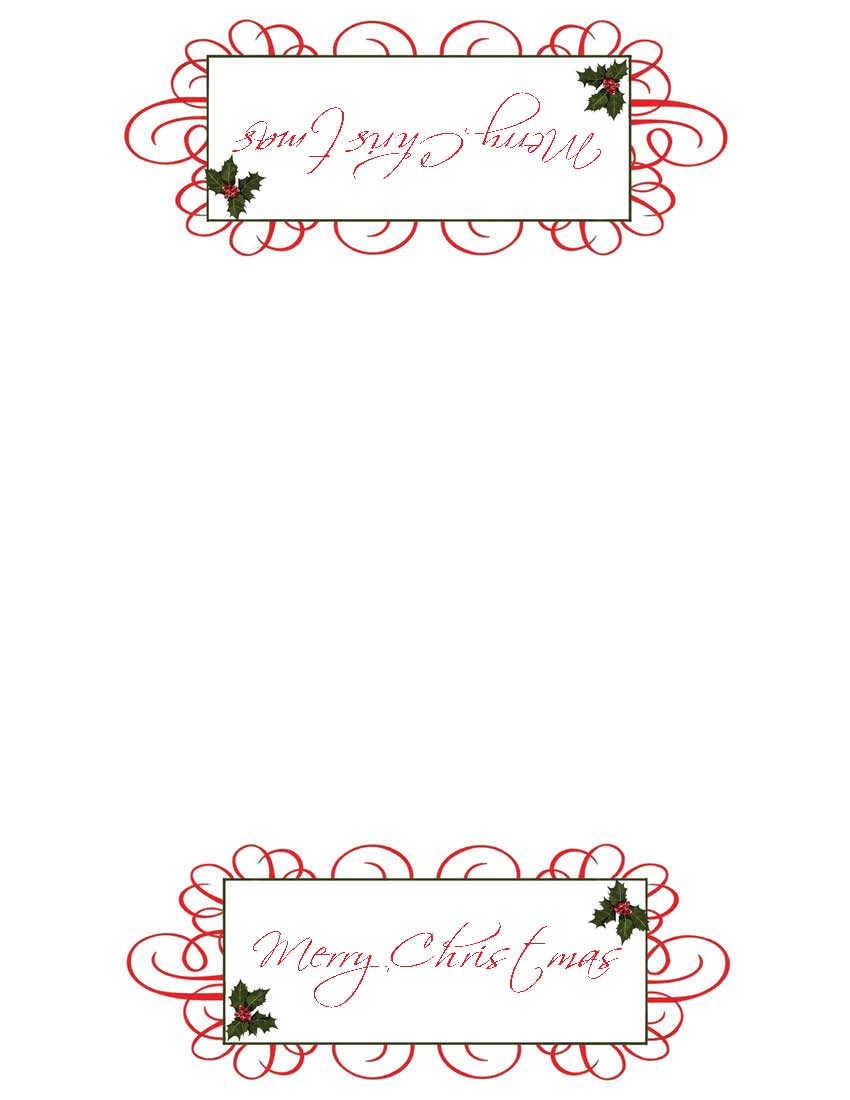
For an easy Christmas baggie, feel free to download {this} PDF, designed my my talented co-worker/friend Ashley – she has seriously awesome skills. (For personal use only). I only ask that you follow my blog or share it with someone whom you think would enjoy it!

You May Also Like
Christmas Cupcakes Wrapper and Topper

Halloween House Village