Print and Cut Receipts Label
| This post may contain affiliate links, which means I may receive a small commission, at no cost to you, if you make a purchase through a link. |
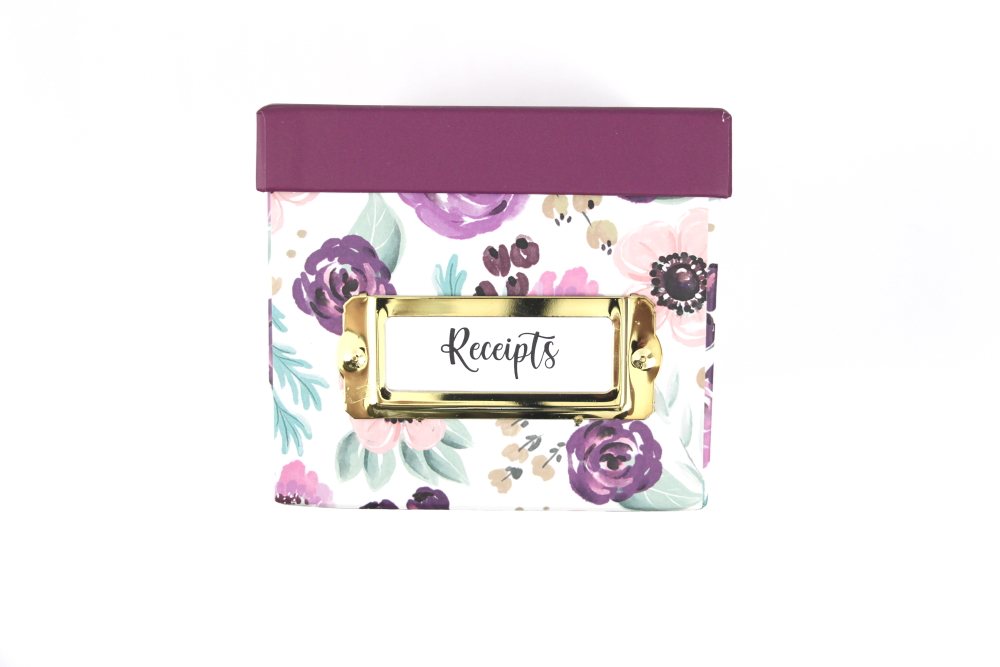
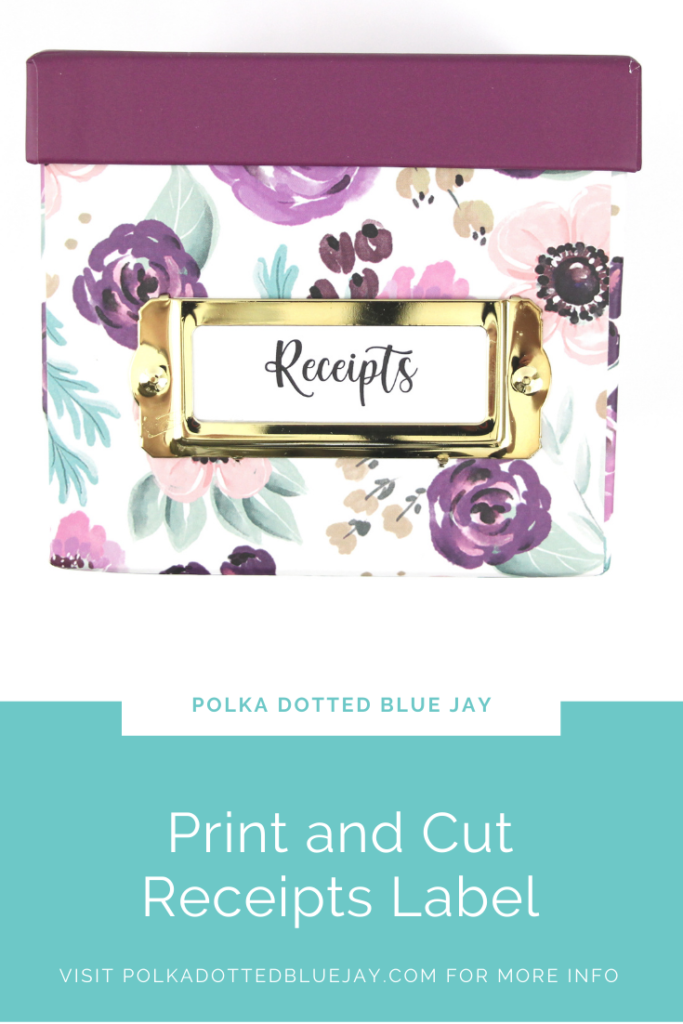
Last month I shared how I use a small photo box to hold my business receipts but I wanted to share how I reused the free receipts SVG as a print and cut receipts label for your box. You can use this print and cut receipts label on a box, on a cover of a 3-ring binder, or any other place you keep your business receipts.
Designating a drop zone for your physical store receipts is my number one tip for getting started with your business bookkeeping and using a print and cut receipts label is one fun crafty way to get organized and have some fun crafting at the same time.
Estimated Time: 10-15 Minutes
Skill Level: Beginner
Supplies Needed:
- Silhouette CAMEO®4
- Silhouette Cutting Mat
- Silhouette Studio
- Mini Photo Box
- FREE “Receipts” SVG
- Printer & Ink
- Cardstock
How To Get The FREE Receipts SVG:
Click here to subscribe to the free cut file library and Polka Dotted Blue Jay newsletter.
Once subscribed you will get a welcome email with a link to the freebie library and the password to access the files.
Find the Receipts file and click the image to download it to your computer.
If you’ve already subscribed but can’t remember the password, check your inbox for a newsletter email. The link and password are always included when you get an email from me.
Step One: Create Your Print and Cut Receipts Label:
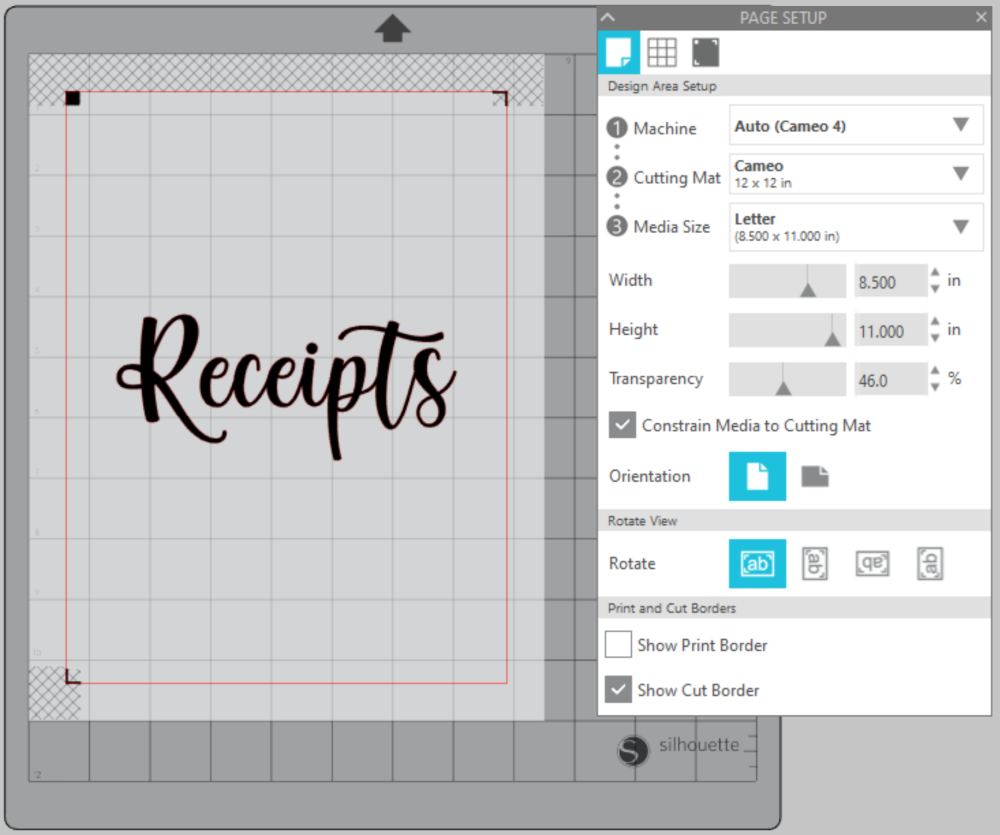
Open Silhouette Studio®.
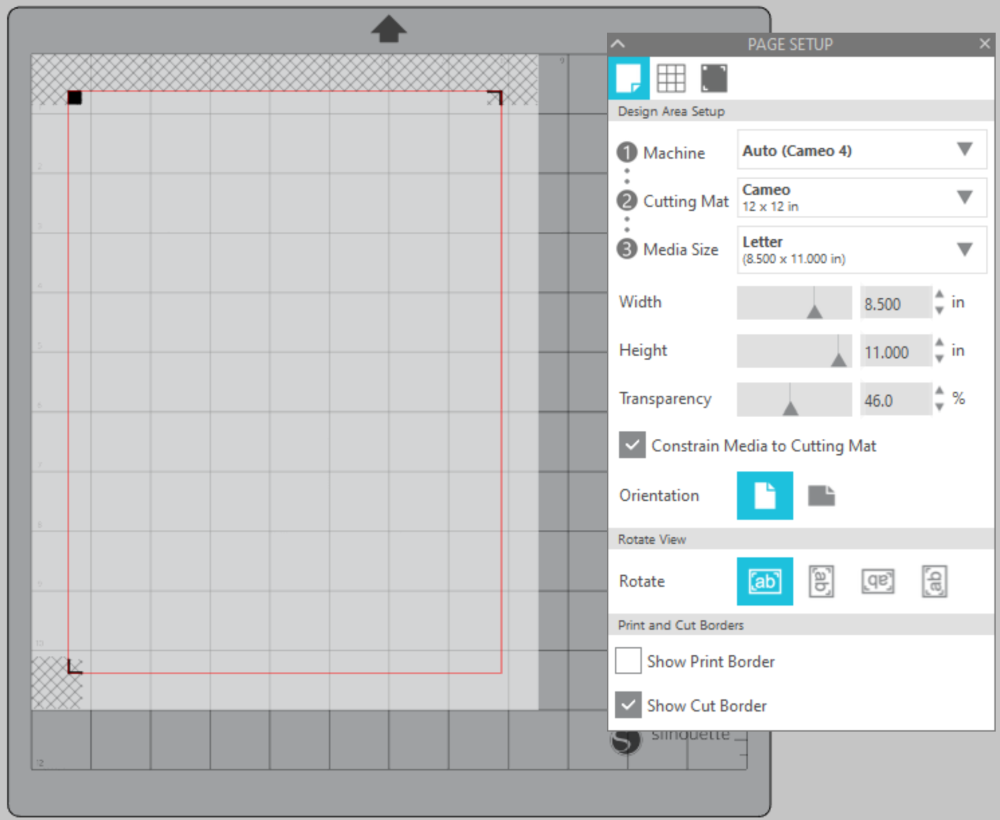
Select the Page Setup Window and adjust your cutting mat size to 12×12 (or the size mat you are using) and your media size to “letter”.
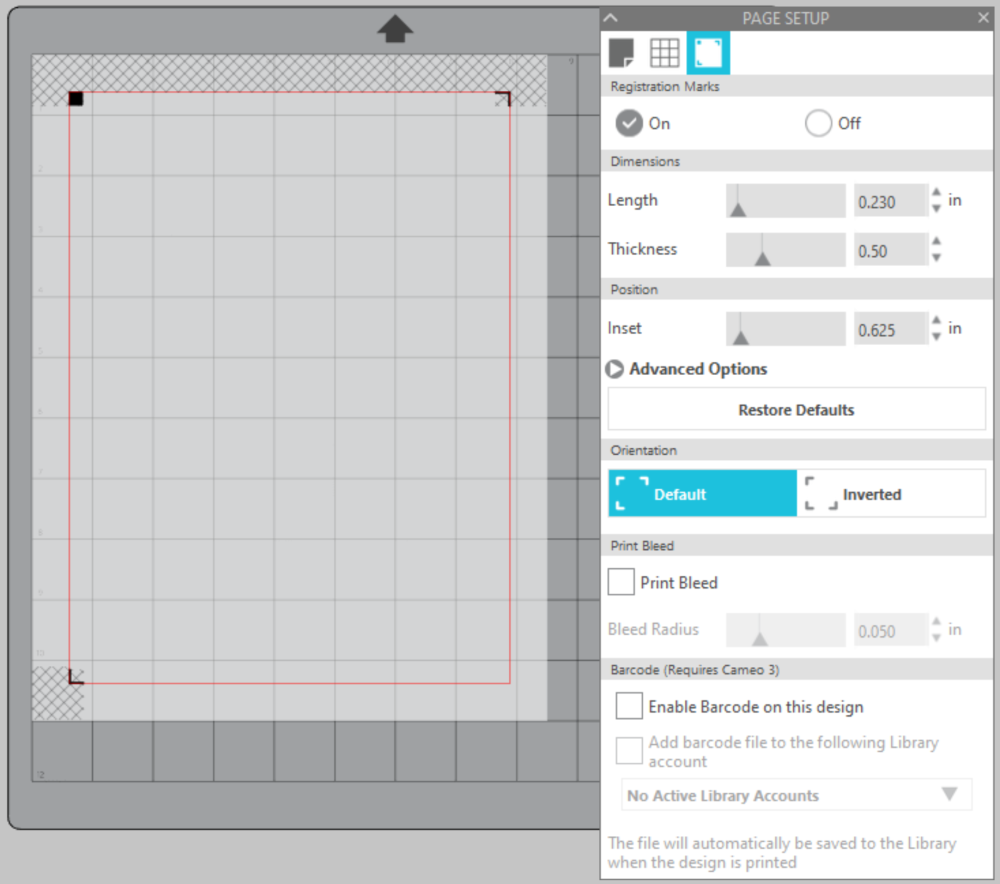
Turn your registration marks “on”.
Open your free receipts SVG in the Silhouette Software. Click File>Open>Double click your file.
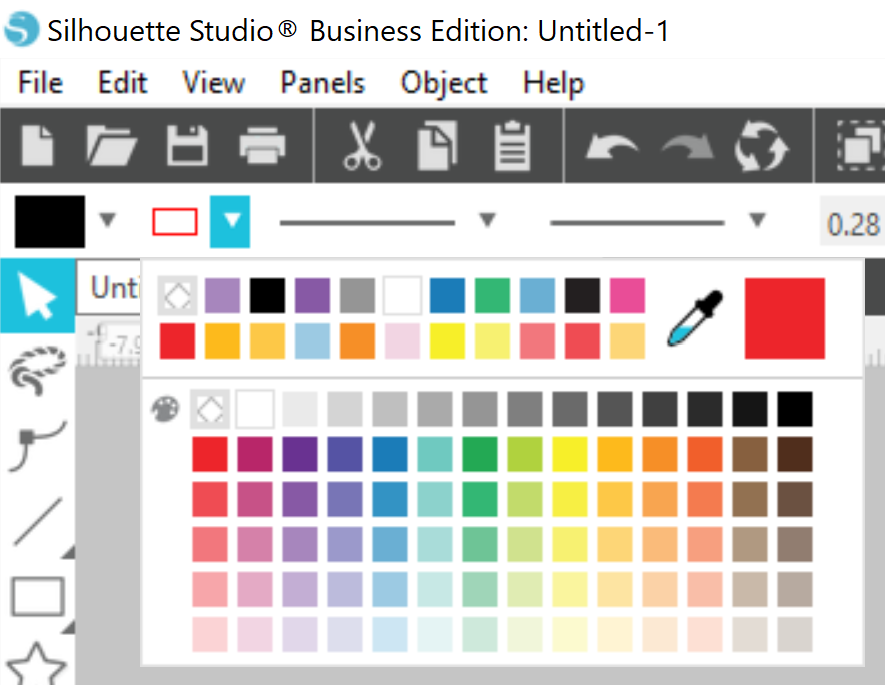
Remove the red cut outline by changing it to transparent. The color option is in the top left corner under “File”.
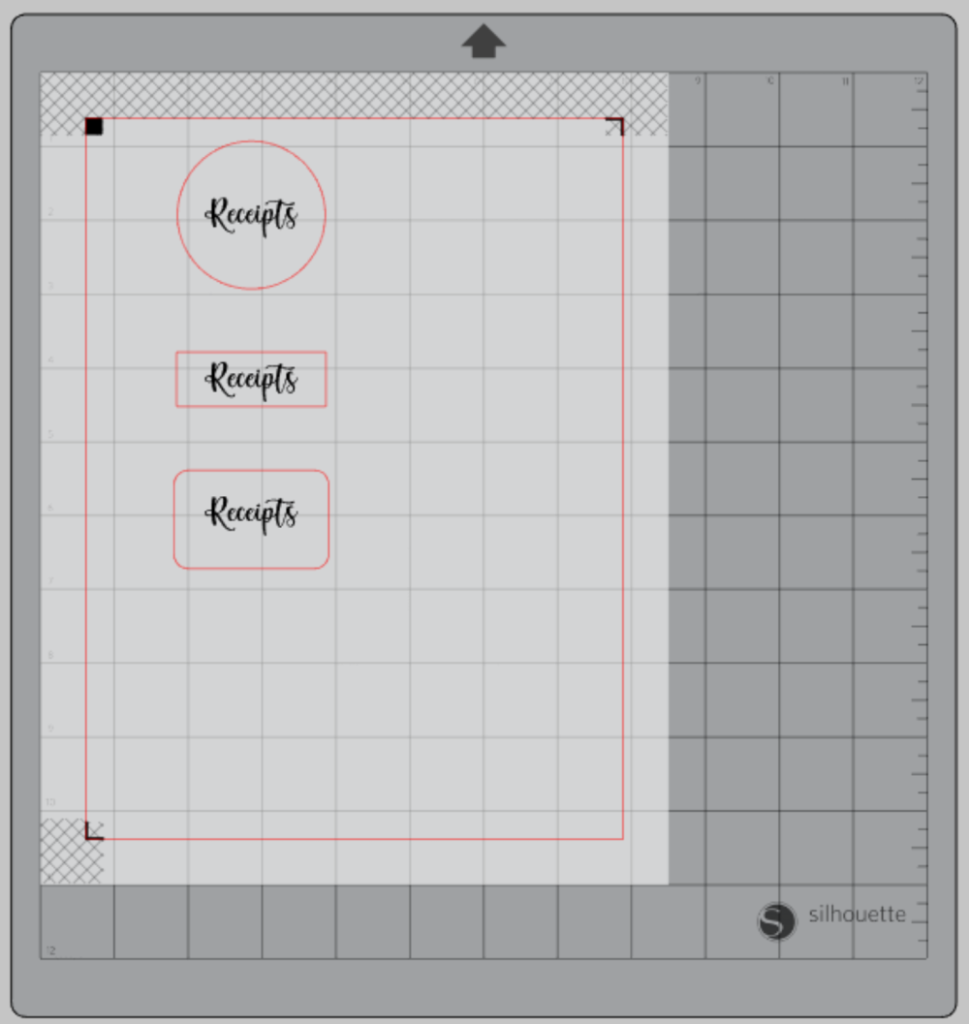
Measure your box (or item you are using) and re-size your decal to the size you would like.
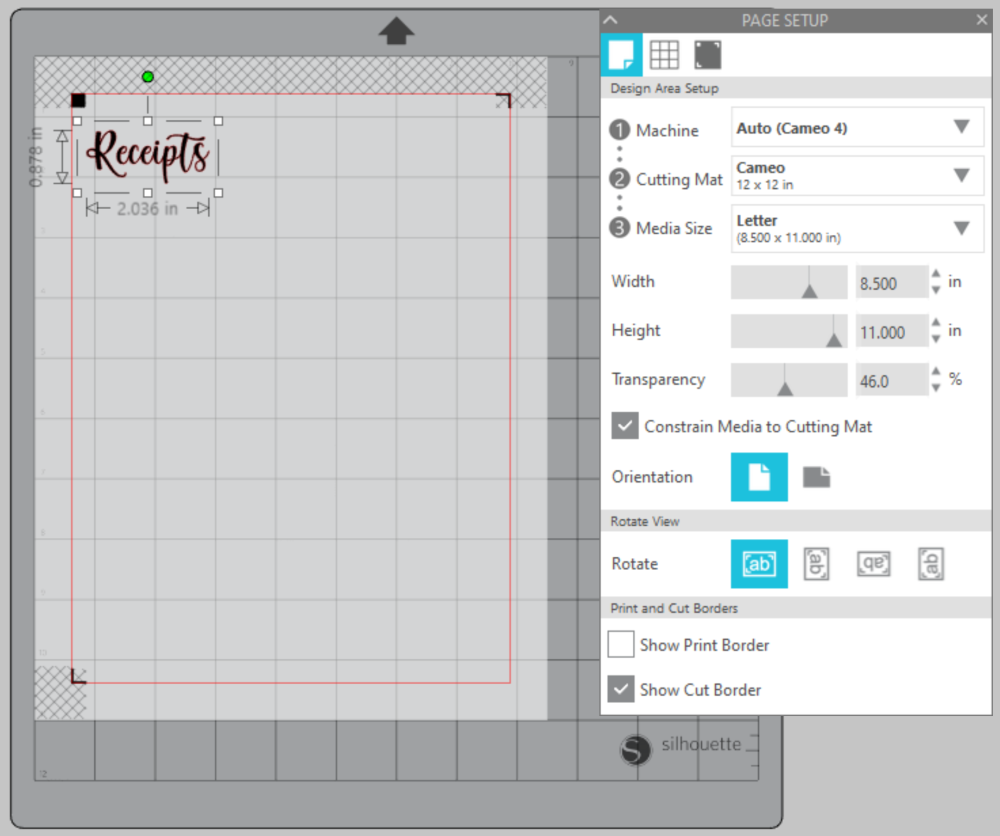
Want to print a full-page label for a binder? Select the “receipts” design and center it on your workspace. Highlight the design and select Object from the main menu then Align>Center>Middle
Step Two: Printing your Receipts Label:
While you’re still in the Silhouette Software click File>Print and send the design to print from your home printer.
Step Three: Cutting your Receipts Label:
I used my paper trimmer to cut out my label in a rectangle – no cutting machine required!
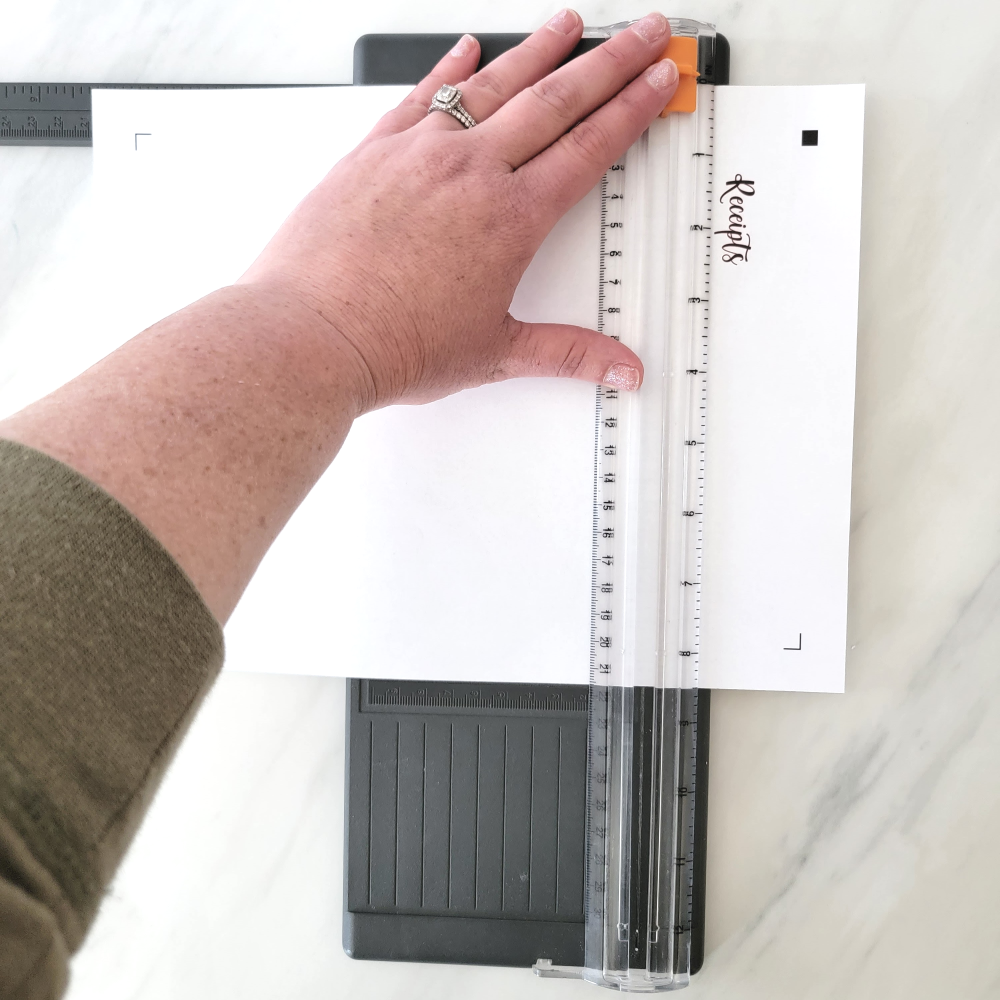
If you need a different shape for your label you can create a cut line and then send the printed page through your Silhouette Cameo.
Turn on your Silhouette Cameo 4.
Attach your print and cut receipts label to the cutting mat, design side up, and load into your machine by lining up the mat on the guidelines and pressing the “up” arrow on the touch panel.
Follow the prompts in the Design Studio for the type of paper you’re using and double-check to make sure your design has been selected to cut. Make sure you’re not telling the machine to cut out the “receipts” at the same time.
Click “Send” in the design studio to start cutting.
Press the “down” arrow on the Cameo 4 touch panel when your machine has finished cutting your design to remove the cutting mat from the machine.

Step Three: Using Your Print and Cut Receipts Label:
Remove your cardstock from the cutting mat – go slow so it doesn’t curl up.
Slip the label into your bookplate and you’re good to go!
Don’t forget to grab A Beginner’s Guide to Bookkeeping to help you with the next steps as you organize your small business expenses.
Need more help? I’ve got you.
Want some DIY help with bookkeeping? I have an ebook that will walk you through some of the basics!
Click here to buy your copy of A Beginner’s Guide to Bookkeeping.
Once you complete your purchase, you will receive a receipt/email with the links to download the e-book and the additional attachments. Save them to your computer so you can edit and print as you would like.
Have some questions you would like to ask me one-on-one? I am now offering video or phone call appointments!
Click here to book an appointment
Are you lost trying to price your Etsy items? Bookkeeping can help!
Click here to check out my FREE Etsy Pricing Printable.
I am rooting for you, friend. Now get out there and build that empire!