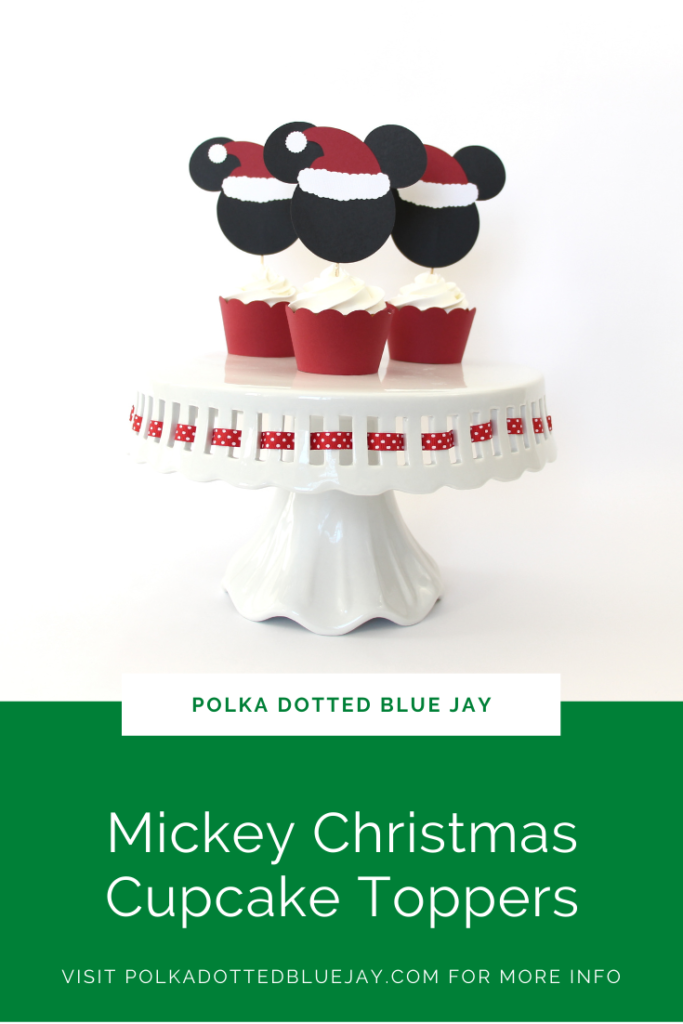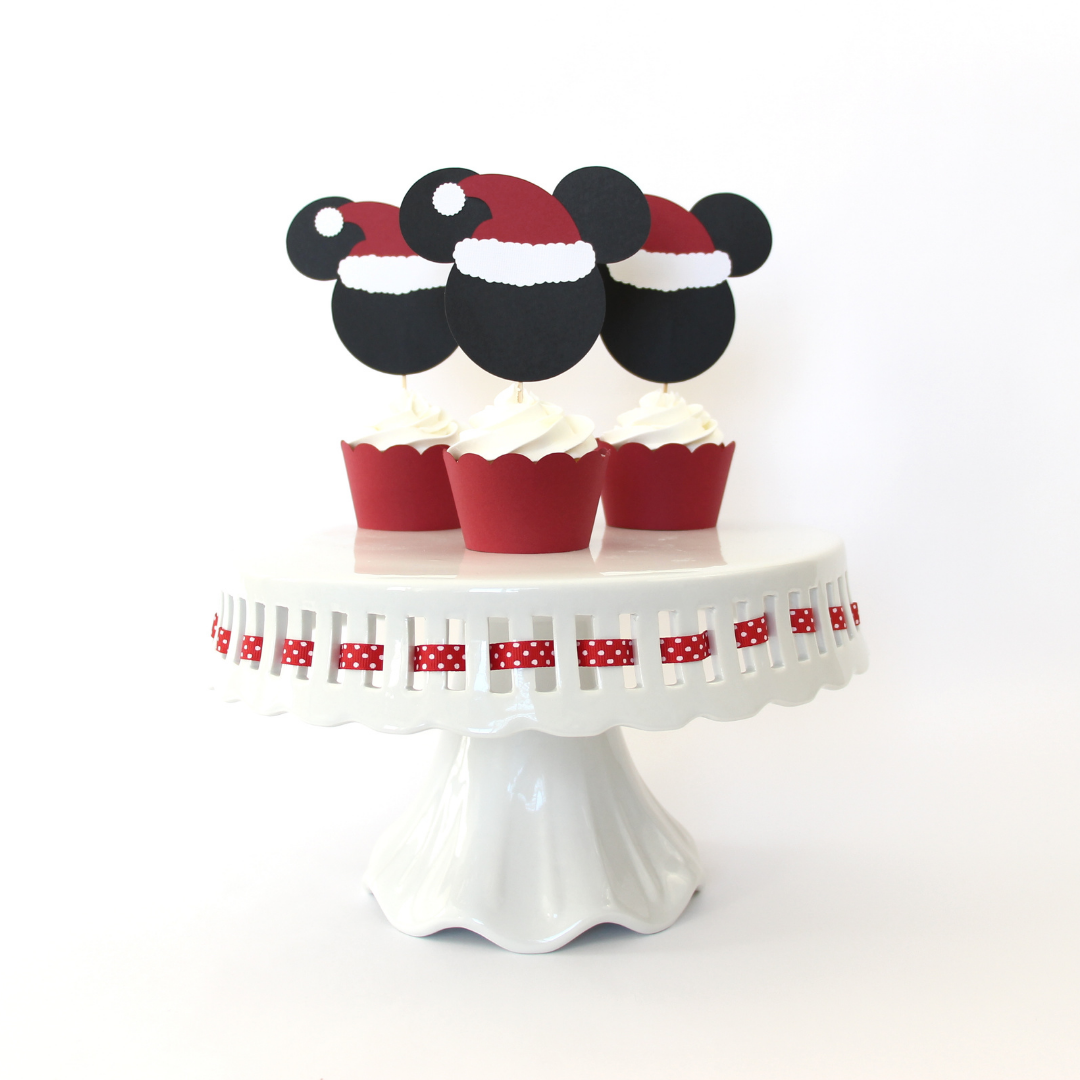
Mickey Christmas Cupcake Toppers
| This post may contain affiliate links, which means I may receive a small commission, at no cost to you, if you make a purchase through a link. |
We have been having so much fun spending time at the Disneyland Resort during the holidays and I knew I needed to make some Mickey Christmas Cupcake Toppers. Jedidiah gets excited every time we say we have a reservation for the parks and I thought these Mickey Christmas Cupcake Toppers would be a great way to have a magical day at home too.
I try really hard to make days at home just as magical as our days at the parks and I love that these Mickey Christmas Cupcake Toppers are something I can surprise Jed with or even have him help me make. We love doing crafts together and I adore his perfectly imperfect creations.
Estimated Time: 20 Minutes
Skill Level: Beginner
Supplies Needed:
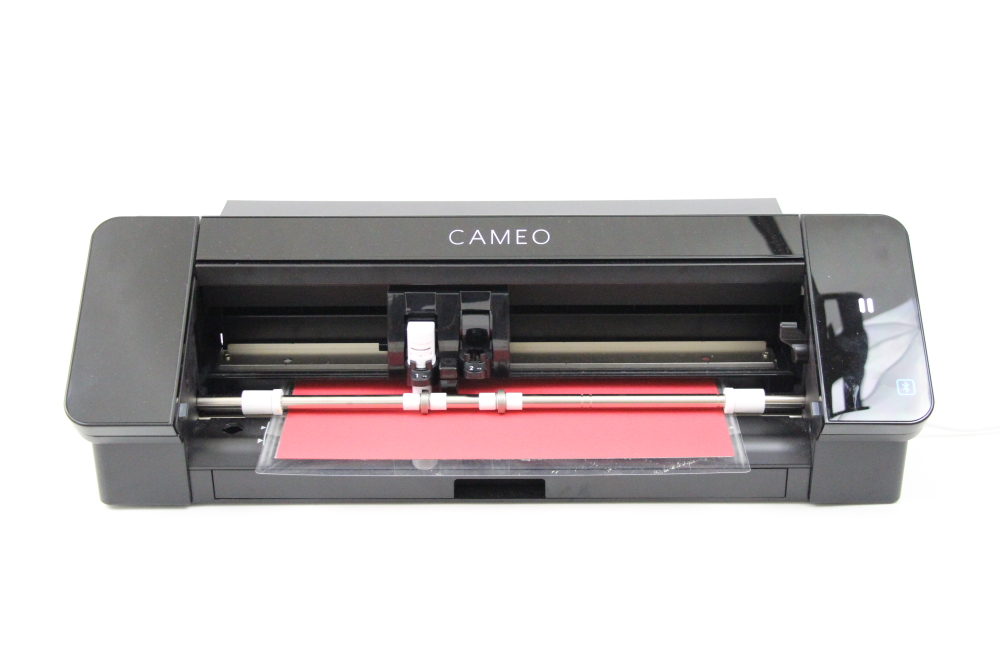
- Silhouette CAMEO® 4
- Silhouette Cutting Mat
- Weeding Hook
- Silhouette Studio
- Santa Hat Design
- Black Mickey Shaped Cut Out – I created my own in Silhouette Studio with 3 circle shapes
- Cupcake Wrappers
- Red Cardstock
- White Cardstock
- Black Cardstock
- Toothpicks
- Washi Tape
- Cupcakes
- Craft Glue

Step One: Design Your Mickey Christmas Cupcakes Wrapper and Topper:
Open Silhouette Studio® on your computer.
Select the Page Setup Window and adjust your cutting mat size to 12×12 (or the sized mat you are using).
Purchase your Scalloped Cupcake Wrapper Design and the Christmas Tree Gift Tag Design from the Silhouette Design Store and then open them in Silhouette Studio. Click File>Library>Library>Recent Downloads>Select the downloaded design.
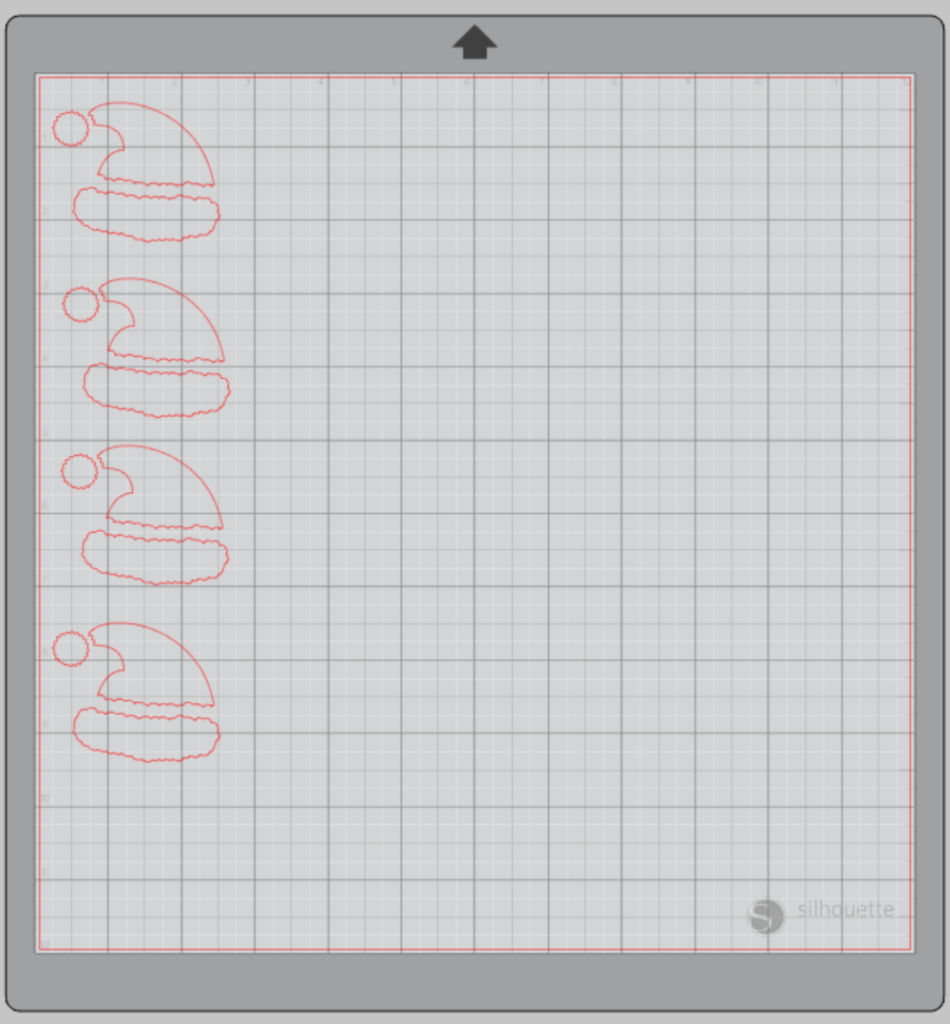
I created a 12×12 sheet of cupcake wrappers and then the pieces for my Mickey and Santa hat in another tab.
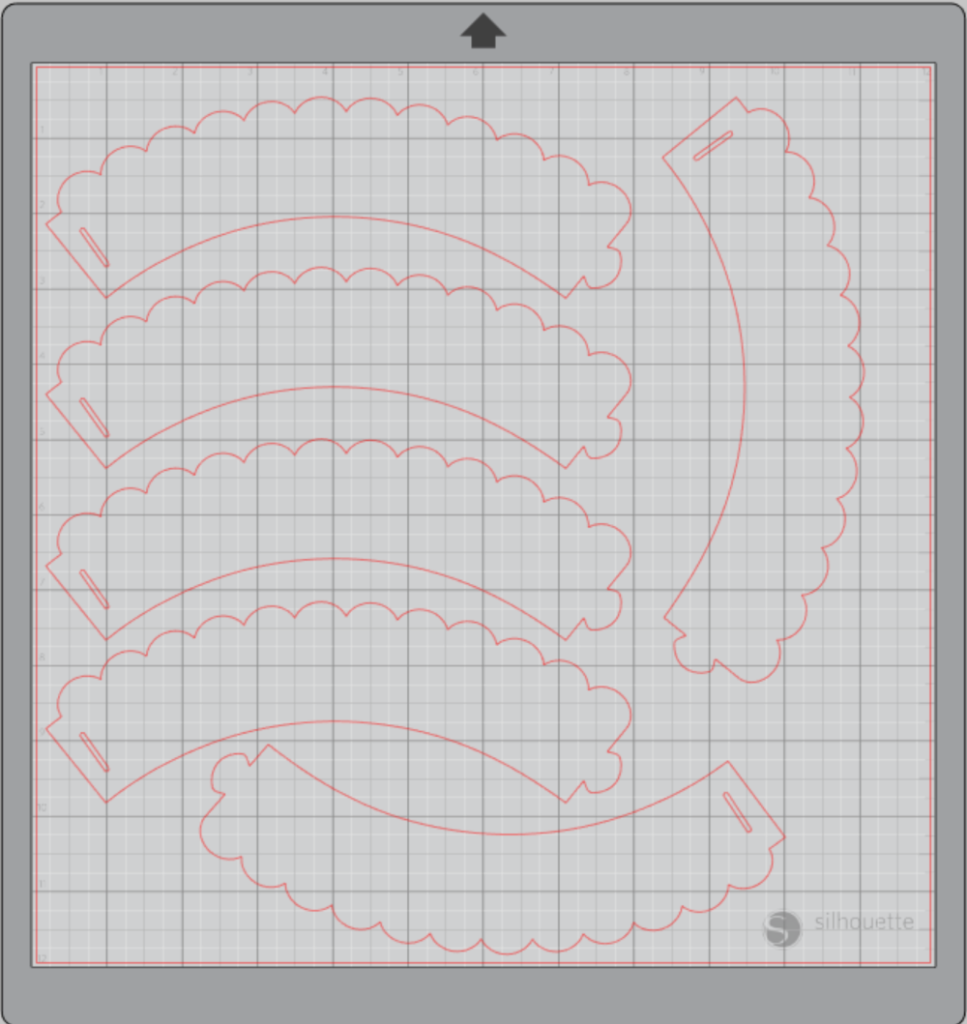
First, Copy and paste your scalloped cupcake wrapper to fit on the cutting mat.
Next, create your Mickey shapes and Santa hat elements.
Step Two: Cutting Out Your Mickey Christmas Cupcakes Topper:
Turn on your Silhouette CAMEO® 4.
Attach your cardstock to the cutting mat and load into your machine by lining up your mat with the guidelines and pressing the “up” arrow.
Then, click “send” in the Software and then select the type of cardstock you are using from the dropdown menu.
Double-check to make sure your design has been selected to cut and the Silhouette CAMEO®4 autoblade had been selected. The autoblade will adjust to cut based on the type of material you selected. I suggest always doing a test cut to make sure it will work with your cardstock – there is a “test” button at the bottom of your screen.
Select “Send” to start cutting your scalloped cupcake wrappers.
Press the “down” arrow when your machine has finished cutting your design to remove the cutting mat from the machine.
Repeat this process for each color of cardstock and element. You can also cut multiple colors at one time if you space them out on your cutting mat to match your software layout.
Step Three: Make Your Mickey Christmas Cupcakes Wrapper:
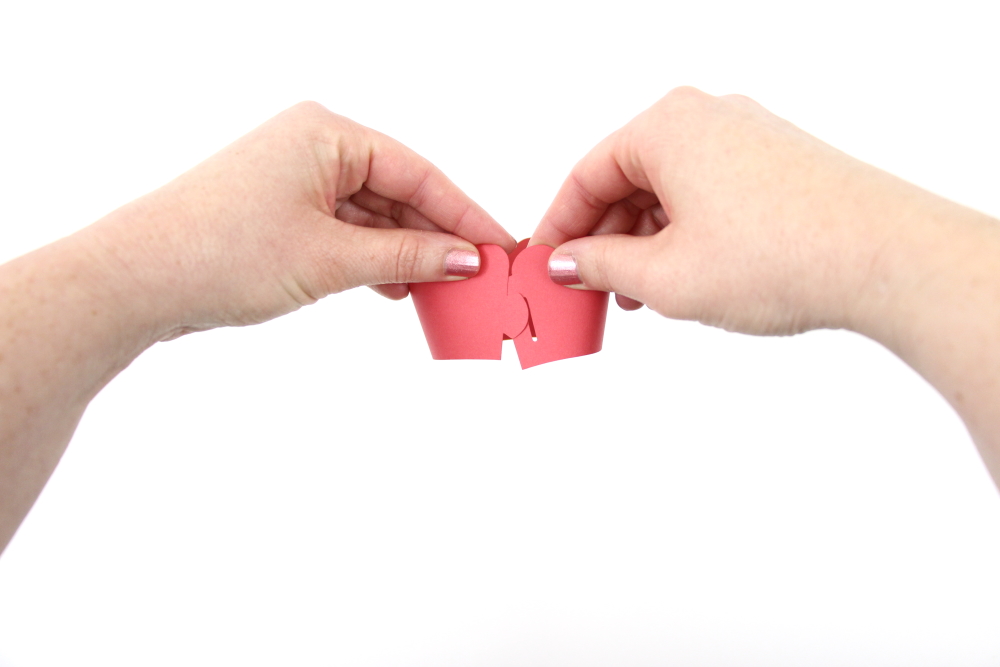
Remove your sheet of red cardstock from the cutting mat – go slow so it doesn’t curl up. The wrappers should easily separate from the cardstock.
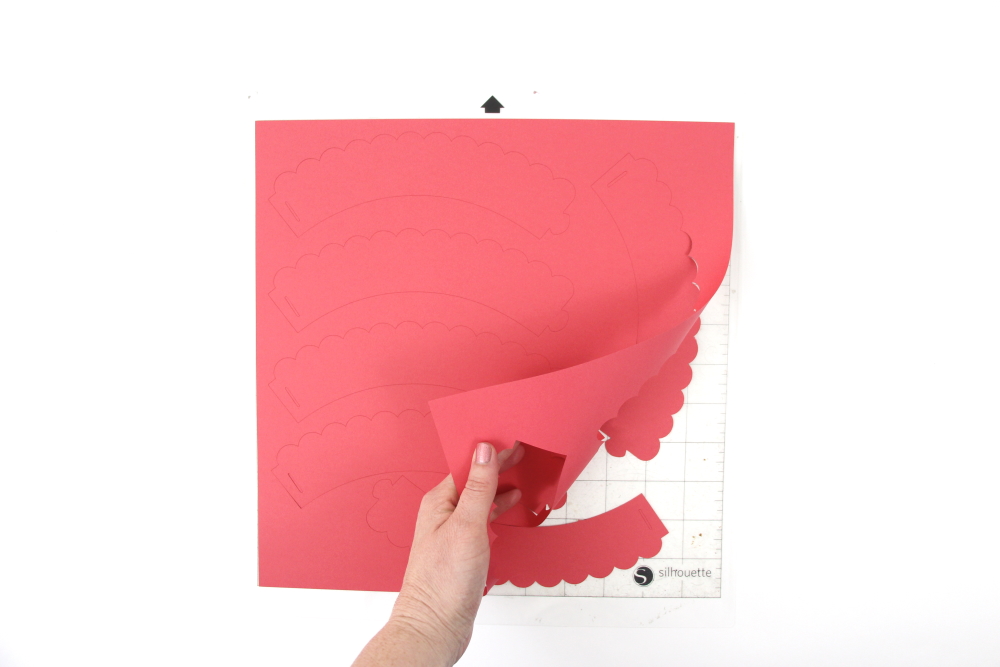
These cupcake wrappers are already the perfect size for standard cupcakes as long as you don’t re-size the design.
Curl the cupcake wrapper in a circle and hook the cutout into the small slot on the other side. I like to add a tiny piece of tape to make sure the wrapper stays closed.
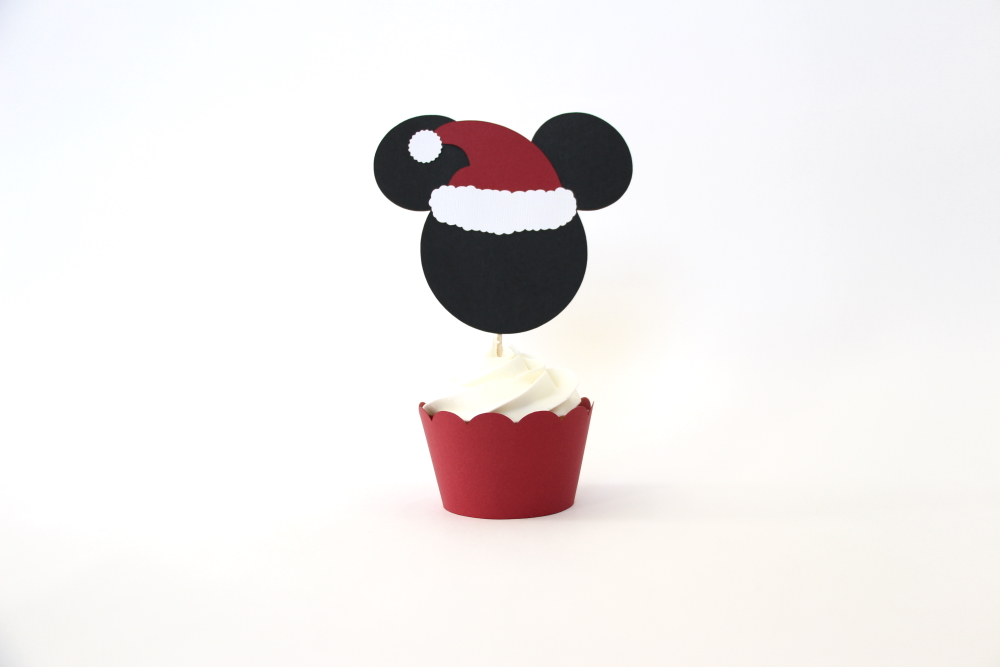
Step Four: Make Your Mickey Christmas Cupcakes Topper:
Remove all your paper pieces from the cutting mat and organize – Mickey head, pom pom, hat, and fur trim
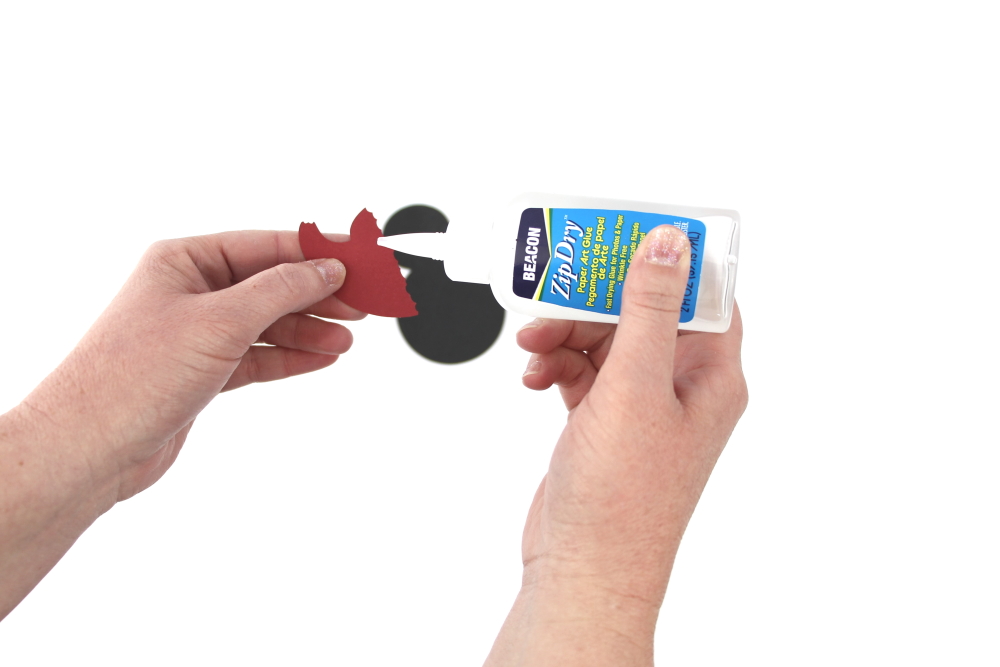
First, add a small amount of glue or adhesive to the bottom of the hat and attach it to your Mickey.
Repeat for fur trim and pom pom.
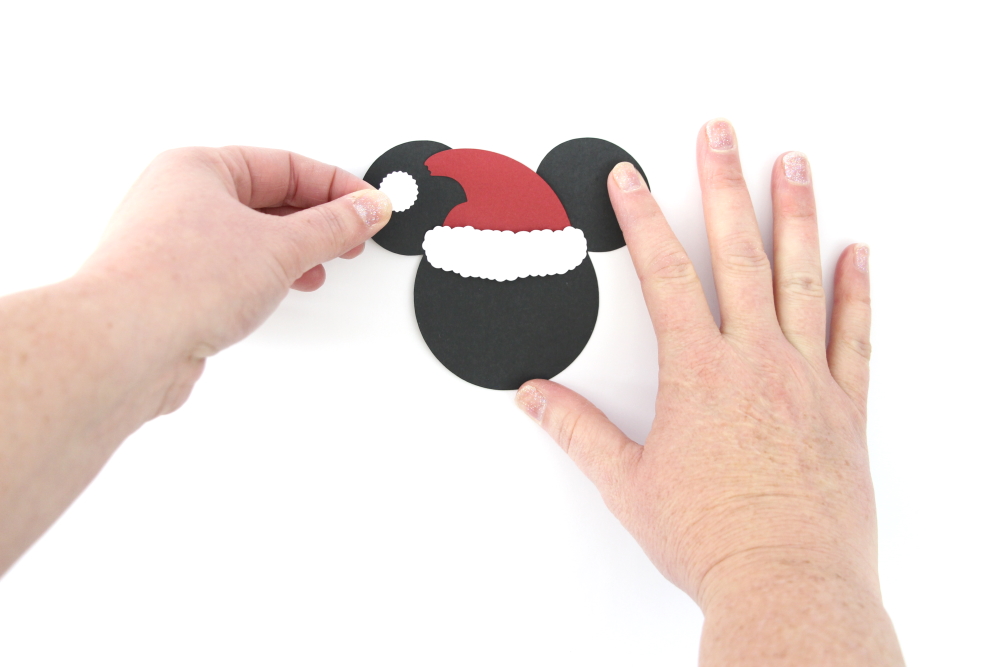
Attach a toothpick to the back of the Mickey with adhesive or glue (I love using some pretty washi tape.)
Step Five: Assemble your Mickey Christmas Cupcakes:
Make your Cupcake Wrappers, place an unfrosted cupcake inside, and then frost your cupcake. It is can be messy trying to place already frosted cupcakes in the wrappers, but it can be done.
I used white buttercream frosting and my favorite large star tip in a piping bag so it would look like snow for my Mickey Christmas Cupcakes.
Insert your toothpick Mickey topper into your cupcake.
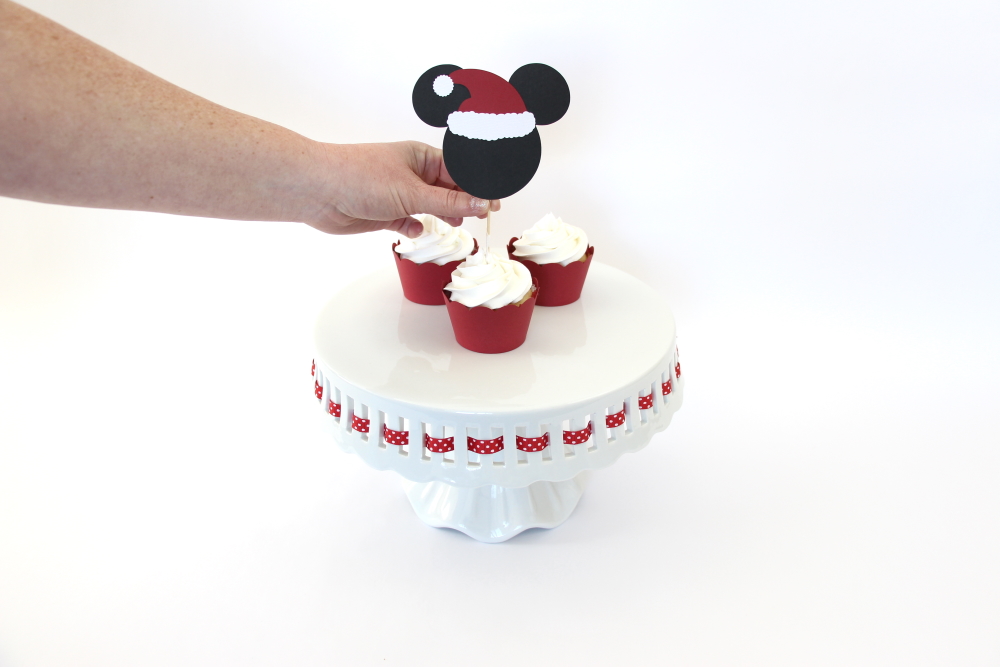
I love how easy these Mickey Christmas Cupcakes are to make and how festive they make dessert! Now, go have some fun crafting and have a magical cupcake for yourself!