DIY Christmas Village
| This post may contain affiliate links, which means I may receive a small commission, at no cost to you, if you make a purchase through a link. |
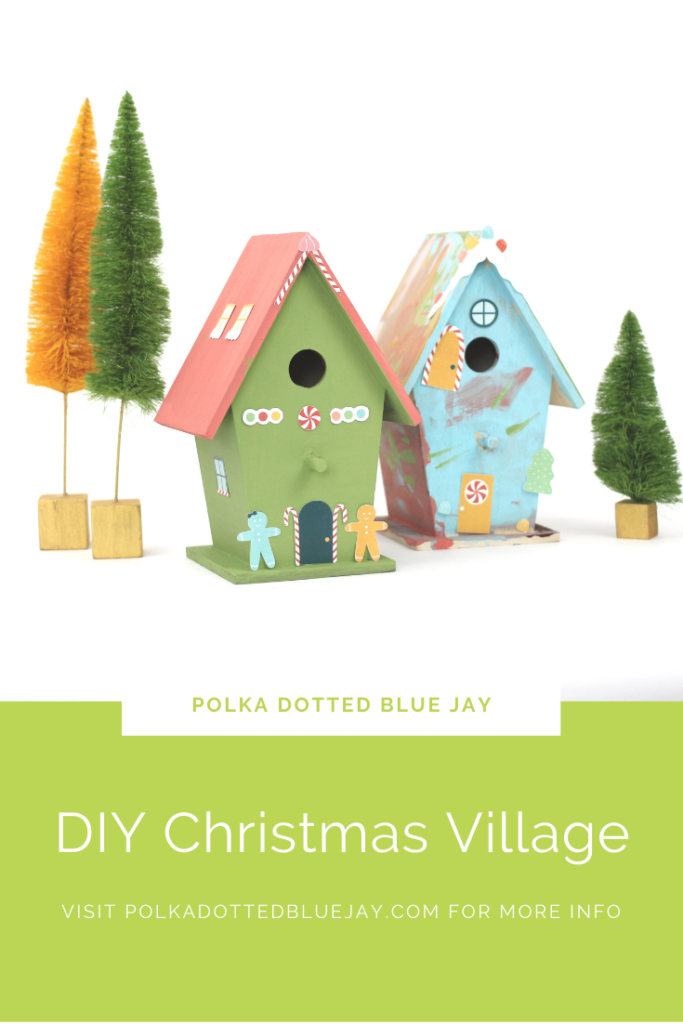
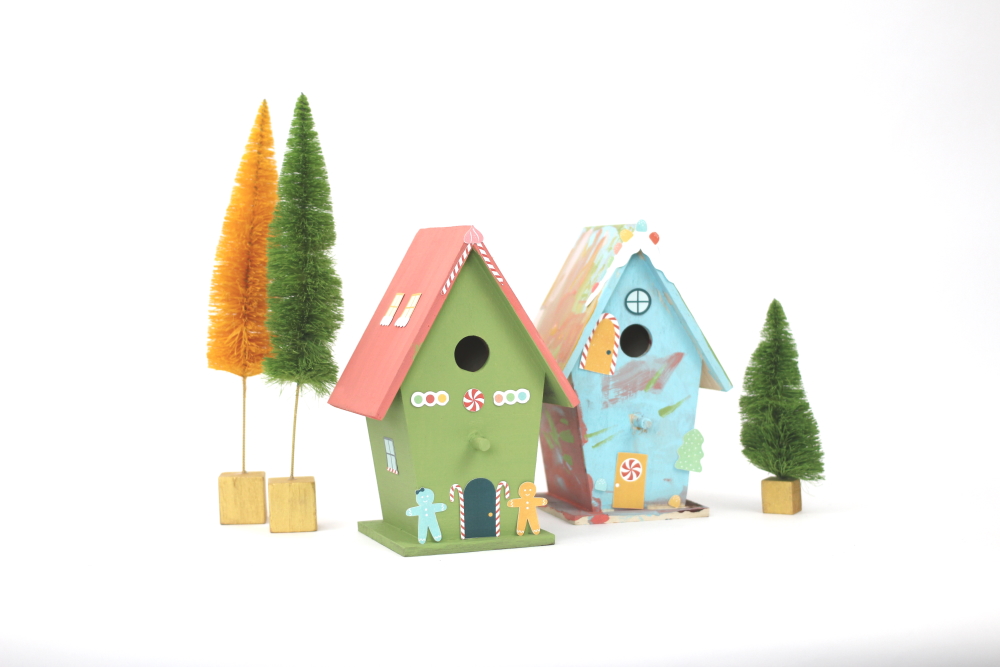
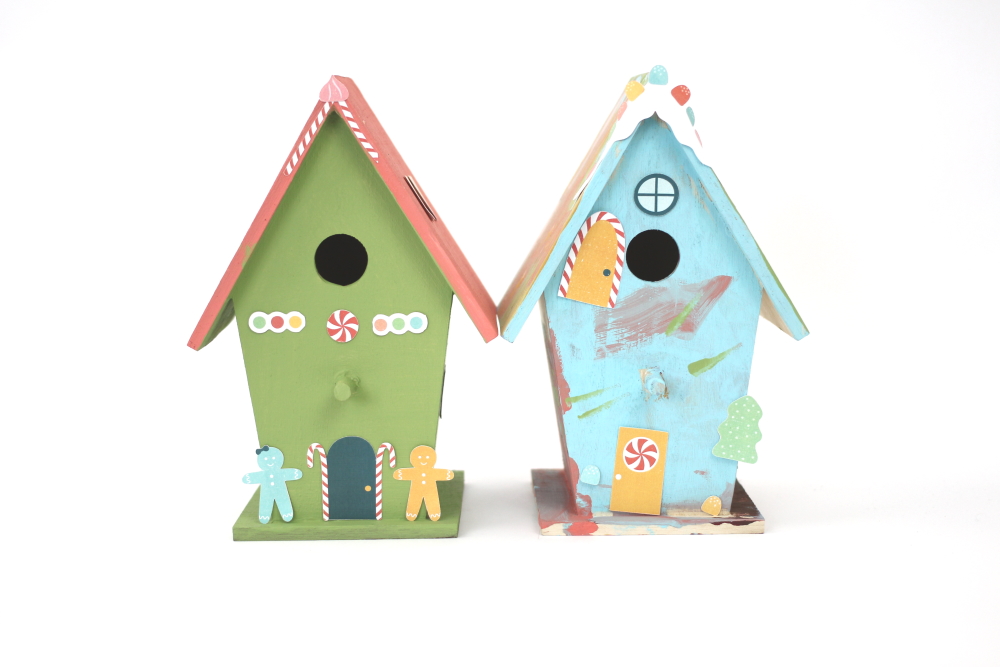
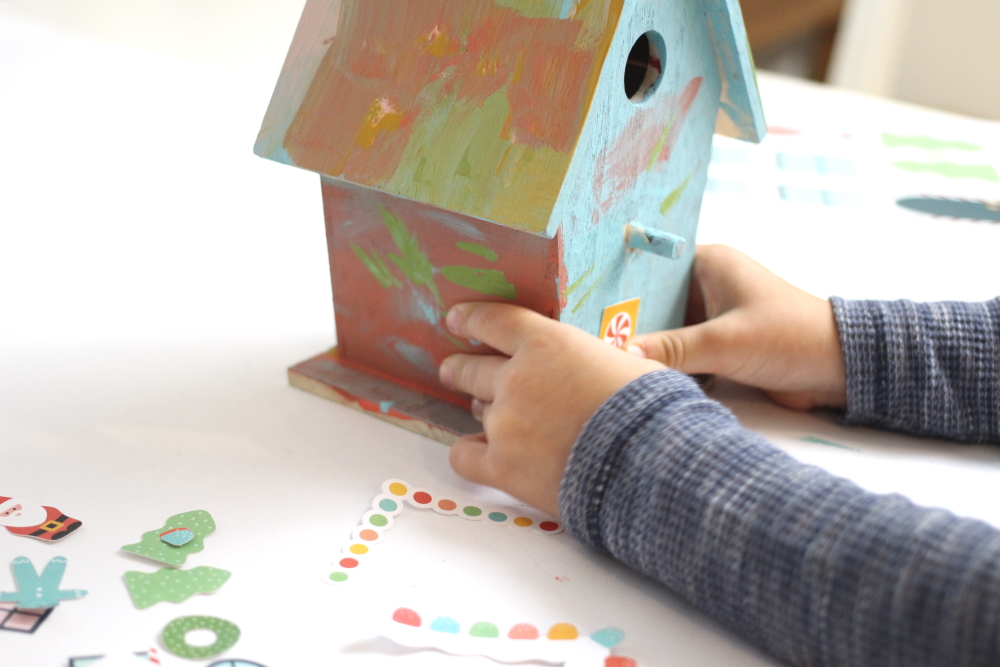
I loved our Halloween House Village so much that I knew we would be doing an update and making a DIY Christmas Village! We re-used our birdhouses and painted and decorated them with more print and cut stickers from the Silhouette Design Store. It was the perfect rainy day activity – Jed always loves getting to help with the Cameo buttons. Our DIY Christmas Village is the perfect addition to my office decorations.
I couldn’t help but get a little emotional while we crafted together. My grandparents would have loved to be a part of this – but I am carrying on the tradition of creativity with their great-grandson. My Gram was a much better painter than I am – but I think she would still be proud of our DIY Christmas Village.
Estimated Time: 20-30 Minutes
Skill Level: Intermediate
Supplies Needed:
- Silhouette CAMEO® 4
- Cutting Mat – Light Tack
- White Cardstock
- Color Printer
- DecoArt Paints (we used: Hauser Light Green, Cotton Candy, Shoreline, Bright Salmon, and True Ochre)
- Foam brush
- Birdhouse (similar one here)
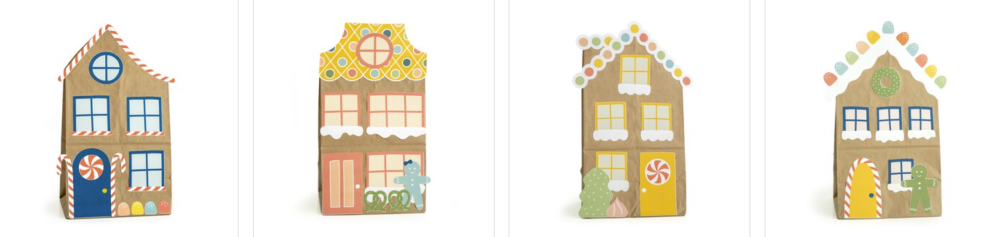
- I have these print and cut designs from the Amy Robison “Home for the Holidays” party pack. You can buy the whole party pack or the individual elements from the Silhouette Design Store (there are four variations of the designs and they’re shown on brown paper bags).Candy Cane, Candy Roof, Chimney Gingerbread, and Gumdrops
Step One: Paint Your DIY Christmas Village Houses
Put a little of your DecoArt paint on a palette or a paper plate.
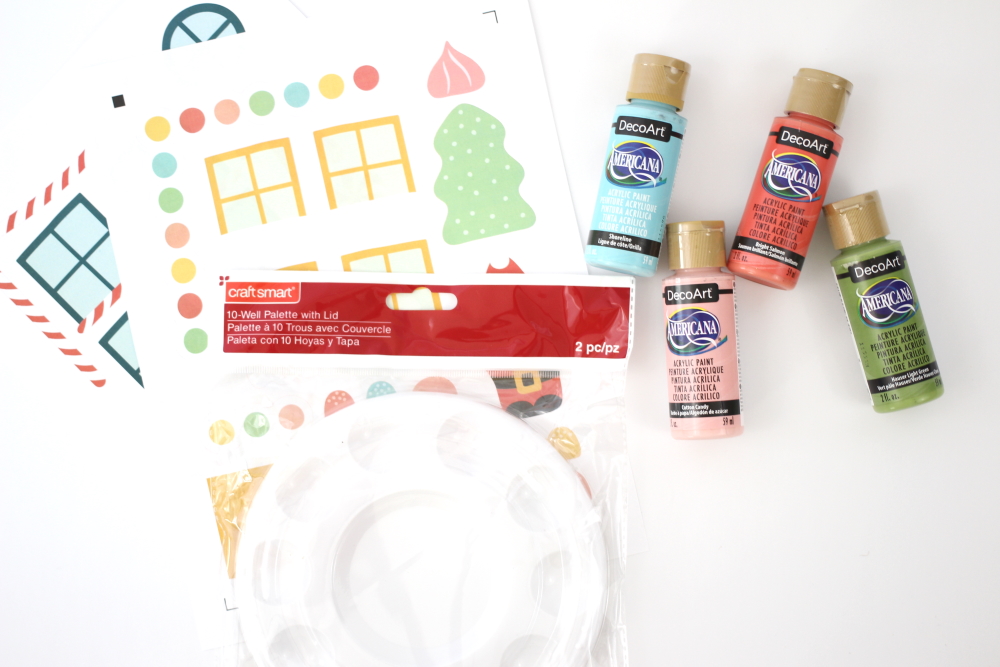
Dab your foam brush in the paint and apply it to your birdhouse.
Allow your DIY Christmas Village Houses plenty of time to try before you move on to the decorating step. We painted ours in the morning and then decorated it after naptime.
Step Two: Print Your DIY Christmas Village Decorations in Silhouette Studio:
Open Silhouette Studio® on your computer.
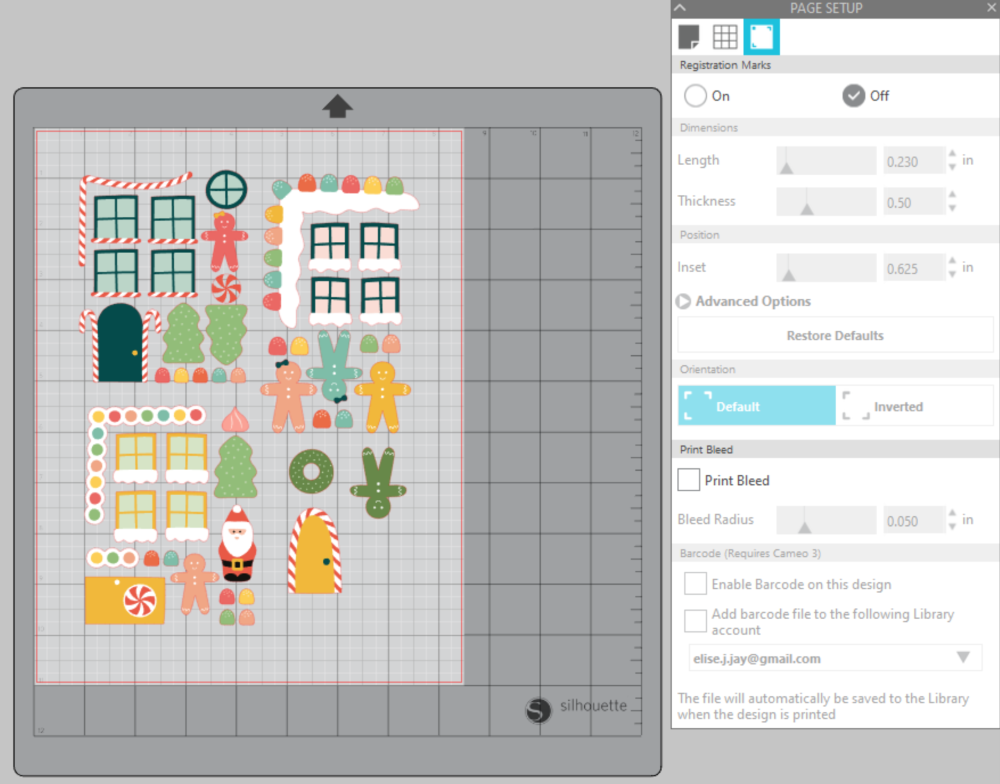
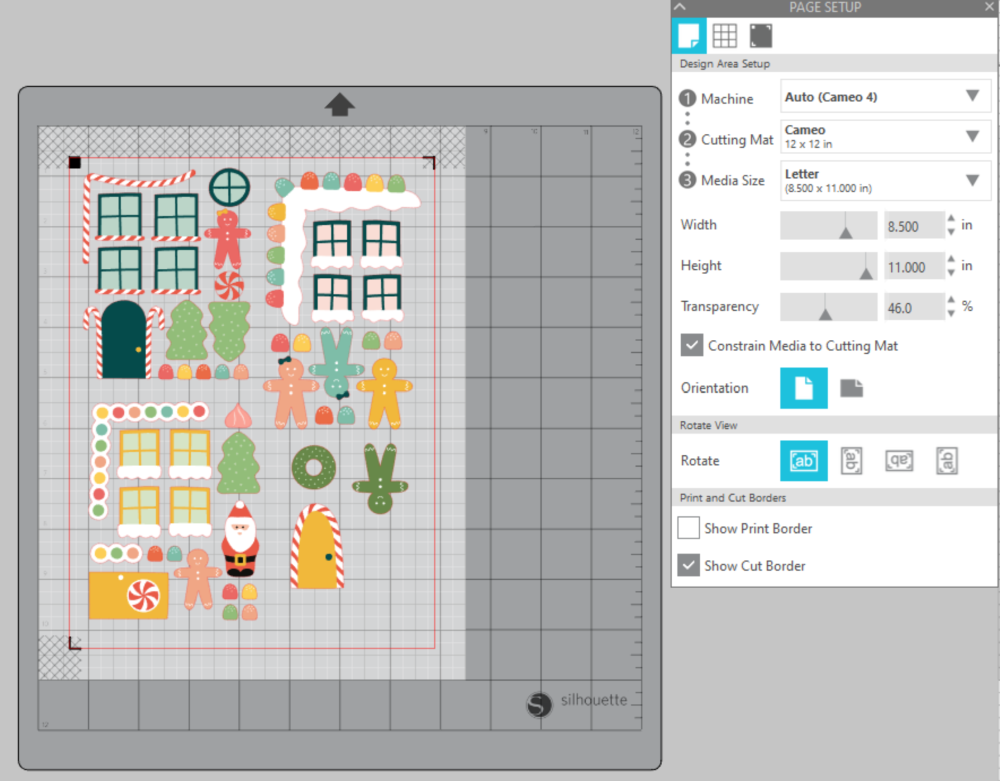
Select the Page Setup Window and adjust your cutting mat size to 12×12 (or the size paper/mat you are using). I use a 12×12 mat but print on letter-sized cardstock so I select “letter” from the drop-down menu.
Add registration marks to your page by clicking the icon with three corners on the page set-up.
Purchase your Party Pack from Amy Robison or the single elements you want from and then open your design in Silhouette Studio. Click File>Library>Library>Recent Downloads>Select the design.
Re-size to the size you would like your decorations to be (you may have to shrink them a little depending on the size of your birdhouse). Be sure your design fits within the registration marks.
Load your cardstock in your home printer. You can also use sticker paper to make decorating your Halloween House even easier. I used cardstock and a little double-sided tape.
Send your design to print within the Silhouette Software.
Remove from your printer
Step Three: Cut Your DIY Christmas Village Designs in Silhouette Studio:
Turn on your Silhouette CAMEO® 4.
Attach your cardstock to the cutting mat and load it into your machine by lining up your mat with the guidelines and pressing the “up” arrow.
Next, click “send” in the Design Studio and then select the type of cardstock you are using from the dropdown menu.
Double-check to make sure your design has been selected to cut and the Silhouette CAMEO®4 autoblade had been selected. The autoblade will adjust to cut based on the type of material you selected above.
Make sure you select “cut by line” so the red lines appear around your designs instead of cutting through the elements.
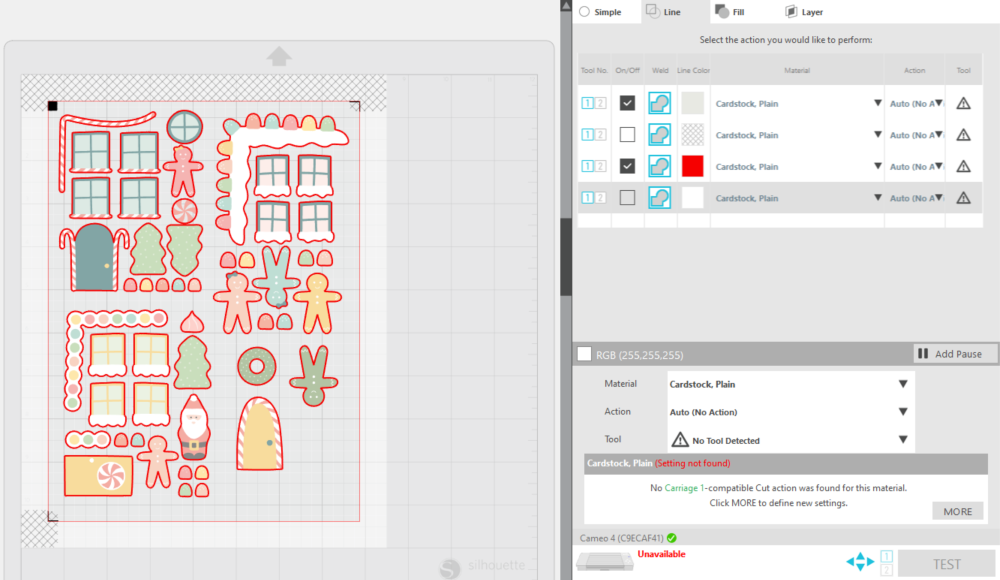
Click “Send” to start cutting. The machine will automatically detect the registration marks and cut out your design.
Press the “down” arrow when your machine has finished cutting your design to remove the cutting mat from the machine.

Step Four: Finish Your DIY Christmas Village:
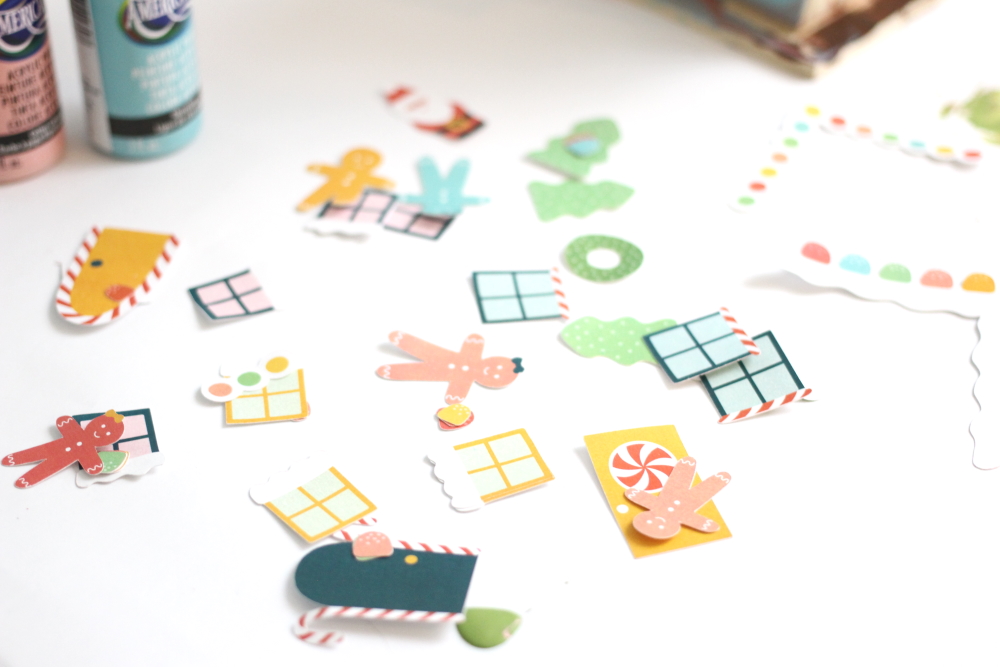
Remove your cardstock from the cutting mat.
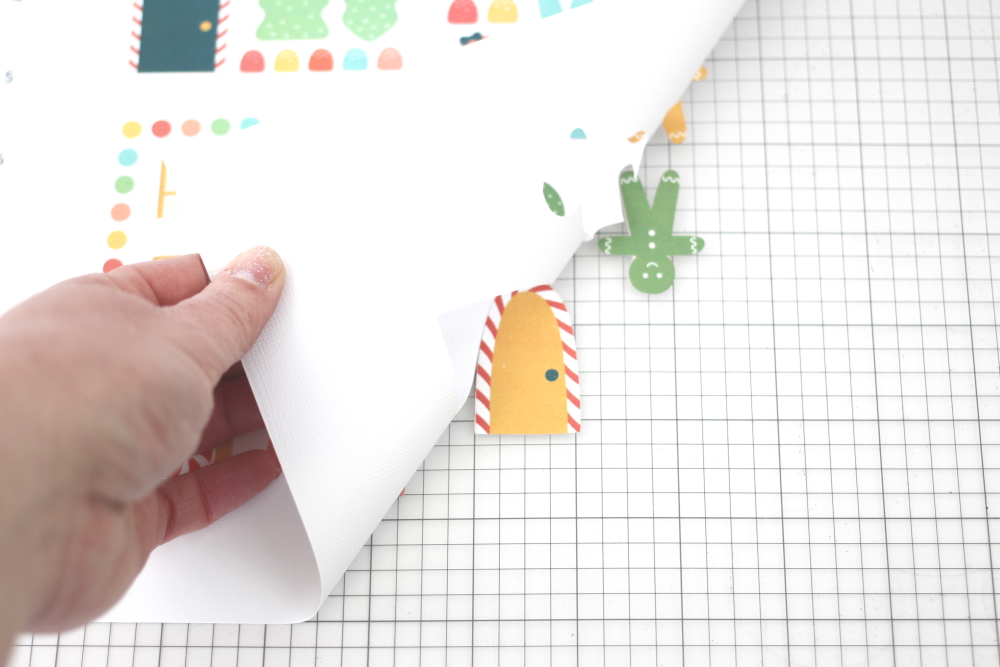
Gently remove the designs from the cutting mat and attach them to your house with double-sided tape.
I love letting Jed decorate on his own. He added a door to the roof so he can “go on the roof to help Dad with the Christmas lights”.
I can’t wait to see your DIY Christmas Village too!