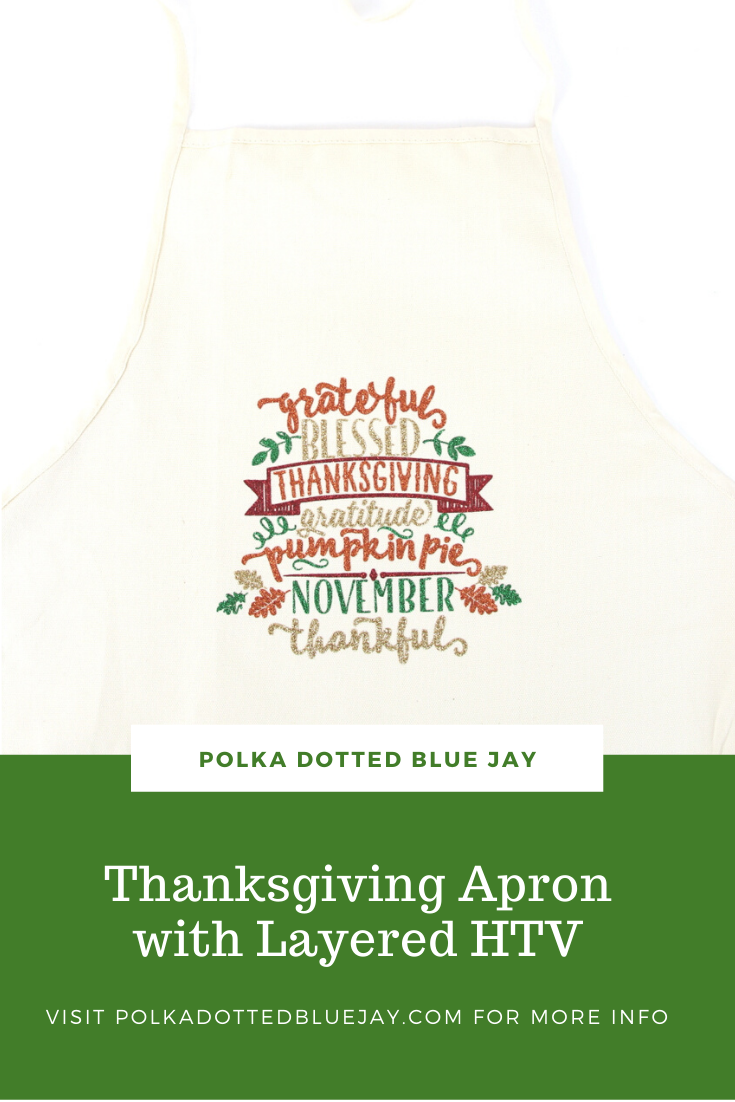
Thanksgiving Apron with Layered Heat Transfer Vinyl
| This post may contain affiliate links, which means I may receive a small commission, at no cost to you, if you make a purchase through a link. |
This Thanksgiving Apron with Layered Heat Transfer Vinyl tutorial is a sponsored post written by me on behalf of Silhouette America®. All opinions are 100% mine.
The older I get the more I love hosting holiday dinners and gatherings with friends and family. As any good hostess knows, a great apron can totally make or break the event. I have been collecting aprons for a couple of years and loved the idea of making one with one of my favorite Thanksgiving designs from the Silhouette Design Store. It was my first time layering heat transfer vinyl in multiple colors and I love the way my Thanksgiving apron turned out.
Estimated Time: 45 Minutes
Skill Level: Intermediate
Care: Machine wash cold and dry with light heat.
Supplies Needed:
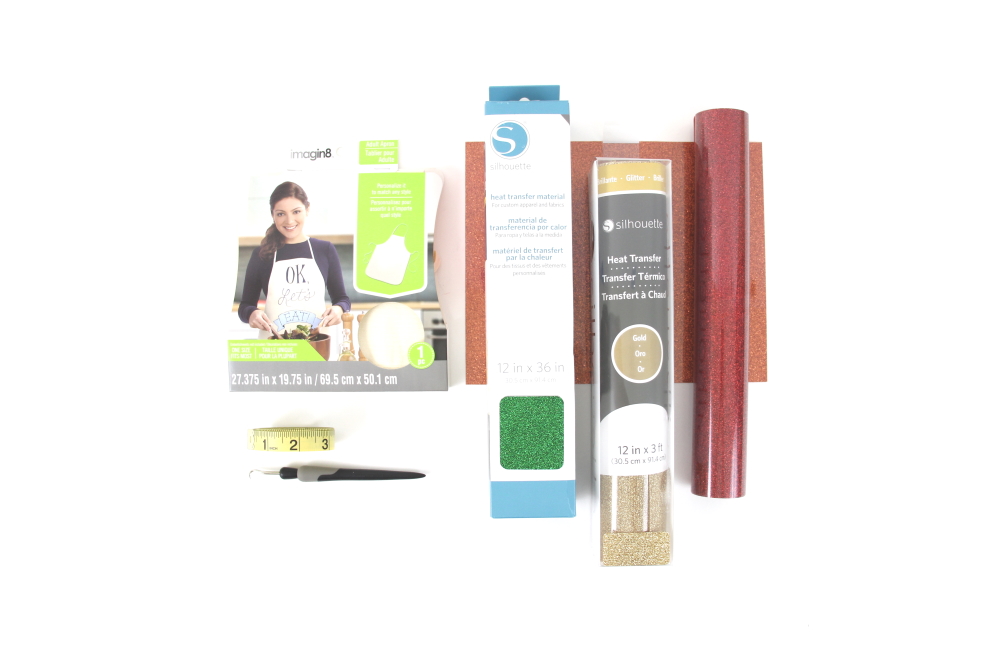
- Silhouette CAMEO®
- Silhouette Cutting Mat
- Weeding Hook
- Silhouette Studio
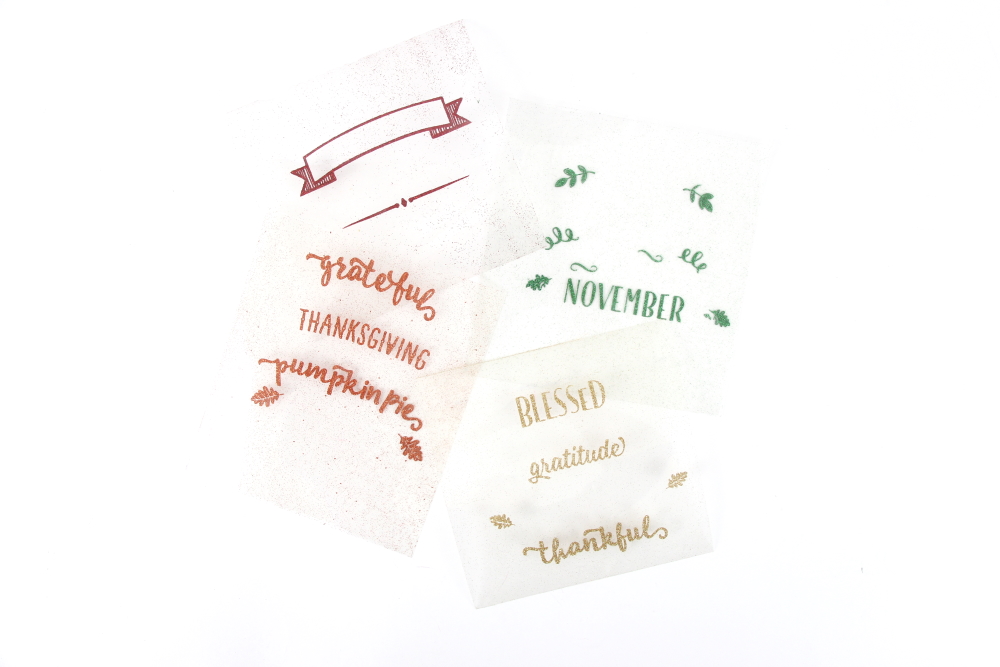
- “Thanksgiving Word Art” Design
- Heat Transfer Vinyl – Gold, Orange, Green, and Red Glitter
- Cotton Apron (be sure to pre-wash and dry)
- Iron or heat press
Creating Your Design:
Step 1: Open Silhouette Studio®.
Step 2: Select the Page Setup Window and adjust your cutting mat size to 12×12 (or the sized mat you are using).
Step 3: Download your design from The Silhouette Design Store and then open in Silhouette Studio. Click File>Library>Library and select your downloaded file.
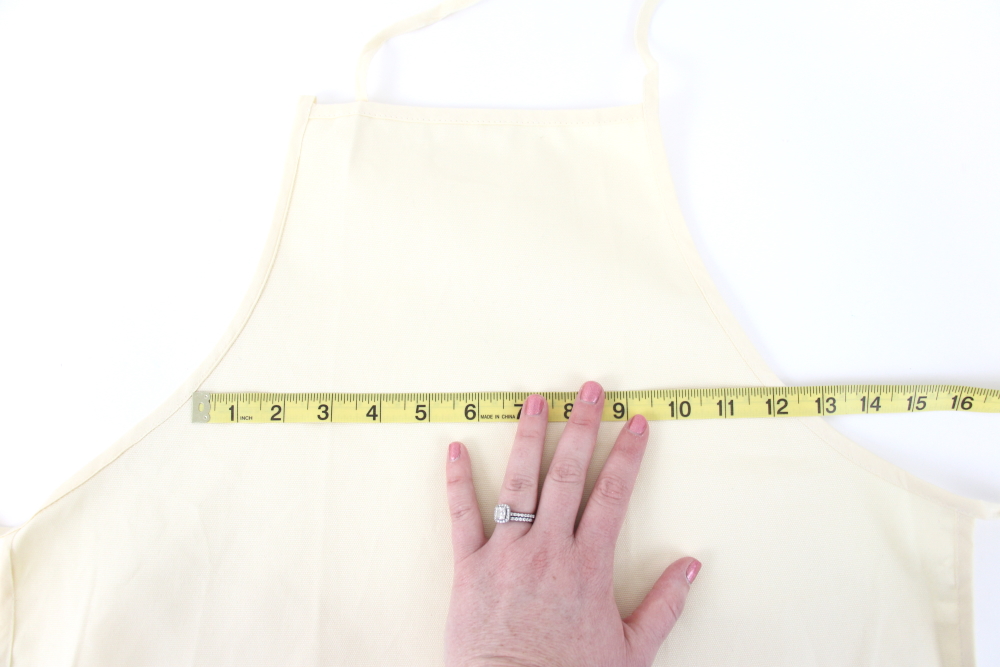
Step 4: Measure your apron and re-size your design to the correct space on your 12×12 template – be sure to move the design as a group so it keeps everything lined up. You can do this by clicking and dragging to cover the whole design and then moving as one piece.
Step 5: Ungroup your design so you can edit each part individually. Right-click on your design and select “ungroup” from the menu.
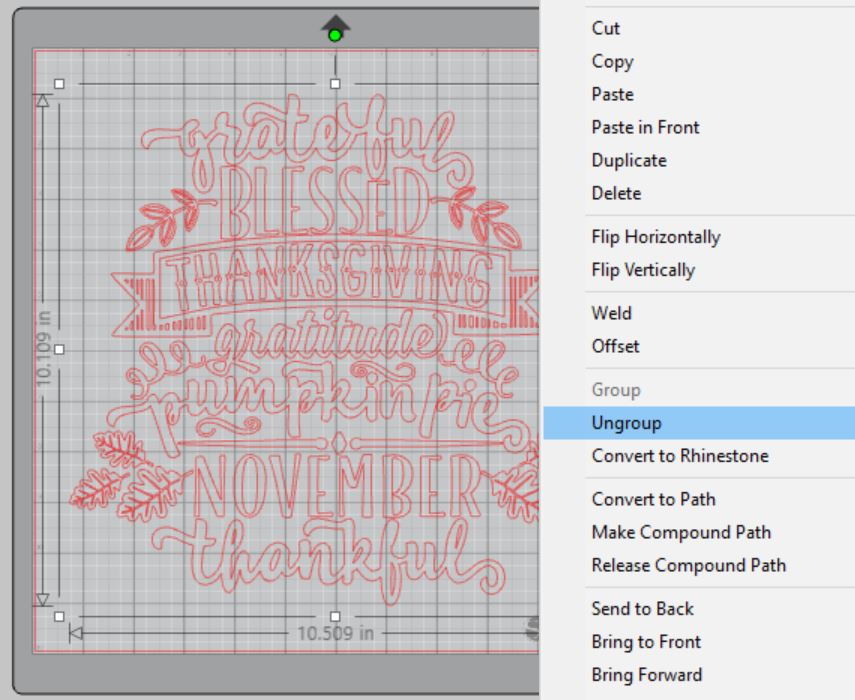
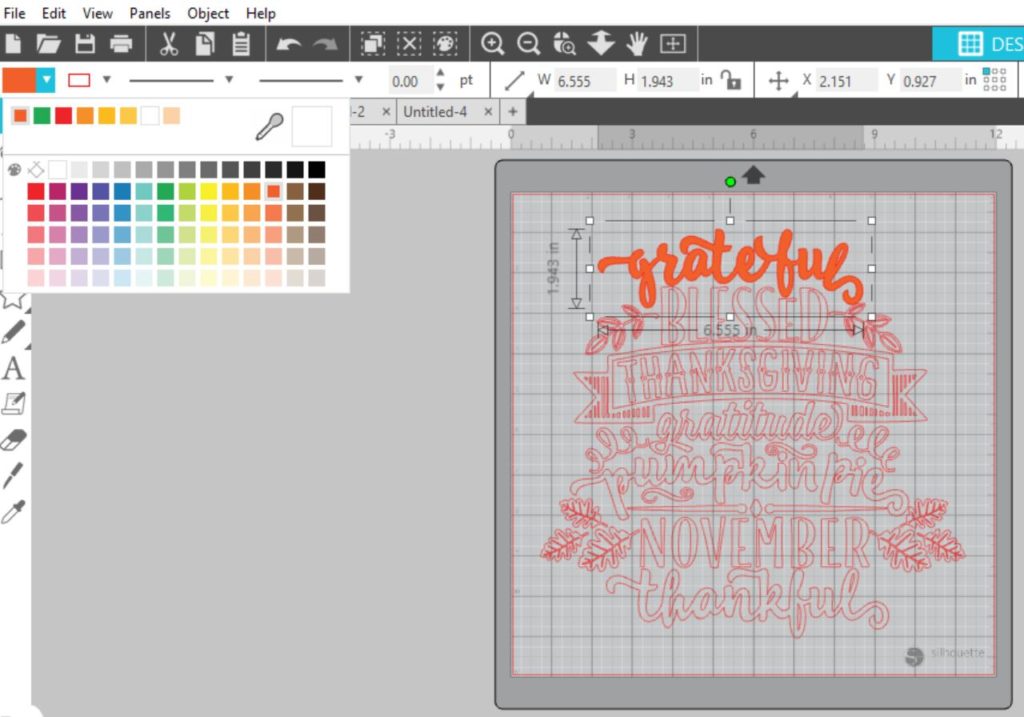
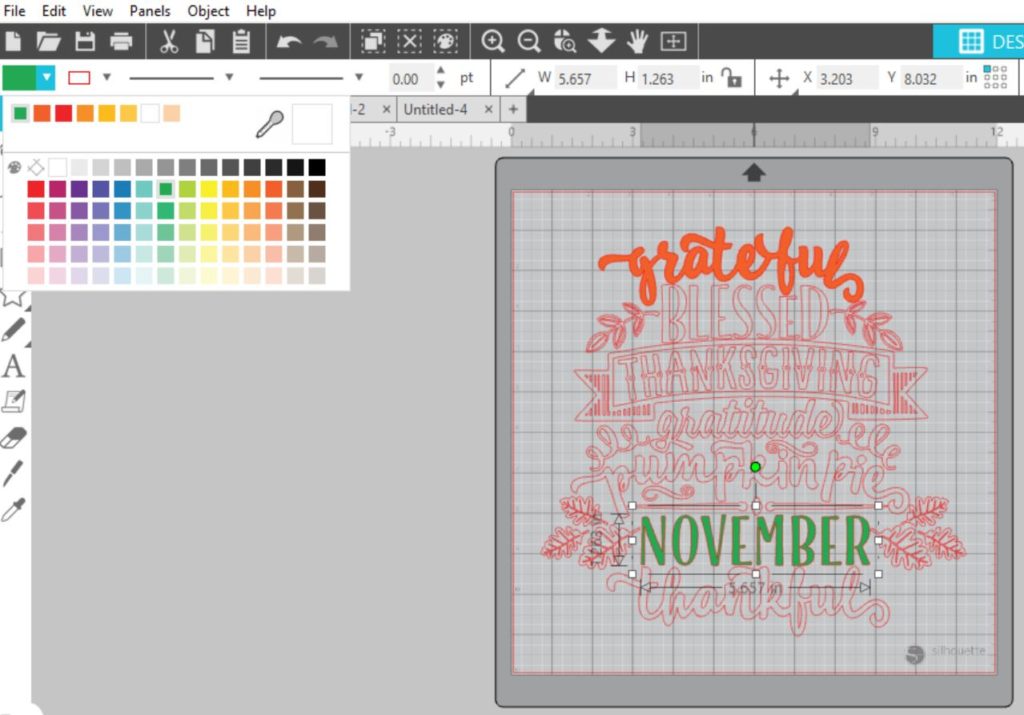
Step 6: Select the fill option in Silhouette Studio® to color in each element of your design. Click an element and then select the color you want from the fill menu in the toolbar. I used colors that coordinated with my vinyl so I could visualize the finished design. Be sure to use the zoom tool to see all the details of the design.
Step 7: Click and drag to select the whole design, right-click, and select “group” to re-group your design.
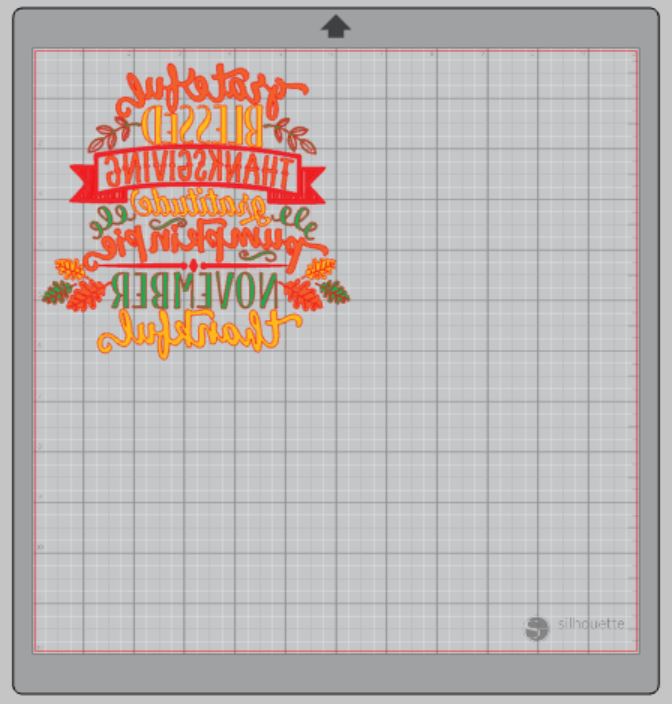
Step 8: You will need to flip your design, so it appears backward for Heat Transfer Vinyl – this is called “mirroring” your design. Highlight your design, click “object” from the toolbar, “mirror” from the menu and then “horizontally” to mirror it.
Step 9: Select “Send” to prepare to cut.
Step 9: Follow the prompts in the Design Studio to adjust your blade (if using a ratchet blade) for Glitter Heat Transfer Vinyl and double-check to make sure your design has been selected to cut.
Step 11: Select the fill option instead of “simple” from the cutting menu. You can select each color and your Silhouette Cameo will only cut out the elements in your design that are that color.
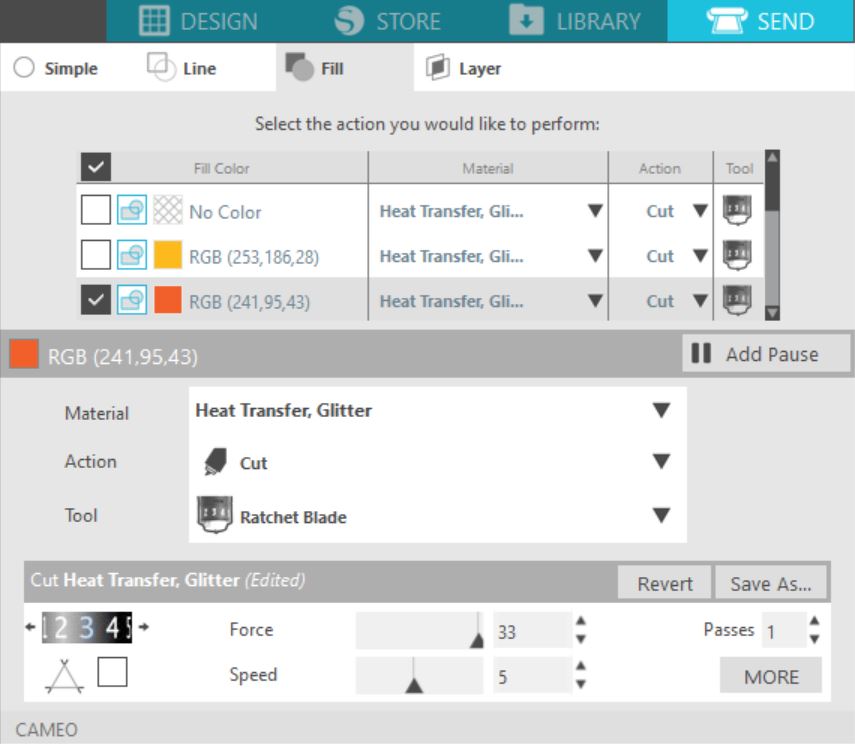
Step 12: Click “Send”
Step 13: Next, select “Unload” when your machine has finished cutting your design to remove the cutting mat from the machine.
Step 14: Repeat for each color.
Preparing Your Design:
Step 1: Remove your sheets of Glitter Heat Transfer Vinyl from the cutting mat – go slow so it doesn’t curl up or tear.
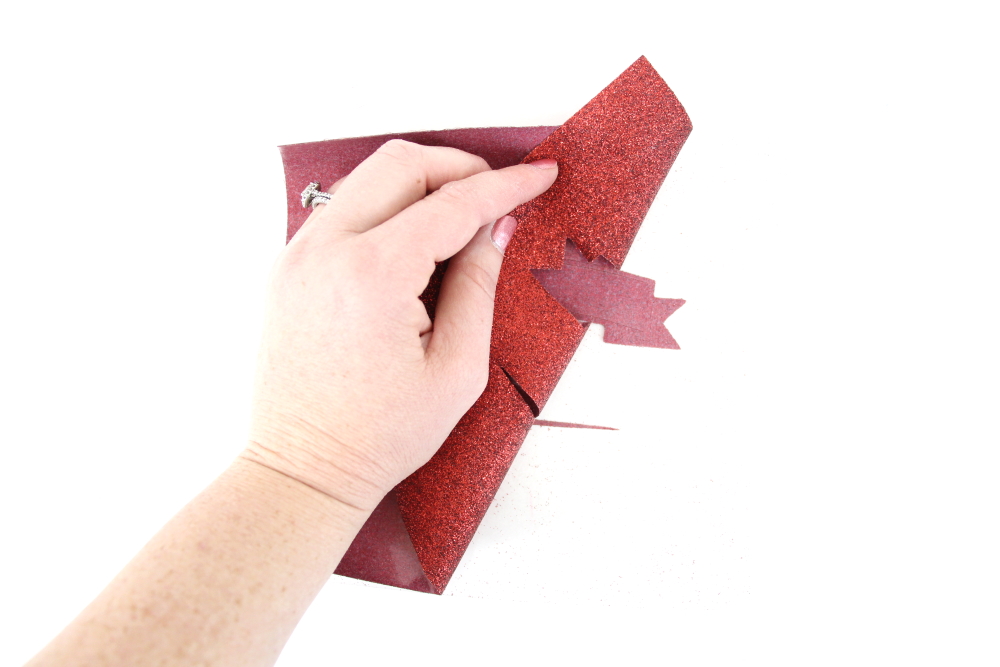
Step 2: Use your fingers or a weeding tool to remove the excess vinyl from each color. Be sure to leave your design on the clear carrier sheet.
Creating Your Thanksgiving Apron:
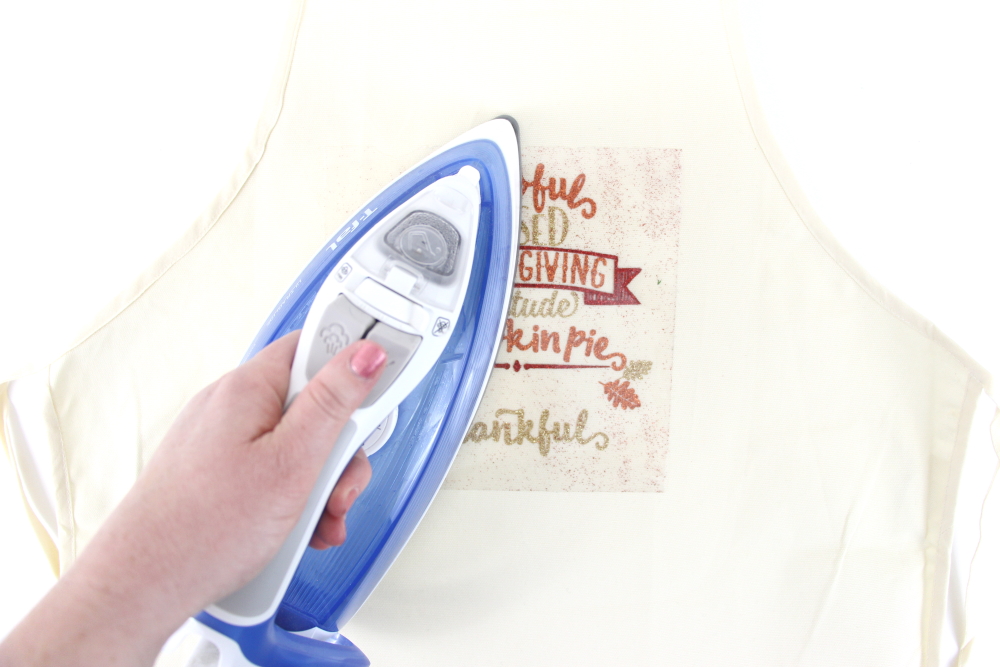
Step 1: Pre-heat your apron – use your iron or heat press to warm up the fabric for a better transfer.
Step 2: Place your first color of your design on your item right side up (this is why your design must be mirrored for cutting).
Step 3: Heat your design for the recommended time for the HTV you’re using. Use steady pressure.
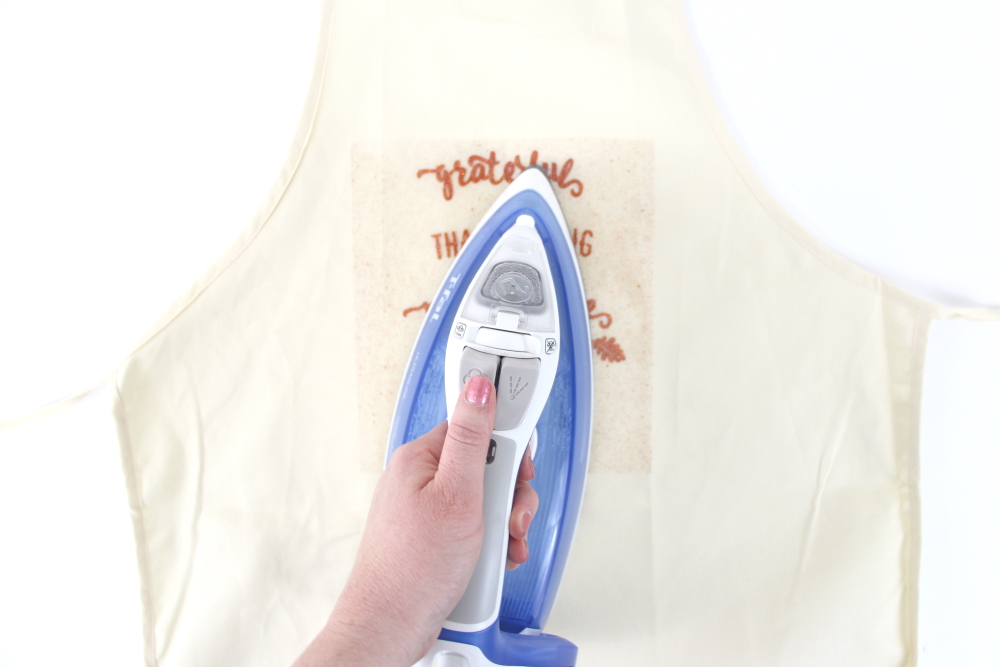
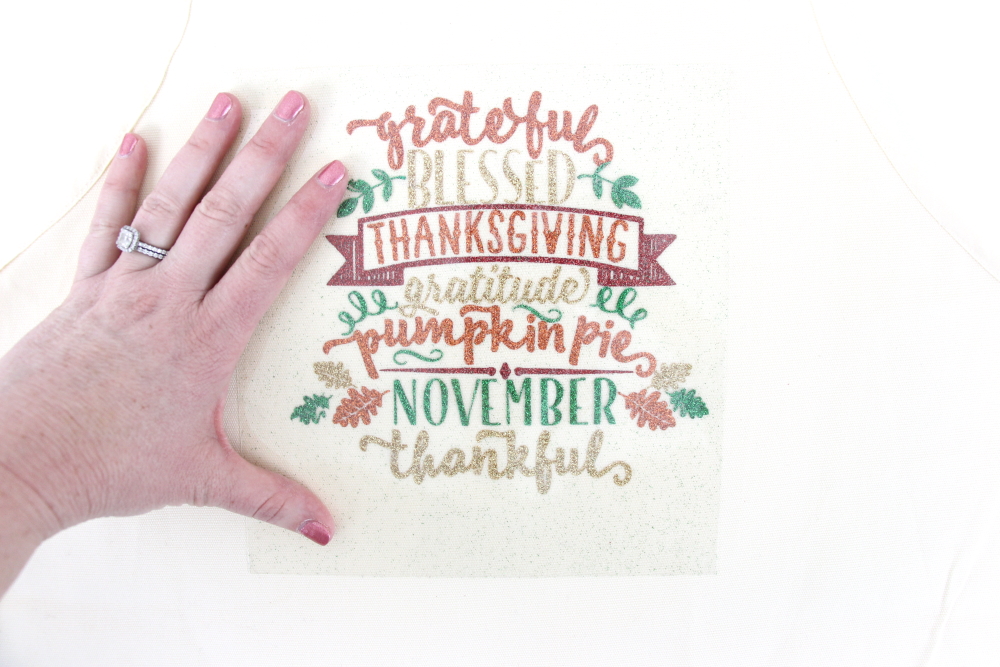
Step 4: Peel back the clear carrier sheet. Some Heat Transfer Vinyl requires a hot or cold peel – always follow the recommended peel for your heat transfer vinyl. Tip: pull from a corner and not the side to make sure each part of the design transfers completely to your hand towel.
Step 5: Repeat for each color making sure that your carrier sheet covers the parts you already pressed so they don’t burn.
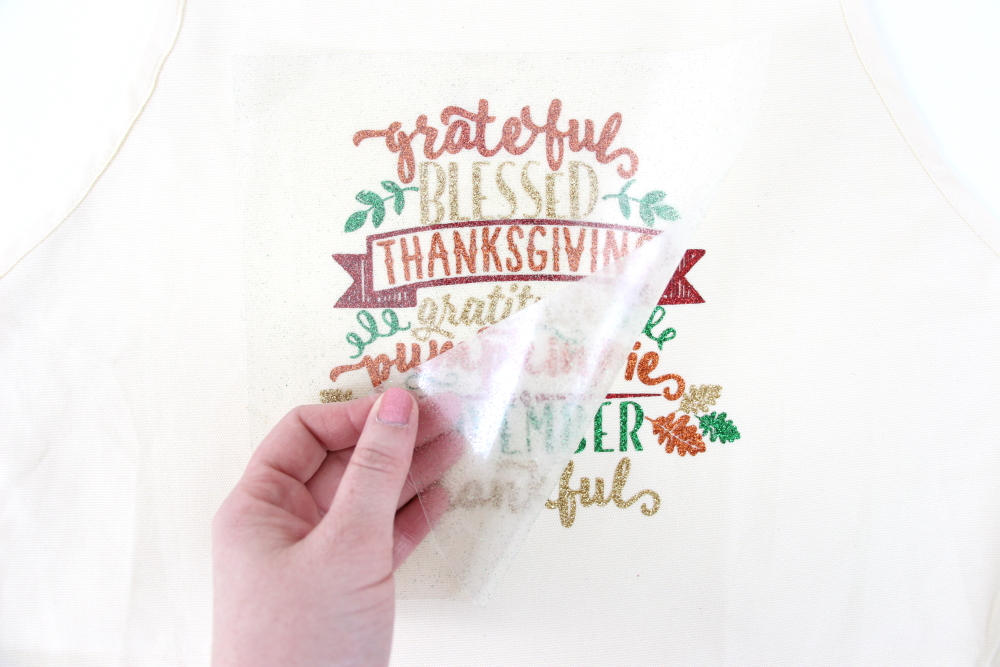
Step 5: Flip your apron over and give it a 10-second press to really activate the adhesive.
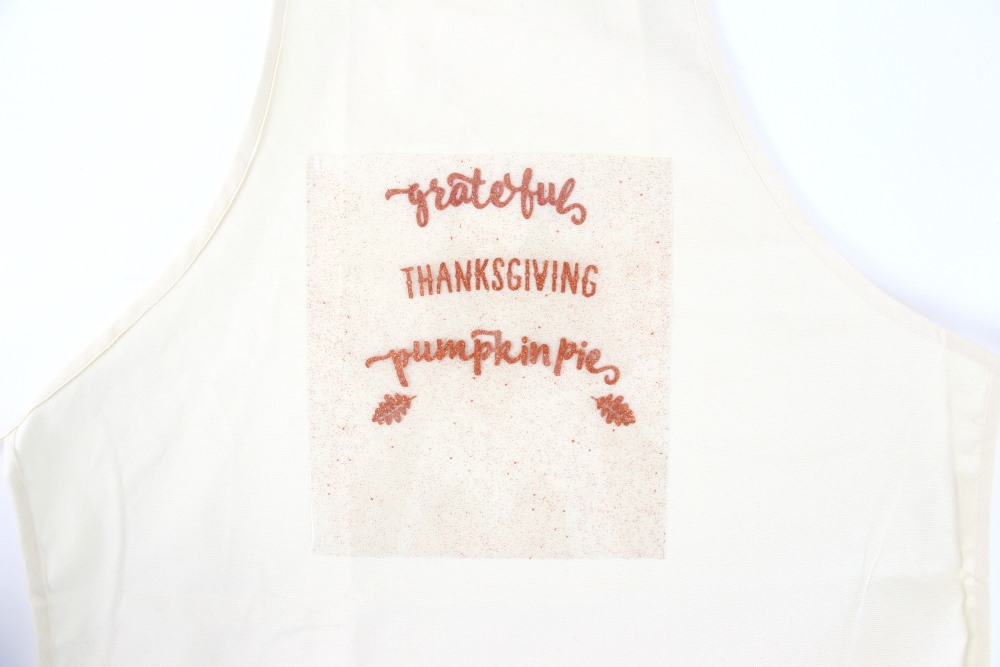
Once you’ve applied all the elements of your design and allowed it to cool, your apron is ready for the kitchen and some baking!
It was so much fun to try a new technique and figure out how to cut and layer heat transfer vinyl for my Thanksgiving apron.


6 Comments
Pingback:
Pingback:
Pingback:
Pingback:
Pingback:
Pingback: