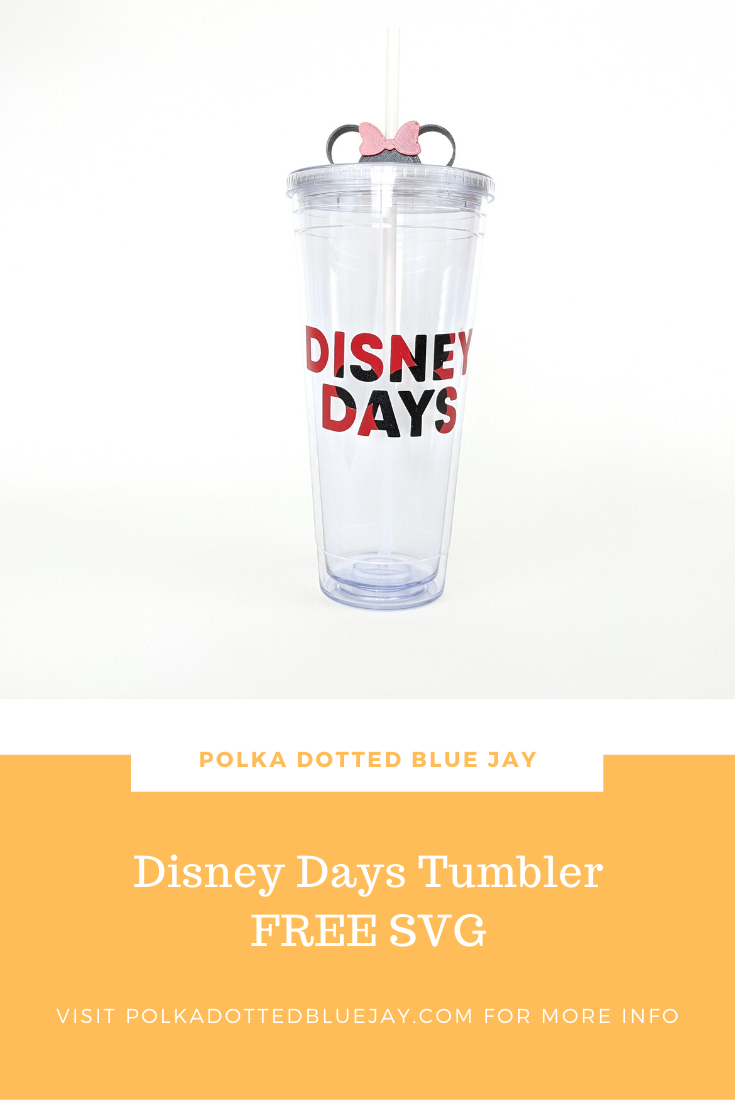
Disney Days Knockout Method Tumbler and Free SVG
| This post may contain affiliate links, which means I may receive a small commission, at no cost to you, if you make a purchase through a link. |
Celebrate every day (in quarantine) and beyond with this DIY Disney Days Knockout Method Tumbler. I have an easy tutorial and free SVG file below so you can create your own tumbler in any color you would like.
Is anyone else having serious Disney withdrawals right now? Thank heavens for Disney+ and access to so many movie nights. I must admit, I was pretty bummed out when the parks shut down in March. It is a very first-world problem, but this year we were going to buy annual passes to Disneyland for my birthday. I mean, talk about a bummer.
I am still moving forward with Disney projects and just celebrating at home until it is safe to return to the parks later this year and I think you should too!
Estimated Time: 30-45 Minutes
Skill Level: Advanced
Care: Handwash.
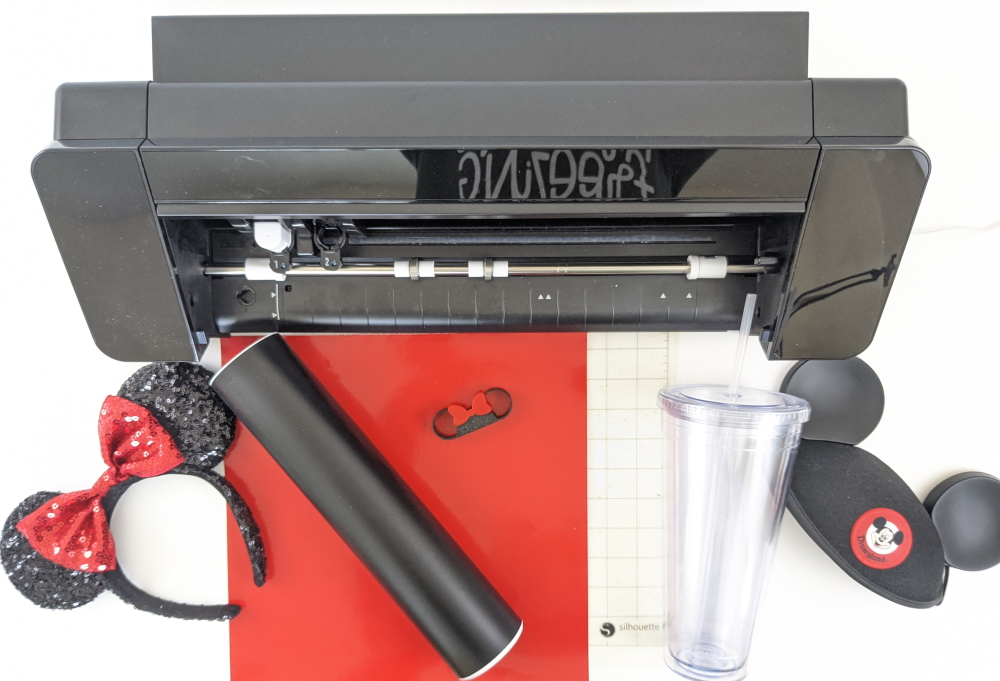
Supplies Needed:
- Silhouette CAMEO®4
- Silhouette Cutting Mat
- Silhouette Auto Blade
- Weeding Hook
- Silhouette Studio
- Adhesive Vinyl in 2 colors
- Acrylic Drink Tumbler or item of your choice
- FREE Disney Days SVG (be sure to grab this and save to your computer so it is ready for the instructions below).
*Don’t forget to use promo code: PDBJay on your purchase from the Silhouette America site to save some money!
Creating Your Disney Days Knockout Method Design:
- Open Silhouette Studio®.
- Select the Page Setup Window and adjust your cutting mat size to 12×12 (or the sized mat you are using).
- Click File > Open > and select the Disney Days Knockout Method SVG
- Measure your tumbler and re-size your design to the correct space on your 12×12 template – be sure to move the design as a group so it keeps everything lined up. You can do this by clicking and dragging to cover the whole design and then moving as one piece.

- Just because the design is red and black doesn’t mean you need to use red and black for your design – use whatever color you would like for your project; just make sure you know which color is your red and black on your design.
- Load your first color/red on your cutting mat into your Cameo®4.
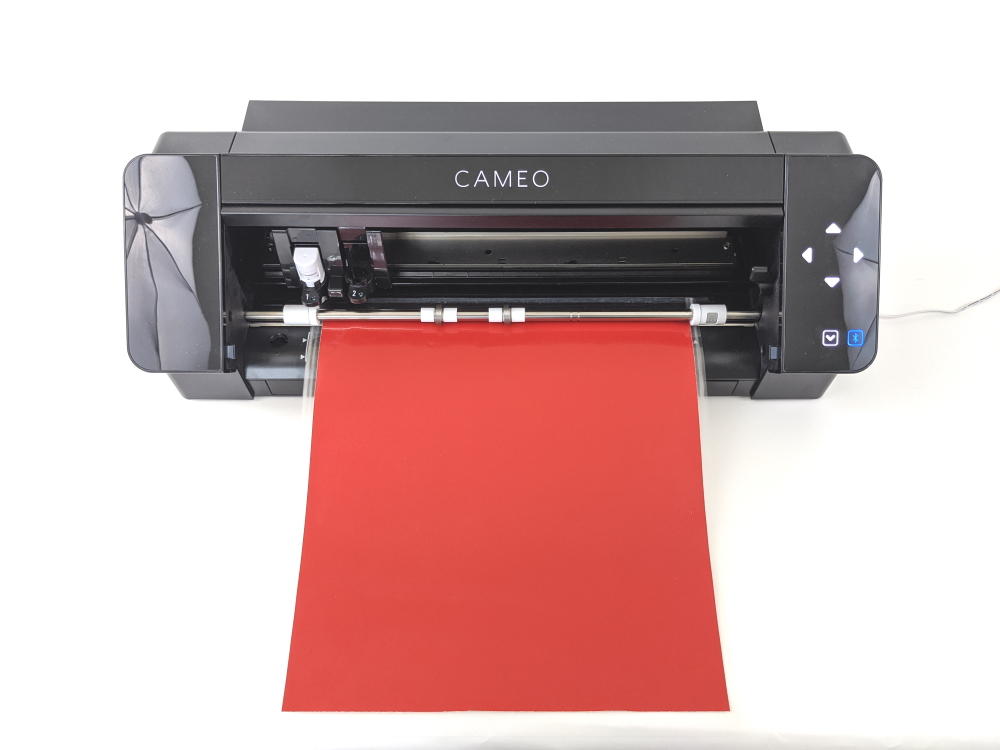
- Click the “Send” button at the top of your screen to get ready to cut.
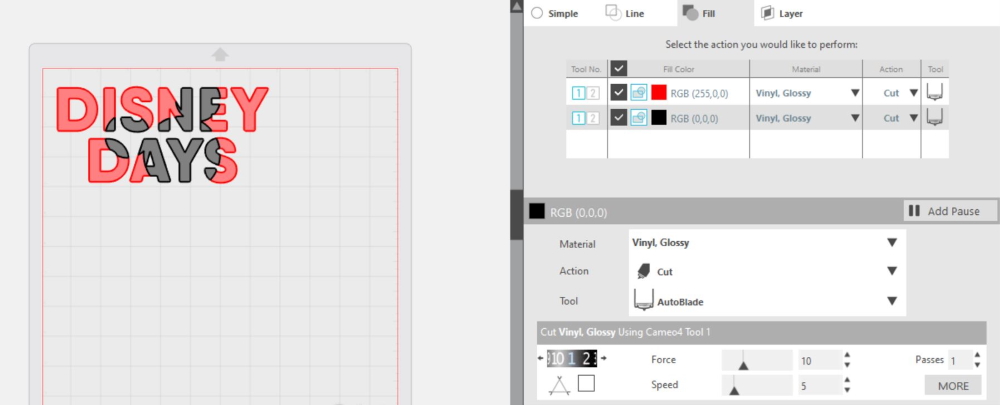
- Click the “fill” option to select portions of the design to cut.
- Select the red checkbox, your material type, “cut”, and “auto blade”.
- Click “Send” at the bottom of your screen to begin cutting.
- Press the down arrow/unload button when your machine completes the cutting.
- Repeat steps 6-11 for your second color/black.
Preparing Your Disney Days SVG decal:
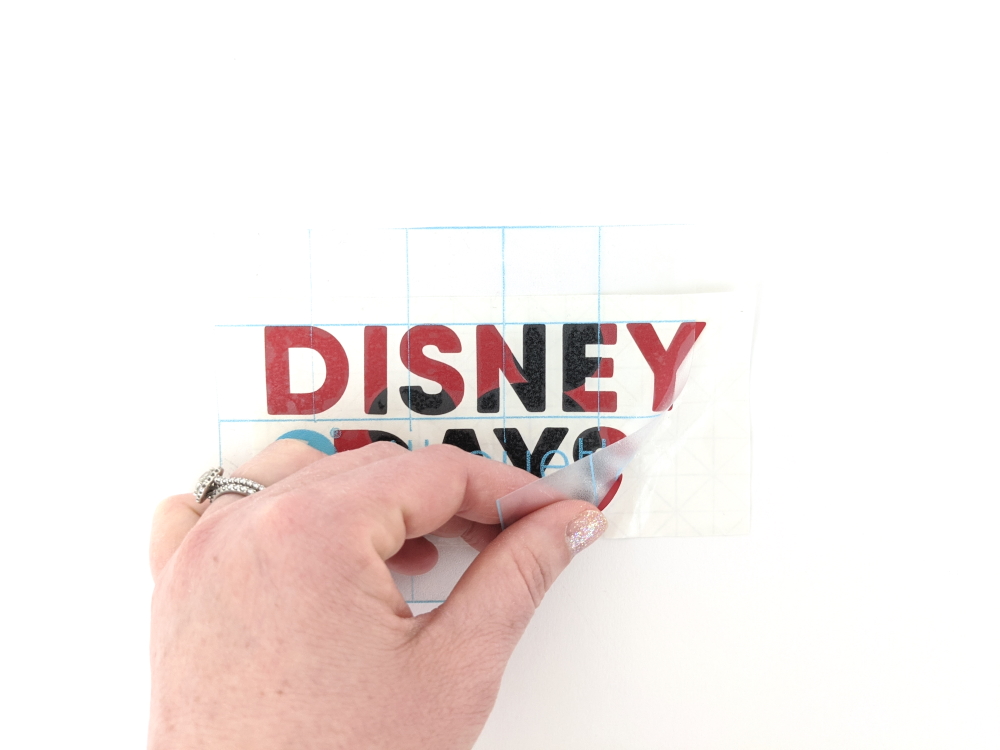
- Remove your sheets of Adhesive Vinyl from the cutting mat – go slow so they don’t curl up.
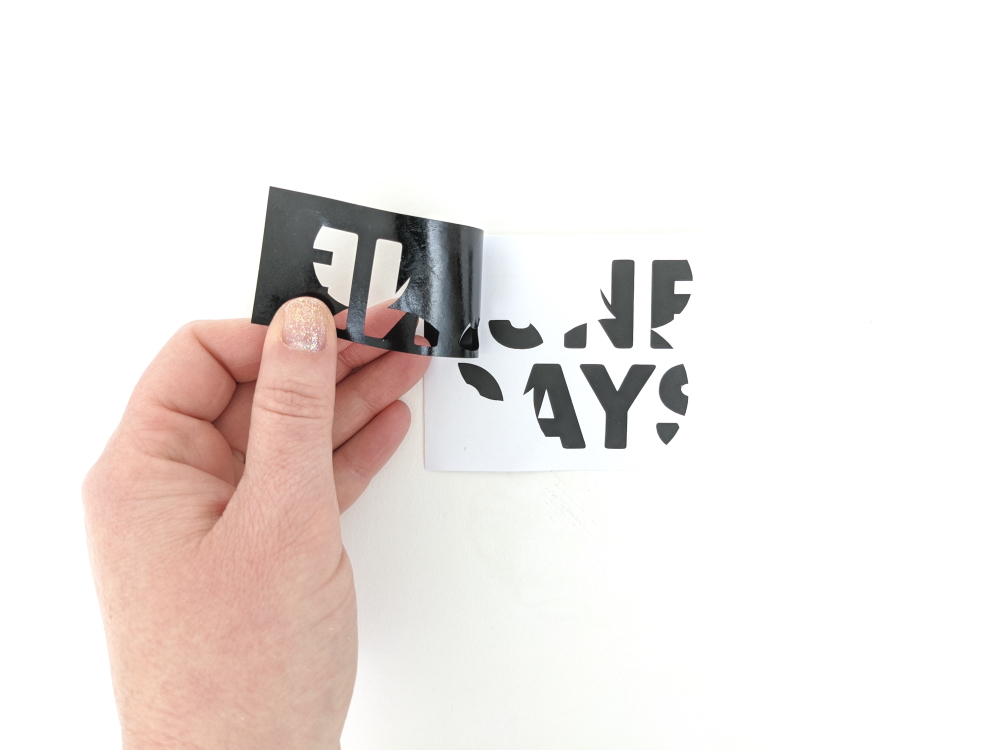
- Use your fingers or a weeding tool to remove the excess vinyl. Go very slow since you need this design to line up perfectly inside each other.
Creating Your Disney Days Knockout Method Tumbler:
- Make sure your tumbler is clean and dry.
- Place your transfer tape over your black Mickey design (be sure your piece of transfer tape is big enough to cover both parts of your design).
- Place your black Mickey design within the red “Disney Days” part of the design. Now you should have both pieces under the transfer tape and lined up within each other.
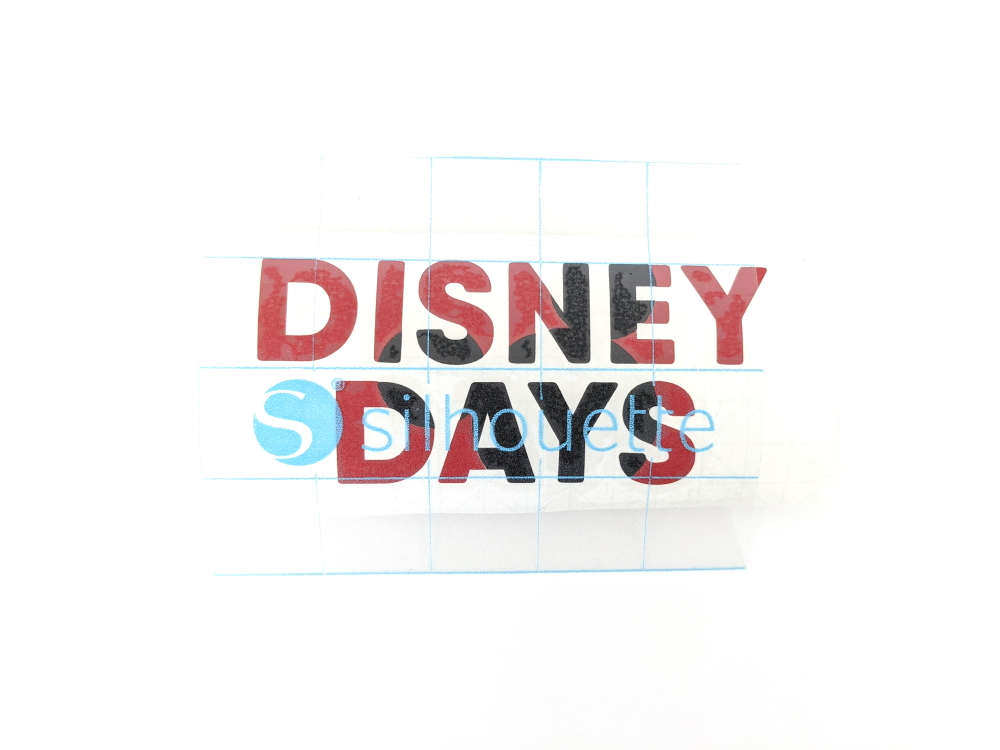
- Peel up the transfer tape and make sure your whole design sticks to it.
- Place your design on your tumbler and use a scraper to make sure it sticks completely.
- Remove the transfer tape.
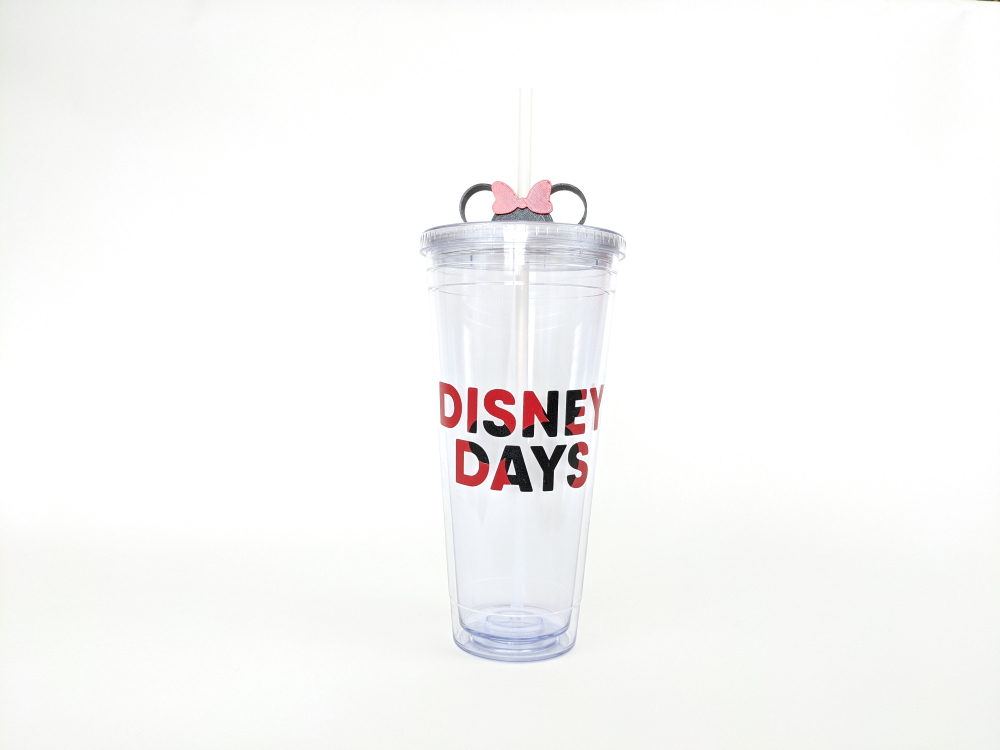
- Fill with your favorite drink or a made-at-home-Dole-Whip and enjoy!
Check out my FIRST Facebook live from last week to see an alternate way of layering the vinyl on the tumbler:
I cannot wait to use this Disney Days SVG on a t-shirt, tote bag, and an autograph book for my niece. Tell me what you would put this design on and your favorite Disney park ride in the comments. Make sure you click here to get the FREE Disney Days SVG!
Stay safe and think of the happiest thoughts, my friends.
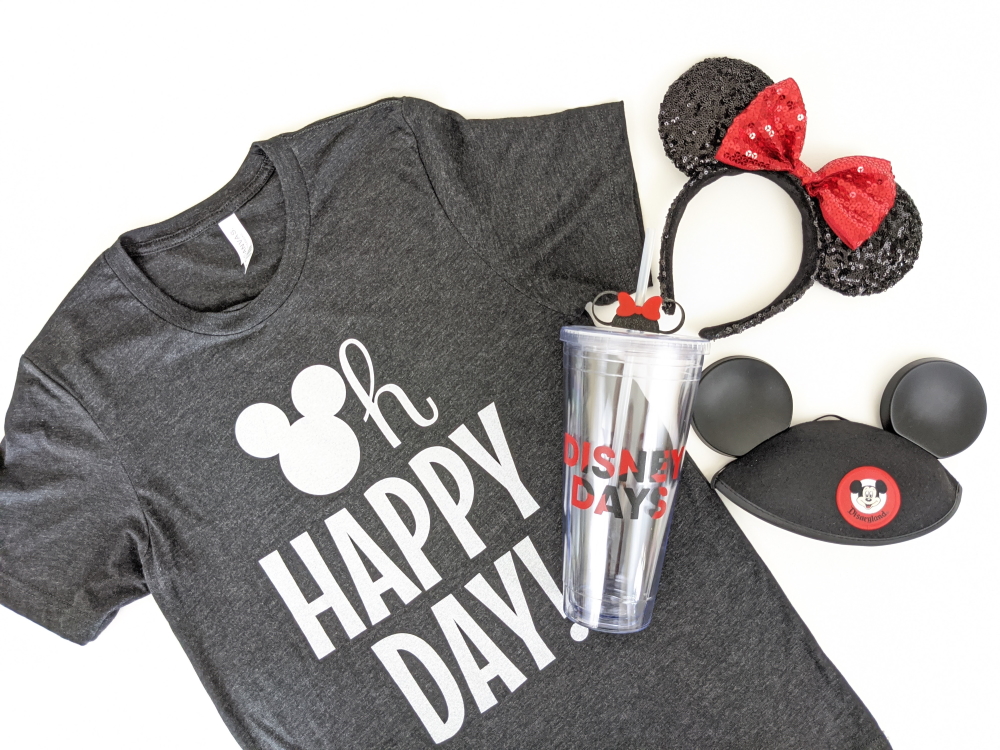
Shirt: Happiest Tees on Earth
Straw Buddy: Shimmering Splendid Ear Co.
Minnie Mouse Ears: Shop Disney
Mickey Mouse Disneyland hat: Shop Disney
Other Disney-themed posts you may enjoy: